

All the Tools You Need to
Install Permanent Christmas Lights
Master the Art of Permanent Christmas Lighting:
Essential Tools for Every Professional Installer
Welcome to the ultimate resource for your permanent Christmas lighting installation business!
Our carefully curated selection of tools is designed to provide you with everything you need to
build a successful and permanent lighting service, catering to both seasoned
professionals and those just starting in the industry.
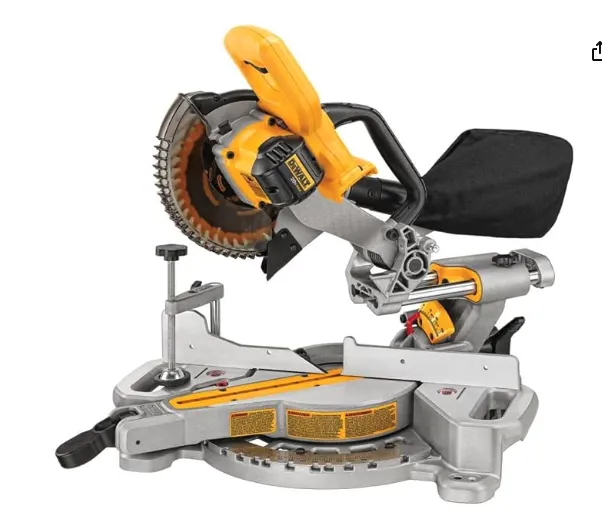
DEWALT 20V MAX 7-1/4-Inch Miter Saw
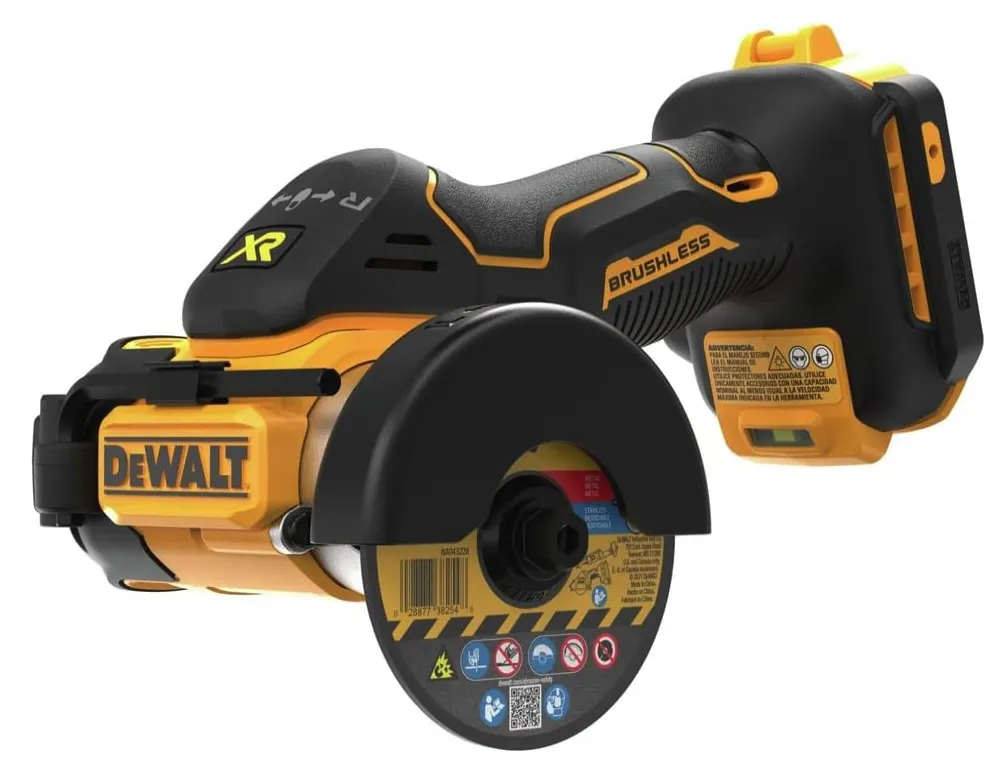
DEWALT 20V MAX Cordless Angle Grinder Kit, 3-in.
CUT A WIDE RANGE OF MATERIALS: Includes Bonded Abrasive Wheel, Diamond(†) Multi-Material Wheel
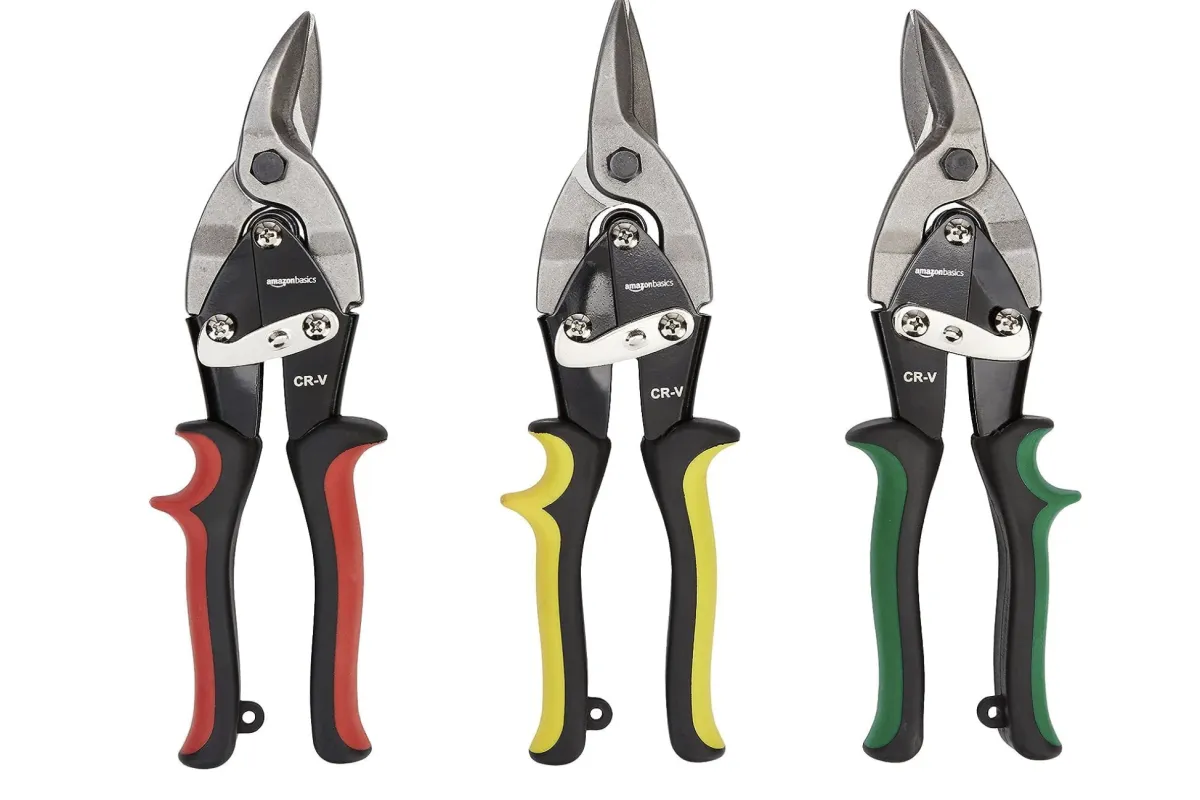
Amazon Basics 3-Piece Aviation Snip Set - Left, Right and Straight Cut
3-piece set of aviation tin snips for easy cutting from any angle
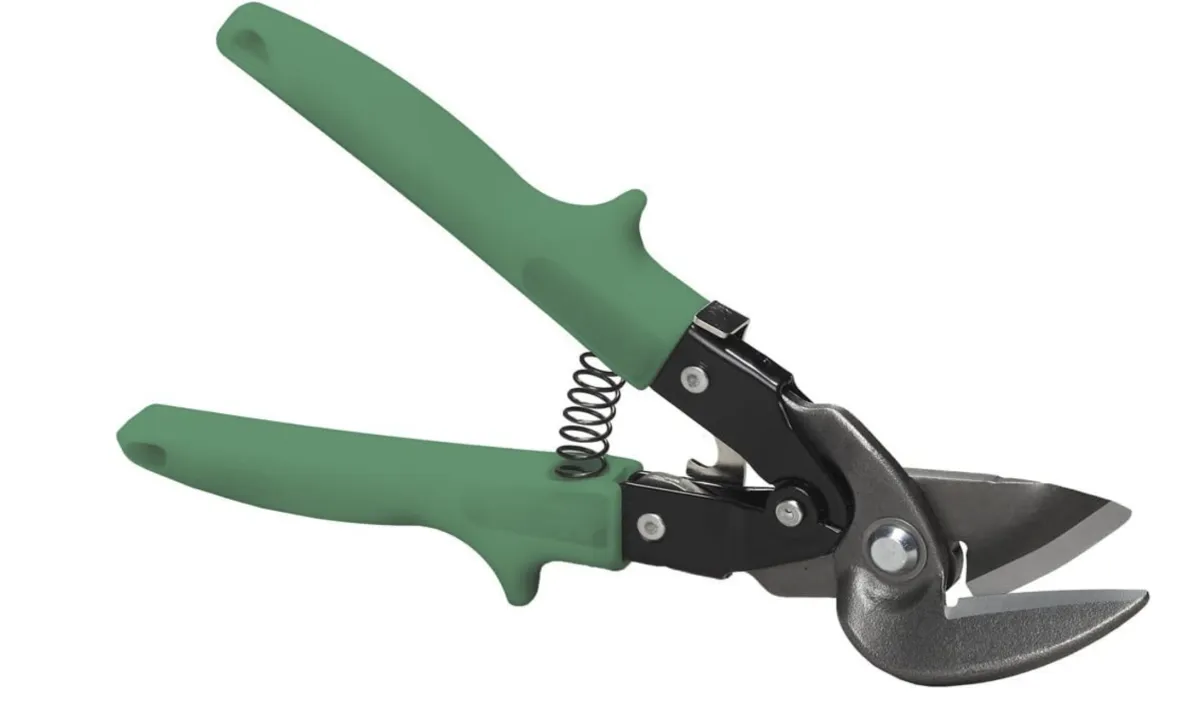
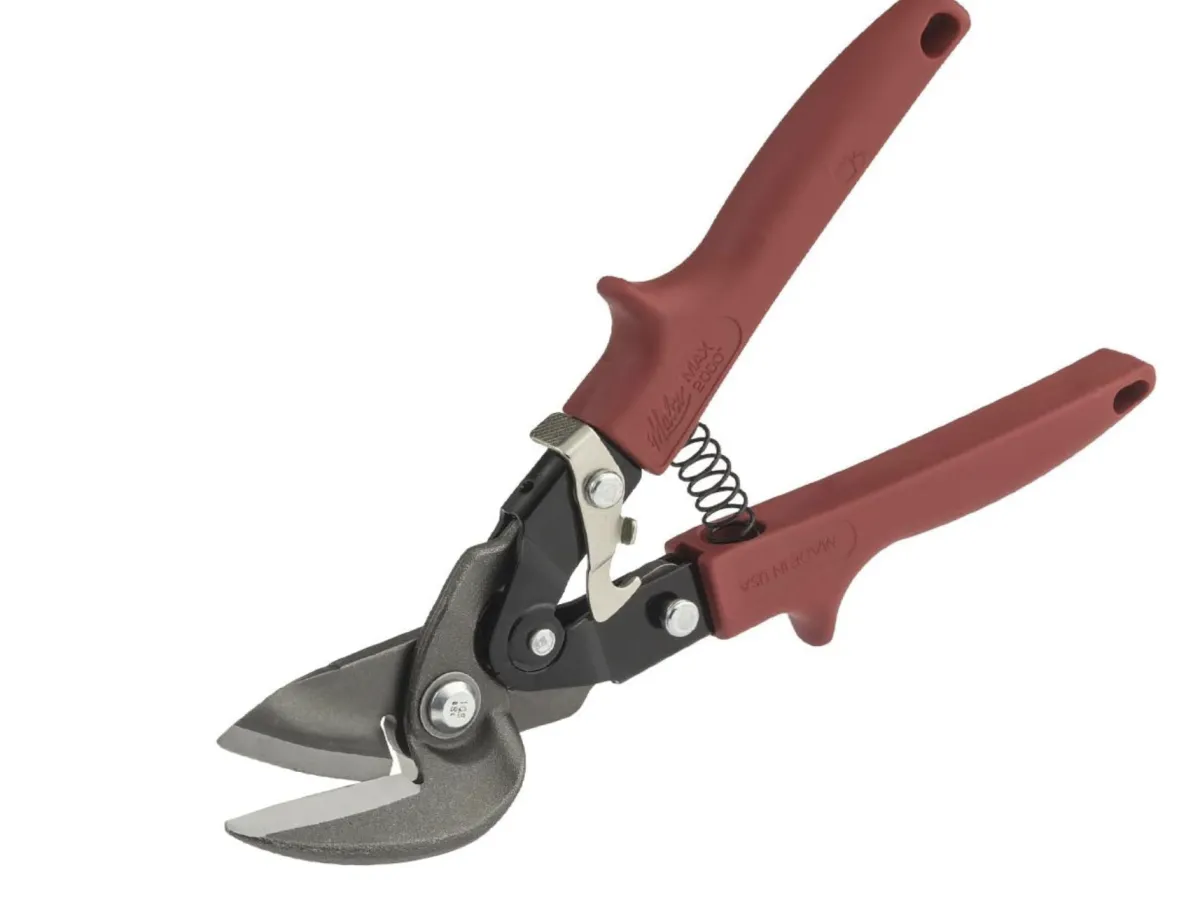
Malco M2007 MAX2000 Bulldog 1-1/4-inch Cut Capacity 10-inch Right Cut Offset Aviation Snip
Aviation style metal snip (green grip) with versatile offset handles for straight cuts and curved cuts to the right
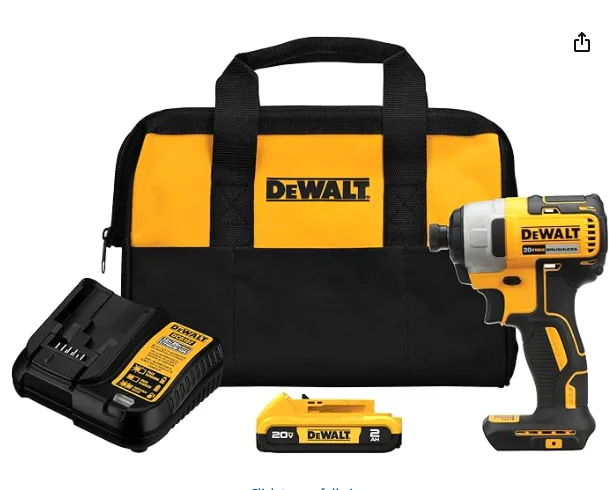
DEWALT 20V MAX Impact Driver, 1/4 Inch, Battery and Charger Included
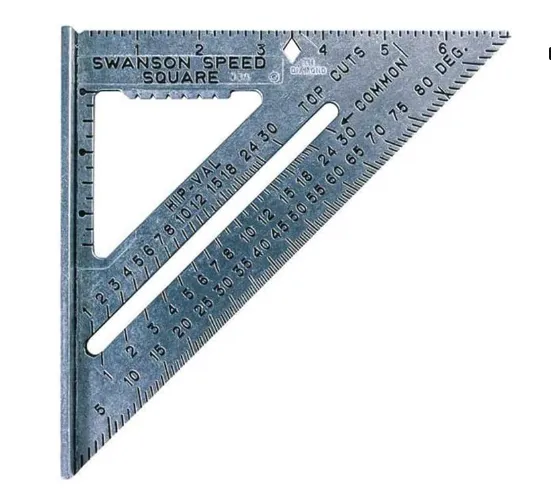
7 Inch Speed Square
Malco M2006 10 inch Left
Offset Snips
Malco Max2000 offset left cutting Aviation Snips features Euro-styled ergonomic handles and superior hardened blade edges for maximum cutting life.
Ladder Stabilizer Standoff Brackets with Foam Elbows
These brackets can be slid into the rungs of most ladders
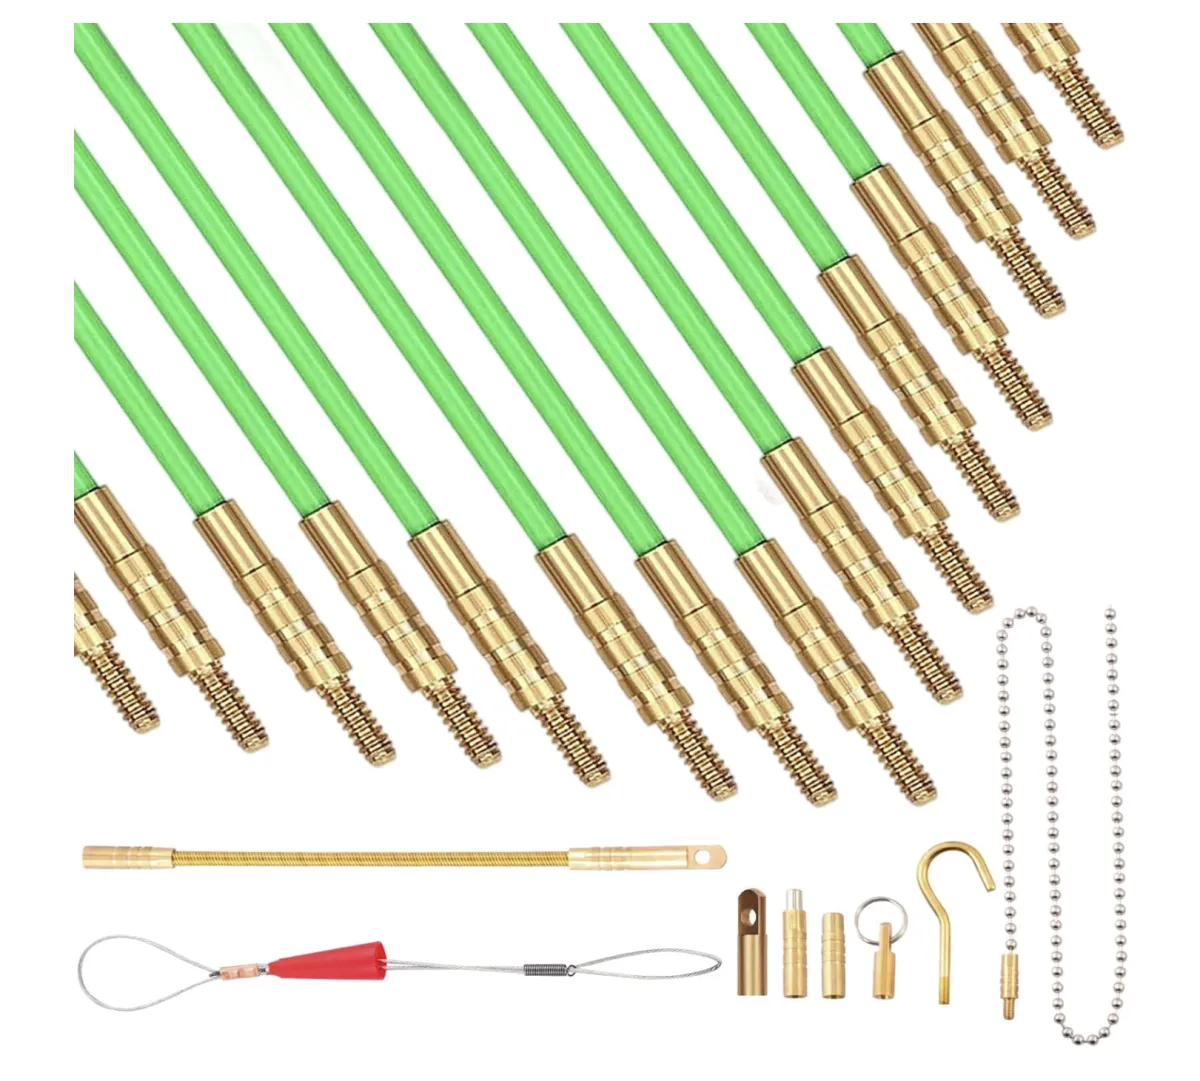
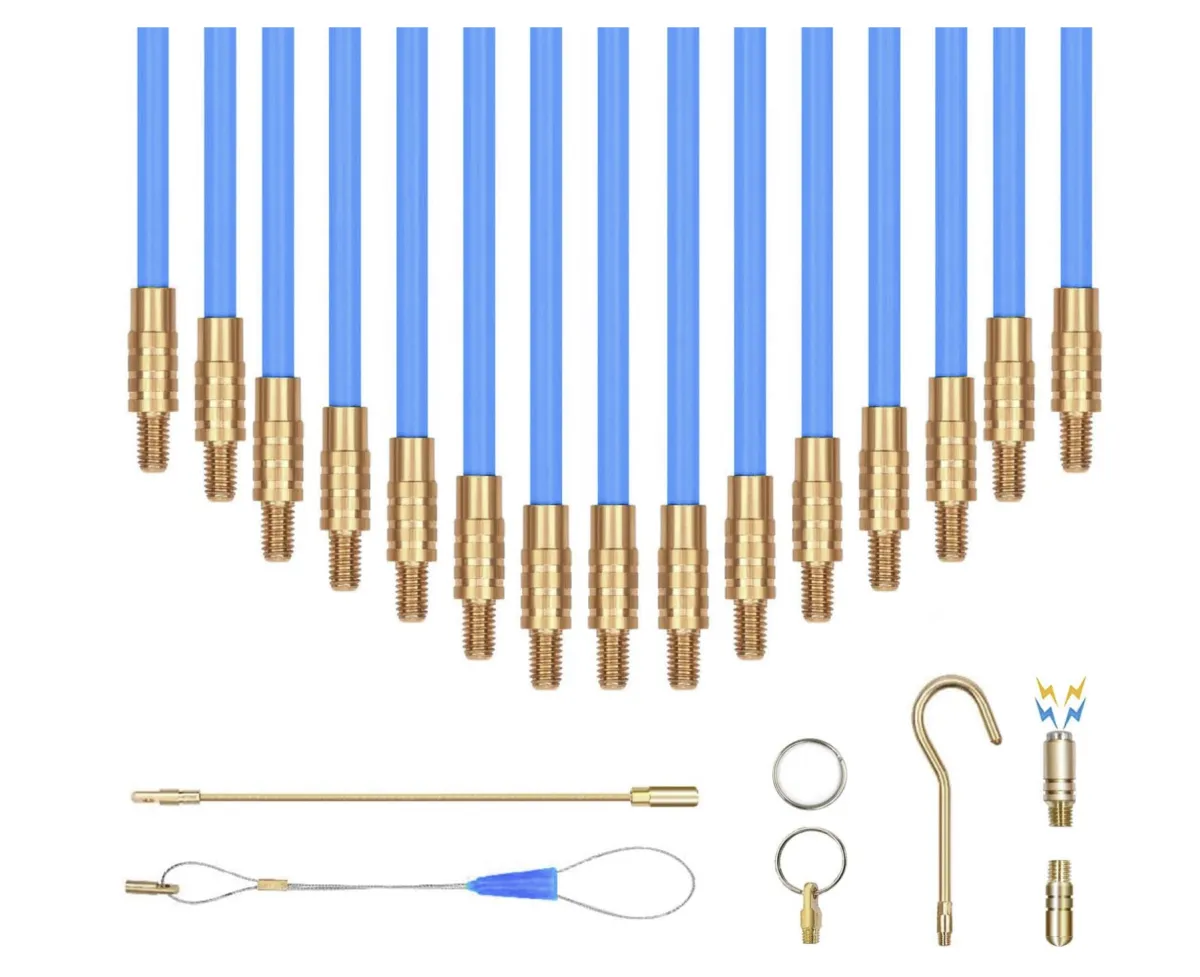
50 FT Wire Fishing Kit
For running wire through walls, attics, crawl spaces, sub-floors and suspended ceilings, great insulating property, low friction design allows the tape to easily glide through the conduit without binding at turns, joints or couplings
50' Fiberglass Fish Tape Running Wire Cable Rods
Rods can be used individually or threaded together for desired length, can be extended up to 50 feet. The item is Strong flexibility, But do not bend too hard, or it will break
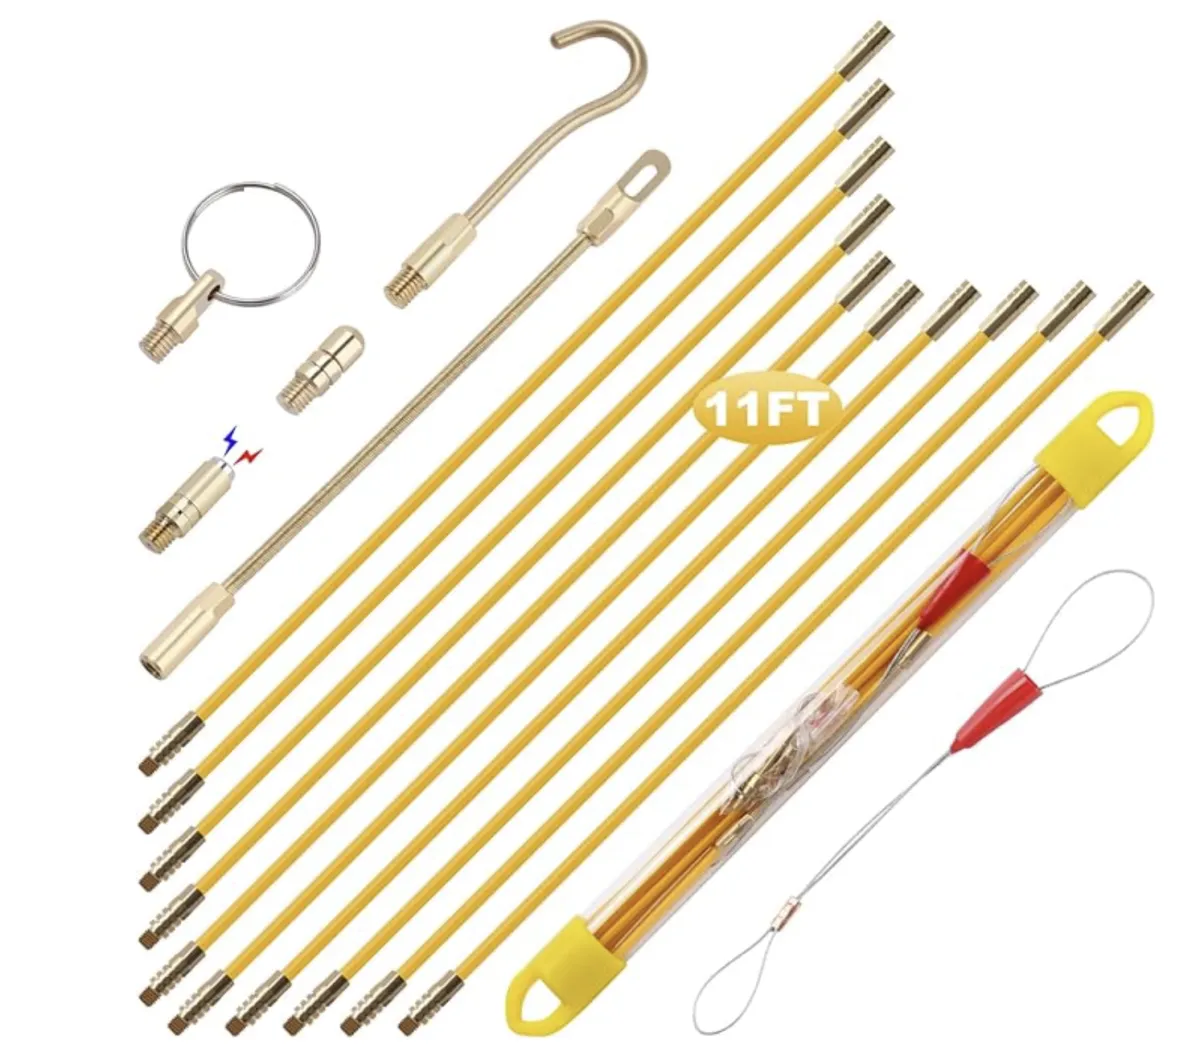
Boeray 11' Fiberglass Running Electrical Wire Cable Pulling Fish Tape Kit
Fiberglass better than Plated Carbon Steel, this fish tape will not break when folded, faster, easier pulls: low friction design allows the tape to easily glide through the conduit without binding at turns, joints or couplings;
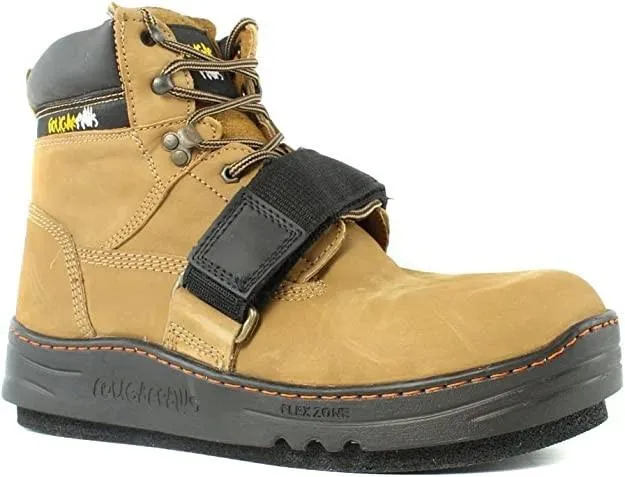
Cougar Paws
Cougar Paws has been tested up to a 12/12 pitch; however, other measures must be taken for steeper pitches. The Peak Performer's 6" high uppers will protect you from rolling or stumbling as you make your ascent while still allowing the light coloration keep feet cool in hot sun conditions with asphalt roofs!
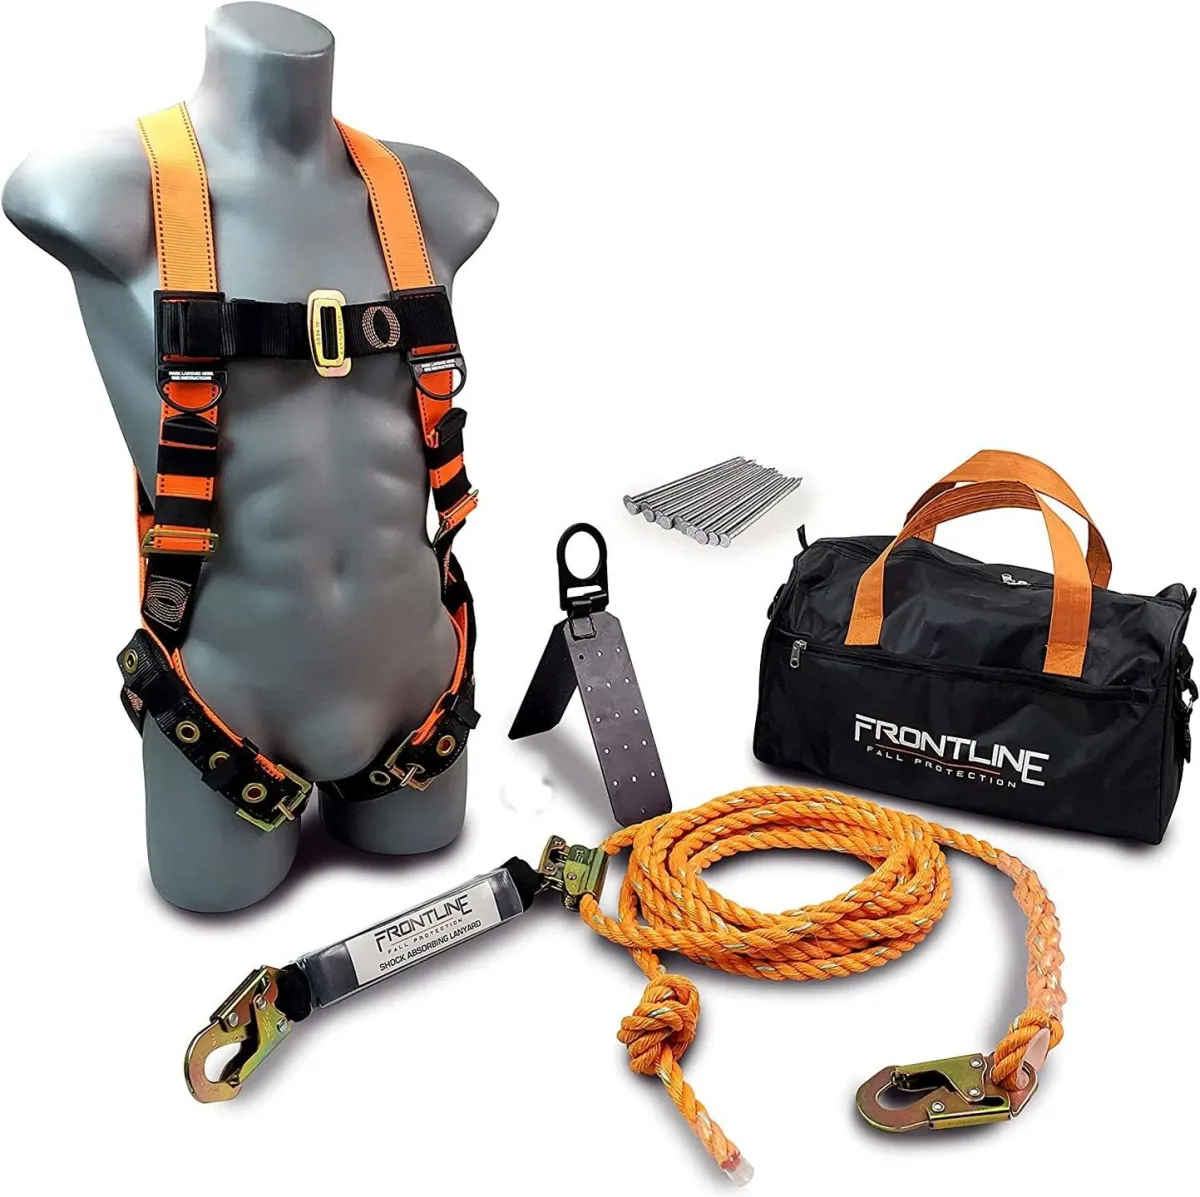
Harness Kit
This harness kit is perfect for ensuring you don't fall off the roof with your Ridge Pro.
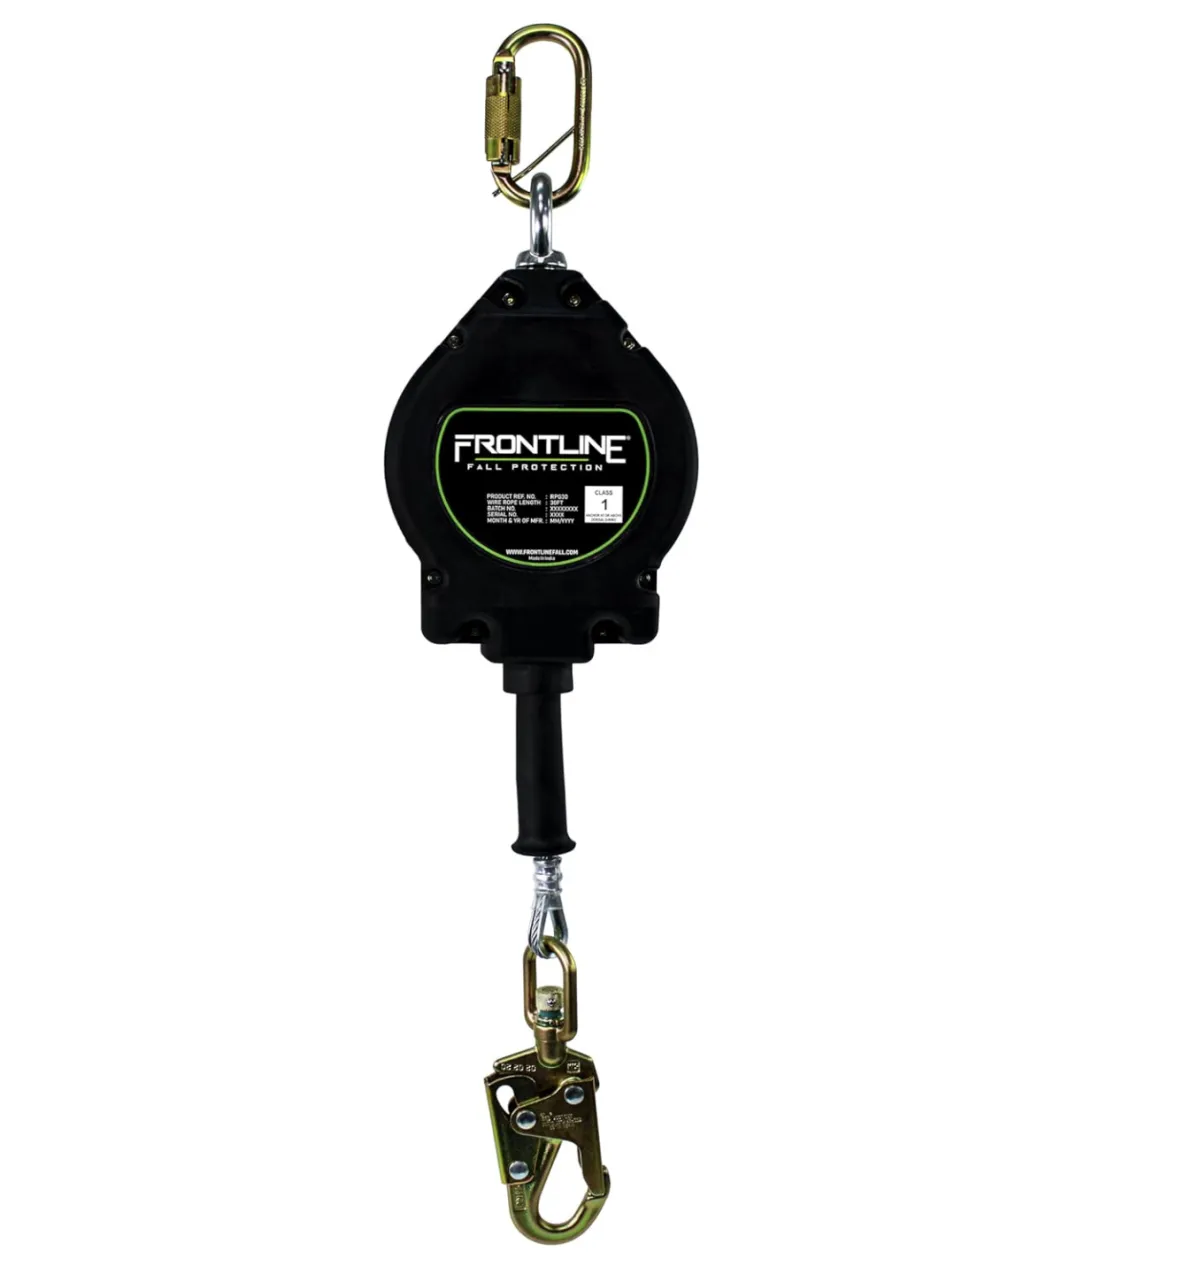
Personal Fall Arrest Protection
This retractable fall arrest is perfect for ensuring you don't fall off the roof with your Ridge Pro.
Quickclick Stabilizer
The stabilizer is a great way to keep your ladder from falling over
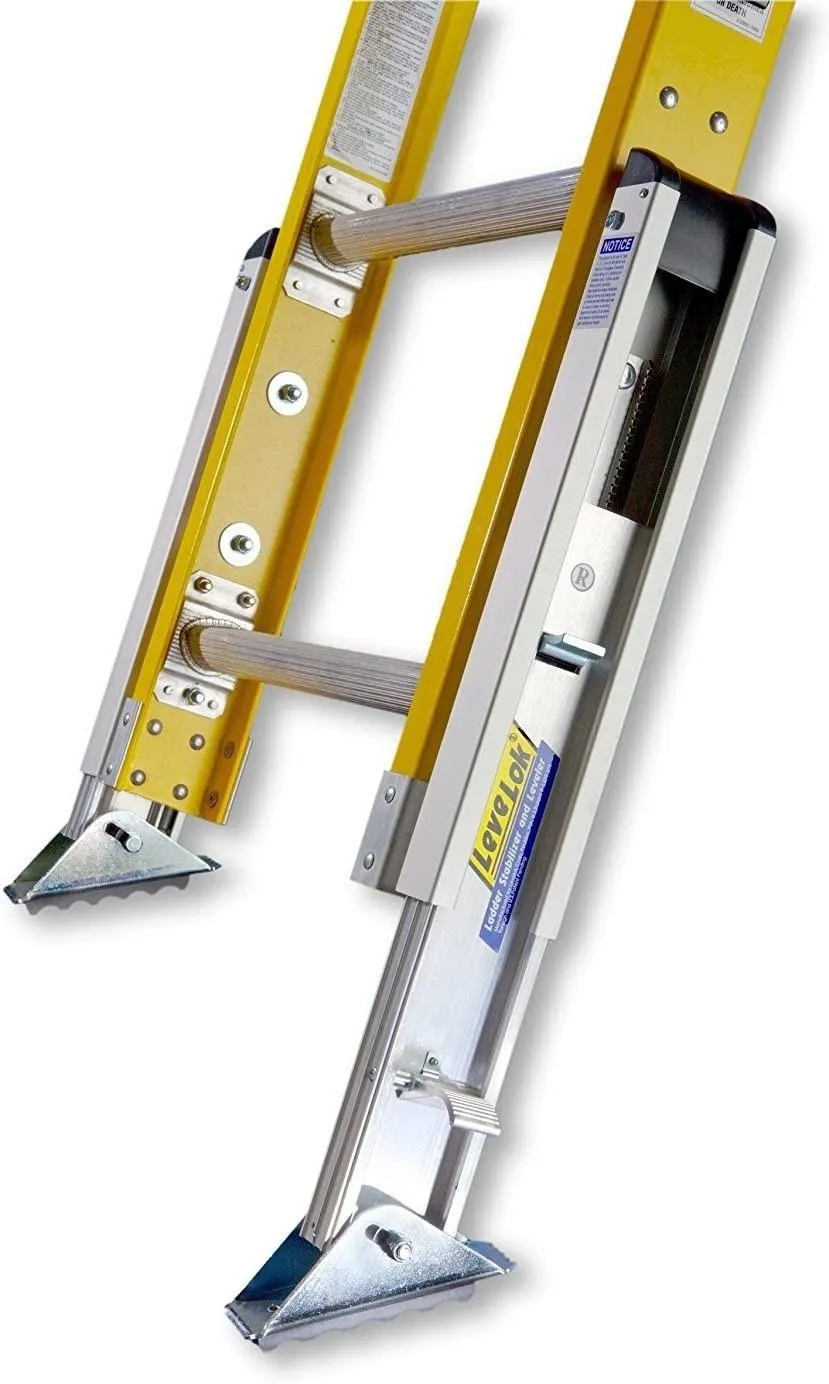
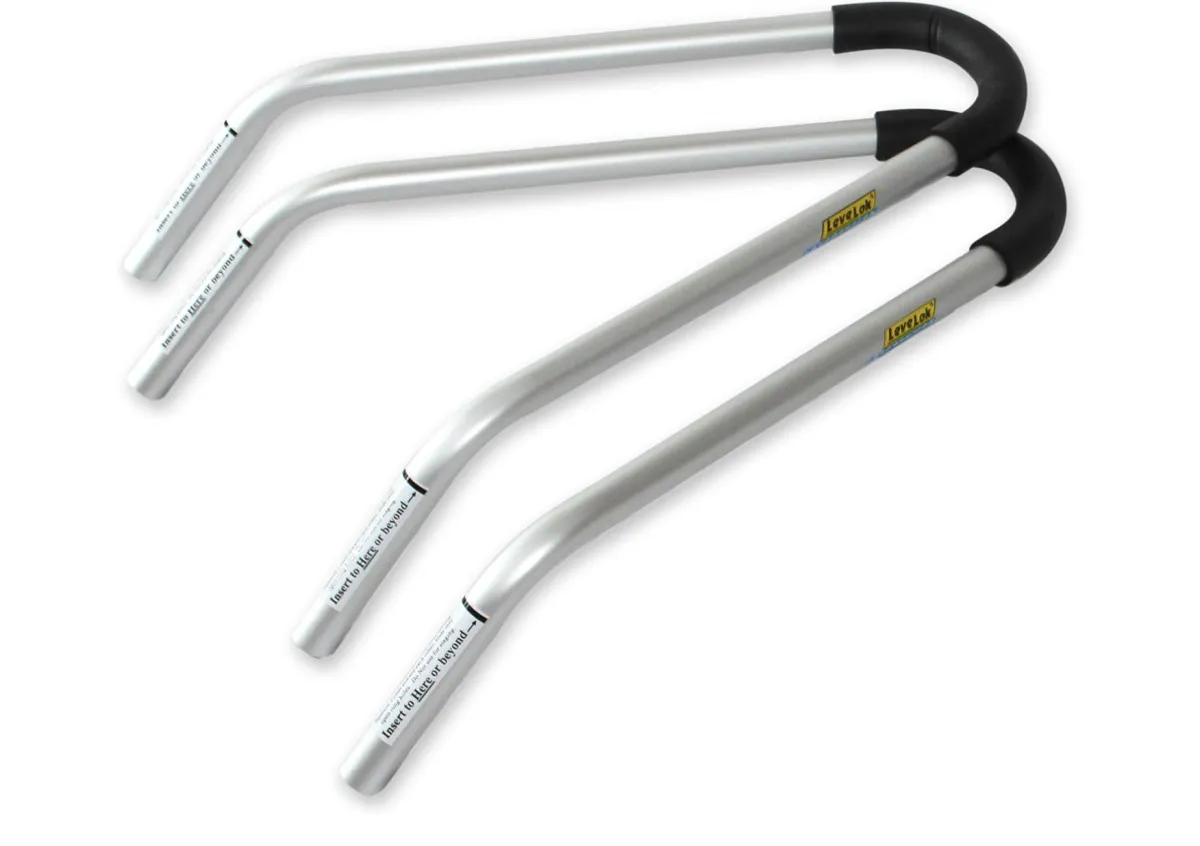
Levelok ladder levelers
Ladder levelers are a great tool for any installer, especially those who work on roofs. The best part about them is that they can be used when the ground isn't perfectly flat or even at all!
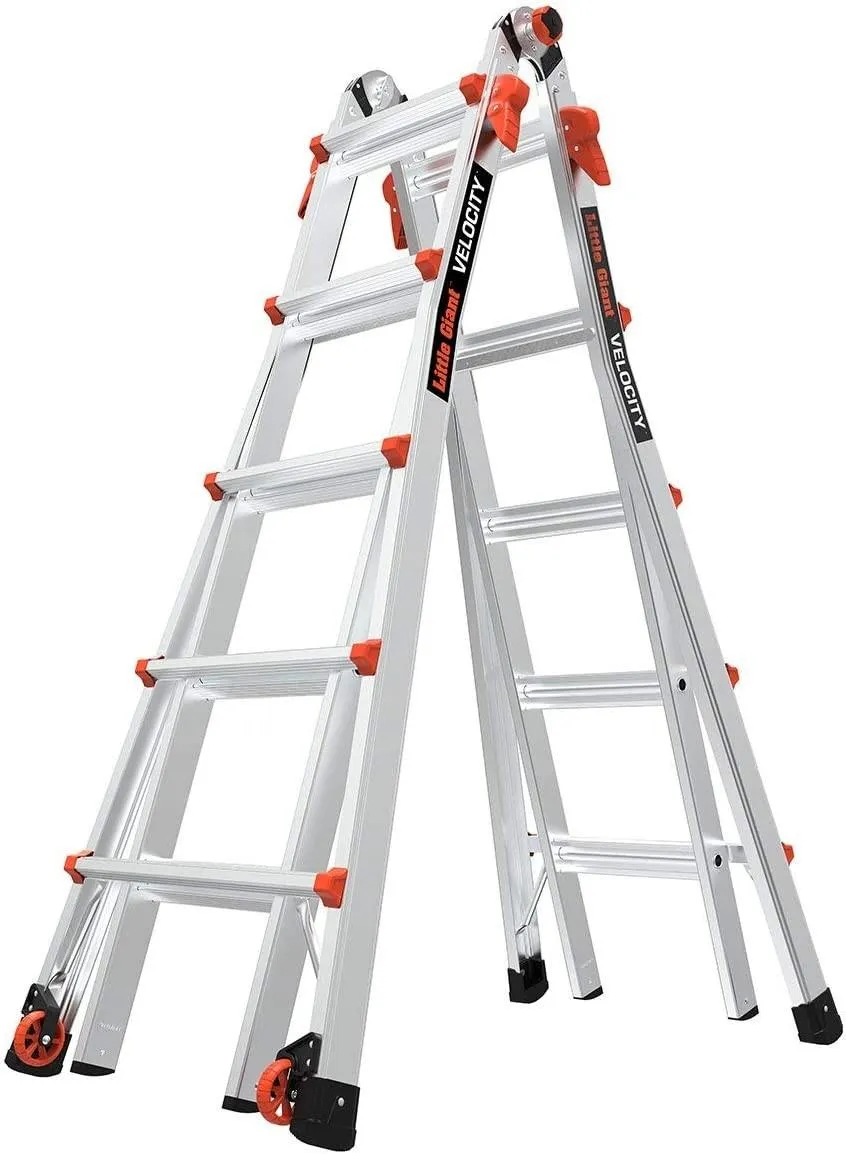
Little Giant Ladder
The remote control allows us to turn on and off the Christmas lights while keeping power supply for all connected devices. This will allow us to turn off the lights to cut the wires.
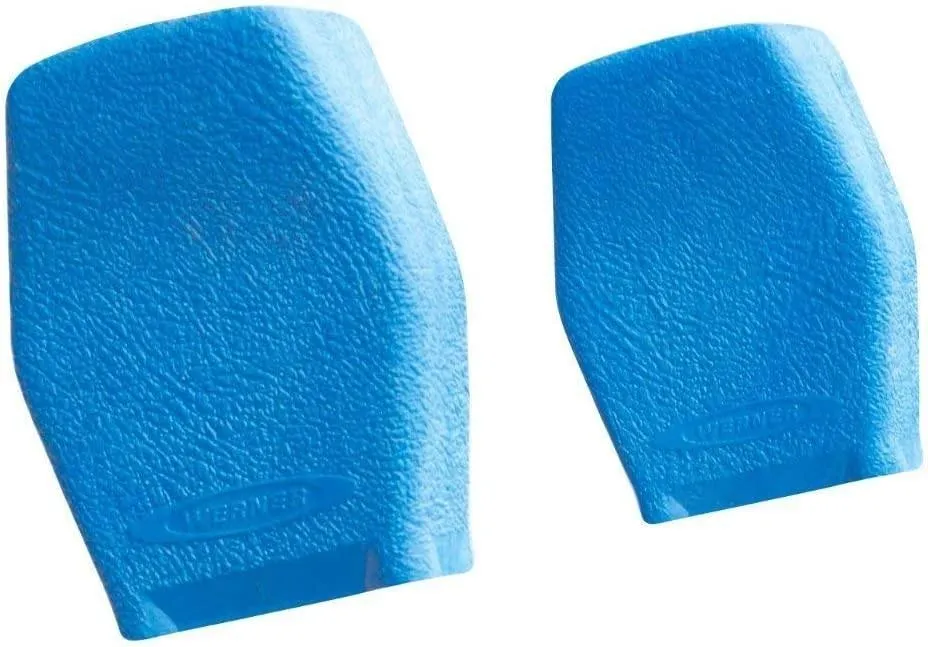
Ladder Protector
Ladder protectors can save your house from being torn by ladders.
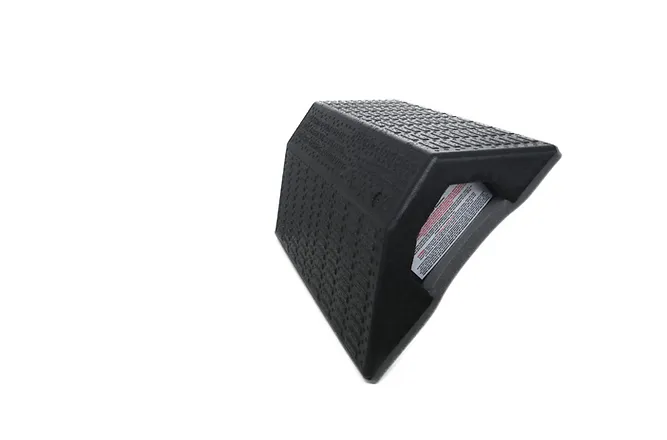
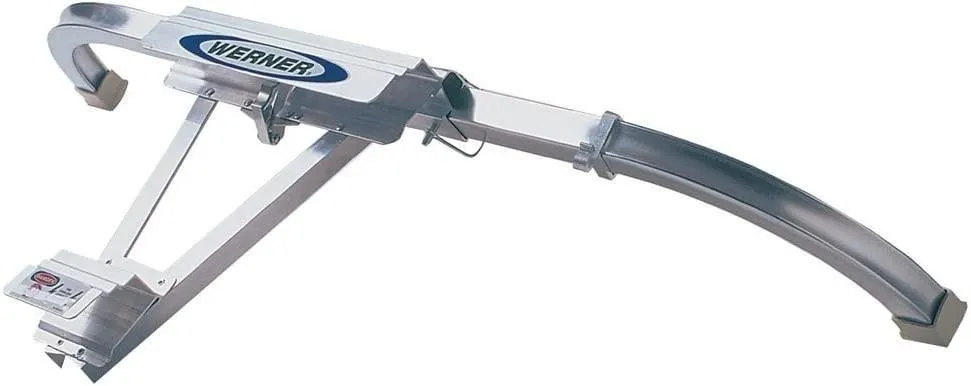
Pitch Hopper
The pitch hopper is a unique tool that allows you to get on any roof, no matter how high or steep it may be. It has many different variations so users can find one suitable for their needs- whether they want something quick with little effort or more challenging than what's been done before!
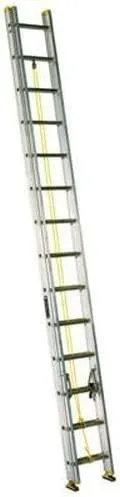
Extension Ladder
Hanging Christmas lights is a complicated task that requires the perfect ladder for your needs. The 28-foot, 32 foot or even 40 foot extension ladders are all great options to have in order hang up those beautiful strands of bulbs without any problem at all!
Elevate Your Permanent Christmas Lighting
Installations with Our Expert-Selected Tools
With these tools at your disposal, you're not just prepared to tackle any permanent installation challenge—you're equipped to excel. Our products are selected for their reliability, effectiveness, and ease of use, ensuring you can deliver exceptional, long-lasting results with every project. Whether you're expanding your services or just beginning your journey in the permanent Christmas lighting installation business, we're here to support your success every step of the way.
Pro Christmas Light Removal: No Ladders Needed
The holidays are over, the joy has been had, and now only one task remains: taking down the Christmas lights. For most, this means a frustrating afternoon on a wobbly ladder, battling a hopelessly knotted nest of wires. It’s the annual chore that sours the end of the season.
But for professionals, it’s just another Tuesday. They can clear an entire house in as little as 15 minutes, and they do it without the stress, mess, or danger. The difference isn't magic; it's a complete system that separates amateurs from the pros. These aren't just "tips"—this is the methodology that makes them fast, safe, and profitable. Here’s how you can adopt their system.

1. The Takedown-First Mindset: Install for Easy Removal
The single biggest secret to a fast takedown begins before you hang the first bulb. Professionals operate with a takedown-first mindset, meaning the entire installation is planned for effortless removal. Amateurs think about how to get the lights up; pros think about how to get them down.
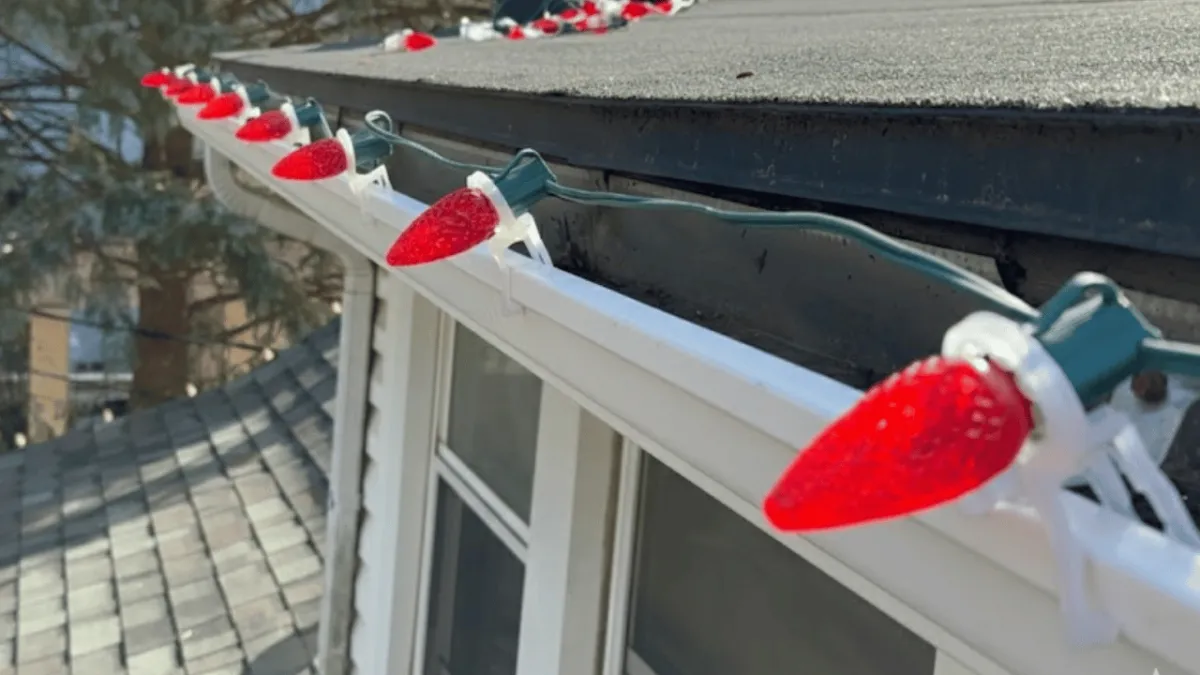
The number one amateur mistake is tightly zip-tying light strings directly to gutters. Every zip tie you add is one you’ll have to hunt down and snip from the top of a ladder. Professionals never do this. Instead of creating a problem, they use a brilliantly simple solution: take a clip and just shove it in behind the gutter. The tension holds it all season, but a gentle tug with a pole makes it fall right out. No climbing, no cutting.
...this is why it's so important that as we install to put up that we take down...
2. The Pro's Primary Tool: Ditch the Ladder for a Pole
Falls from ladders are a serious, costly risk, and for this job, they are almost entirely avoidable. The professional’s primary tool for a swift and safe takedown is not a ladder, but a long extension pole with a simple hook on the end.
This isn’t a specialized piece of equipment. A standard painter's pole (like a "Mr. Long Arm") with a paint roller hook attached is all you need. For higher jobs, a stiffer carbon fiber pole is even better. Using this tool, pros can lift lights from clips and even remove wreaths from as high as 24 feet, all while keeping both feet planted safely on the ground. You simply hook the wire, lift it off its anchor, and guide it down.
3. The Tangle-Free System: A Pro's Guide to Storage
A fast takedown is useless if you create a tangled nightmare for next year. Pros use a methodical system to ensure that when the lights come out of storage, they are perfectly organized and ready to be installed with zero guesswork.
Start in Reverse. The system is simple: take the lights down in the opposite order you put them up. If you started installing on the far right side of the house (when viewed from the street), you begin your takedown on the far left. This way, next year you can grab the first bundle and start on the far right, with every subsequent strand in perfect order.
Create the "Zip Tie Code". This is the organizational trick that makes the system foolproof. Think of it as a coordinate system for your house. Assign a color to each major section—for example, "red zip tie right." You can use pinks or any other color for the left side, front porch, etc. Then, use the number of zip ties to denote the level: one zip tie for the first floor, two for the second. A strand with two red zip ties instantly tells anyone on the crew, "Right side, Second floor." No photos or diagrams are needed.
The Arm's-Length Wrap. To prevent tangles, hold the strand and reach out as far as your arm can go, then bring the wire back to your hand to create a large loop. Repeat this, creating a neat, long bundle. When you reach the end, take the last couple of feet of wire and wrap it tightly around the bundle to secure it. For a final pro touch, tuck the male plug under one of the wraps. That way, you know exactly where the end is next year. This bundle will unspool perfectly, without a single knot.
A Quick Word of Caution from the Pros
While the pole method works for over 90% of the job, there's one critical exception: ridge clips on the peak of your roof. If your lights are attached with clips that go over the very top shingle (the ridge cap), a ladder is required.
Under no circumstances should you yank these with a pole from the ground. Pulling too hard will rip the entire ridge cap off your roof, causing expensive and significant damage. These specific clips must be removed carefully by hand.
Conclusion: Reclaim Your Post-Holiday Sanity
Taking down Christmas lights doesn't have to be your most dreaded annual chore. By adopting a professional system—installing for easy removal, using a pole instead of a ladder, and following a foolproof storage method—you can transform this task into a quick, safe job that takes as little as 15 minutes. A little foresight is all it takes to end the season on a calm and organized note.
Now that you have a professional system for takedown, what other holiday traditions could be simplified with a little more planning?

Why Should You Avoid Ladders for Christmas Light Takedowns?
To significantly reduce the risk of falling from ladders or roofs.
Using a ladder for takedown introduces unnecessary danger. Industry experts have observed several installers falling, which can lead to serious injury. By adopting a ground-based method using an extension pole, you can complete the job safely and efficiently.
What Tools Do You Need for a No-Ladder Takedown?
You primarily need an extension pole with a simple hook attachment for removal and colored zip ties for organization.
Extension Pole: This is the core tool for reaching high areas. Standard poles like "Mr. Long Arm" are sufficient for many jobs, but "carbon fiber" or "waterfed" poles perform much better for higher installations, such as those at 24 feet.
Hook Attachment: A simple hook is used to grab wreaths and pull down light strands. A dedicated tool is not required; a standard "paint roller" attachment works perfectly for this task.
Colored Zip Ties: These are used for organizing light strands during takedown, not for installation. A color-coding system helps identify where each strand belongs for the next season (e.g., red zip ties for the right side of the house).
How Do You Remove High Wreaths Without a Ladder?
Use an extension pole and hook to lift the wreath up and off its hanger, then carefully lower it to the ground.
The success of this method is determined during installation. By hanging the wreath with a simple, loose loop rather than wrapping it tightly around an anchor, you enable a fast, ladder-free removal.
Extend the pole and position the hook to securely grab a sturdy part of the wreath.
Lift the wreath straight up to unhook it from its hanger.
Lower the wreath slowly. It is critical to keep the pole as straight as possible during descent. Allowing the pole to bend sideways, especially when fully extended, can cause it to snap.
What is the Professional Method for Taking Down Light Strands?
Start removal from the opposite side of where the installation began, using a pole and hook to systematically pull lights down from their clips.
- Where Do You Start the Takedown Process?
Begin the takedown from the opposite side of where the installation started.
This simple rule creates a repeatable and efficient system. For example, if your installation process starts on the far right side of the house (when viewed from the street), your takedown process should begin on the far left side. This ensures the lights come down in the correct order for storage and re-installation.
- How Do You Use the Pole to Remove the Lights?
This is where a key installation decision pays off: by not securing the main line with zip ties, you enable a rapid, pole-based removal. Use the hook attachment on the extension pole to grab the light strand and pull it down and away from the gutters and clips.
This technique is effective because the main line is attached with simple clips rather than zip-tied to the gutters. This allows it to be pulled down easily without needing to climb a ladder to cut ties. Once a section is started, the rest of the line will often come down with a gentle pull.
When is a Ladder Still Necessary?
A ladder is only required when removing lights attached with "ridge clips" on the peak of a roof.
Attempting to pull lights from ridge clips with a pole is extremely risky. The force required can pull the entire ridge cap off the roof, causing significant damage. For this specific task, using a ladder is the only safe and correct method, reinforcing the need to plan your installation and takedown strategy together.

How Should You Organize Lights for Next Season?
Use a system of colored zip ties to label each strand by location and wrap them in large, tangle-free bundles.
- The Zip-Tie Labeling System
This system is designed for delegation and scalability. By creating a simple, logical code, you ensure that any crew member—even a new hire—can correctly identify and place each light strand next season without direct supervision, freeing up the business owner to manage other jobs.
The system uses color to denote the side of the house and the quantity of zip ties to denote the floor level. While the examples below use a red/blue system, you can use any consistent color scheme (e.g., pinks, greens) that works for your team.
Code Element
Meaning
Example
Color
Indicates the side of the house (viewed from the street).
Red = Right Side <br> Blue = Left Side
Quantity
Indicates the vertical level.
1 Zip Tie = First Floor <br> 2 Zip Ties = Second Floor
- The Tangle-Free Wrapping Method
This bundling technique ensures that lights can be quickly deployed next season without frustrating tangles.
As the lights come down, take the strand and create a large loop by reaching out as far as you can (e.g., 6 feet).
Continue creating these large, uniform loops along the entire length of the strand.
Once the entire strand is looped, take the final few feet of the light strand (the female plug end) and wrap it tightly around the bundle several times to secure it.
This method ensures the lights will "come right undone" when you unwrap them for the next installation.
Ready to turn seasonal takedowns into a profitable winter business? Learn the complete install-to-takedown system in our Christmas lights training.
Copyright ©2026 All Right Reserved website designed by christmaslights.io
Terms of Service / Privacy Policy
Have questions or need assistance?
Contact us at (855)619-LITE