
Invisilights
Permanent Holiday Lighting
Customizable Lights for Any Event
Permanent Christmas Lights 24V Kit

Permanent Christmas Lights 36V Kit

Permanent Christmas Lights
Demo Kit
WHAT YOU NEED TO KNOW BEFORE ORDERING
Total Linear footage of the installation.
This should include footage of lights and channel along with any Extensions or jumps you'll need to make
Where your controller box will be located
This is the most important step to planning out an installation, Without knowing where the controller will be you'll have no way to know the right materials to buy when it comes to extensions and accessories.
What Voltage system you want to use 24V or 36V
This is a decision you will make based on convince and efficiency, the most important factor with this will be the footage of each lighting run. If the total footage of a run is over 100' you'll need to either power inject on that run or switch to the 36V system that can go up to 200' before needing power injection.
Draw a Map
By mapping out the installation you'll be able to better understand and plan out the install giving you a better idea of what all you'll need to purchase to complete the job.
take the measurements from your map and add up the total number of materials you'll need.
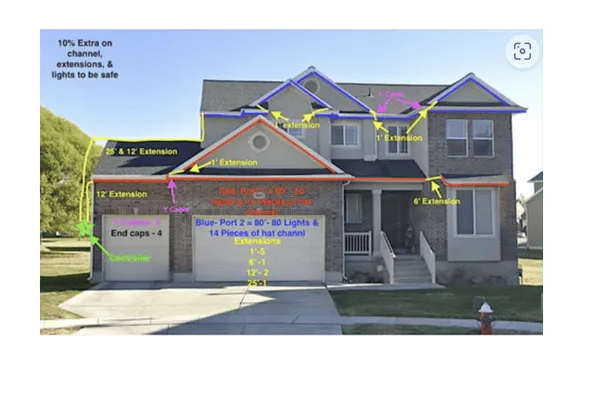
For the Map out example above the total material breakdown is:
System Voltage: 36V
Color of channel: Cameo
Channel Type: Hat
Total Lighted Footage: 160'
Power injection: NO
Controller: 1
Channel: 27- 6' sticks
Screws- 200
Lights: 175
1' extensions-7
6' Extensions-2
12' extensions-2
25- extensions- 1
Y Cables- 3
End caps- pack of 10
Absolute necessities
-Controller
-Lights
-Channel
-Screws
-Extension cables
Other Accessories
-Y Cable
-End Caps
- Signal boosters
-Power injection material
When would you need to power inject?
The controller will come with 3 outputs for your lighting runs, each 36V output can do a Max of 200', the 24V system can do a max of 100'. After that max you'll need to inject power. After you do so you can go an additional 100' with the 24V or 200' with the 36V system.
Power injection is needed due to voltage drop, voltage drop happens due to the length traveled away from the power source along with the gauge of the wire. due to the gauge of wire the lights and extensions run on it drops in voltage enough at 100' with the 24V system and 200' with the 36V system to effect the lights performance requiring a addition of power (Power Injection)
Materials needed for power injection 36V
Power injection pig female pig tale
Power injection Extension cables
Power injection T Cable.
Materials needed to Power inject 24V
16/2 - 12/2 Low voltage landscaping wire
Cut and Splice T cable
Water Proof Wire connectors
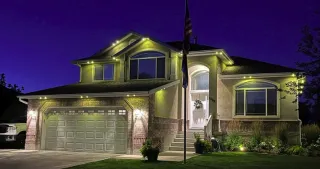
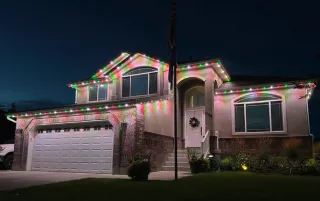
Discover the Transformative Power of Invisilights: Expertly Installed Permanent Lighting Solutions
Enhance your installation offerings with Invisilights, the premier permanent lighting solution designed for seamless integration into any property’s exterior architecture.
Crafted with high-quality aluminum channels and advanced LED technology, Invisilights delivers durability and superior energy efficiency—key selling points for your clients seeking long-lasting, cost-effective lighting solutions. Our system not only provides brilliant illumination but also boosts the aesthetic appeal and functionality of any home.
Offer your clients peace of mind with our robust 5-year warranty, ensuring reliable performance and minimal maintenance needs. This warranty supports your commitment to quality and customer satisfaction, making it easier for you to sell and install with confidence.
Our flexible, programmable system allows you to meet any client’s specific desires—from subtle accents to full-scale holiday displays—making it an adaptable choice for various applications. With Invisilights, you can cater to a wide range of preferences and needs, increasing your market reach and customer retention.
Choose Invisilights for your installations and add a transformative product to your portfolio that will impress clients and ensure your services remain in demand for years to come.
Frequently Asked Questions
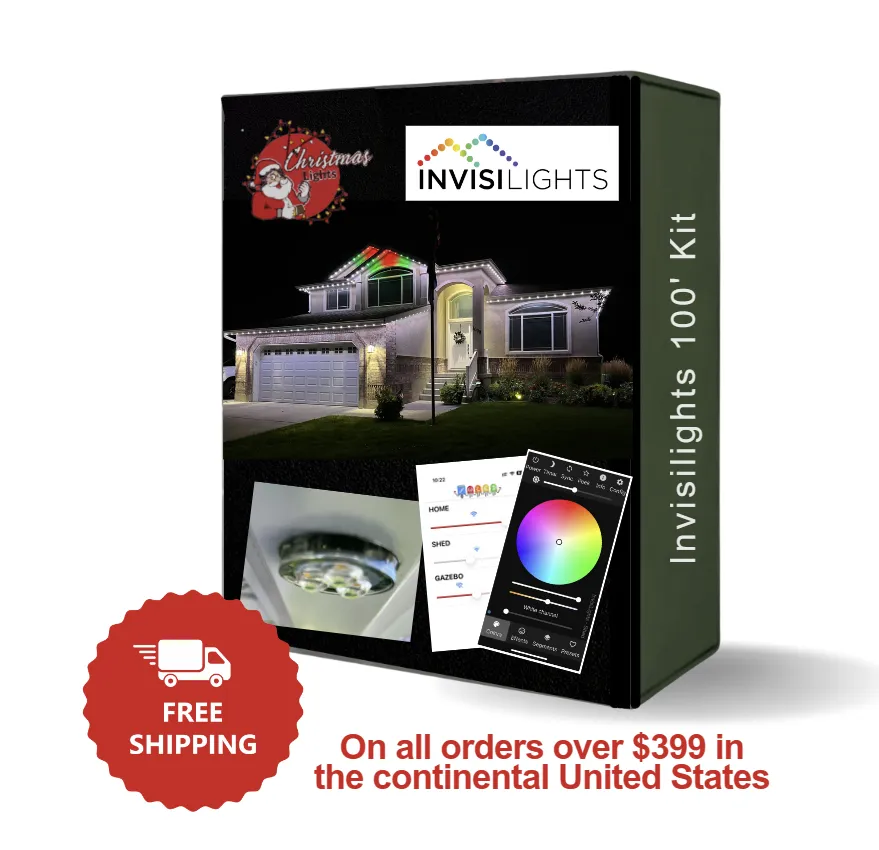
What exactly comes in the 150' InvisiLights permanent outdoor lighting kit?
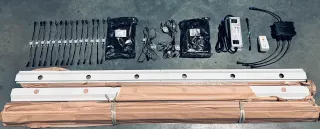
The InvisiLights kit is comprehensively equipped to ensure you have everything you need for installation. Each kit includes:
27 sticks of 6-foot Aluminum Channel to house and protect the lighting elements.
150 feet of dynamic RGBW LED Lights, which includes 23 sets of 6-count and 14 sets of 1-count lights, allowing for extensive coverage and diverse configuration options.
2 Data Boosters to enhance signal strength across the lighting installation, ensuring consistent control and color output.
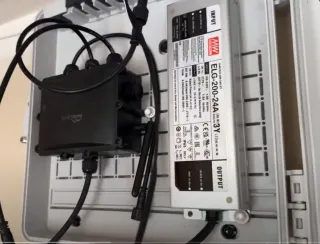
A 320W Power Supply capable of supporting up to 190 puck lights, providing ample power for even the most extensive setups.
1 GFCI Outlet Adapter to ensure safe outdoor electrical connections.
1 Controller that allows you to manage and customize the lighting effects easily.
Will I need any additional components besides what's included in the Invisilights permanent lighting kit?
While the Invisilights kit comes with all the essential components for a standard installation, there are a couple of scenarios where you might need additional items:
Jumper Wires: Depending on the layout of your installation and the number of gaps or 'jumps' between the sections of lights, you may require jumper wires. These wires help bridge the gaps without losing the continuity of the light sequence, ensuring a smooth and uniform display across more complex architectures.
Data Boosters: If any section of your lighting setup is more than 15 feet away from the control box, additional data boosters will be necessary. Data boosters help maintain the integrity and brightness of the lights over longer distances, ensuring consistent performance throughout your installation.
Can I choose the color of the aluminum channel for my InvisiLights kit?
Yes, you can select your preferred color for the aluminum channel to match your home’s exterior or personal taste. Please make sure to specify your color choice in the notes at checkout when you place your order.
How do the included components of the InvisiLights kit enhance the lighting system?
Each component in the InvisiLights kit plays a crucial role in creating an effective and stunning lighting display:
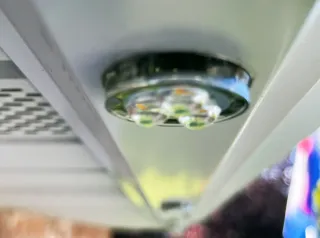
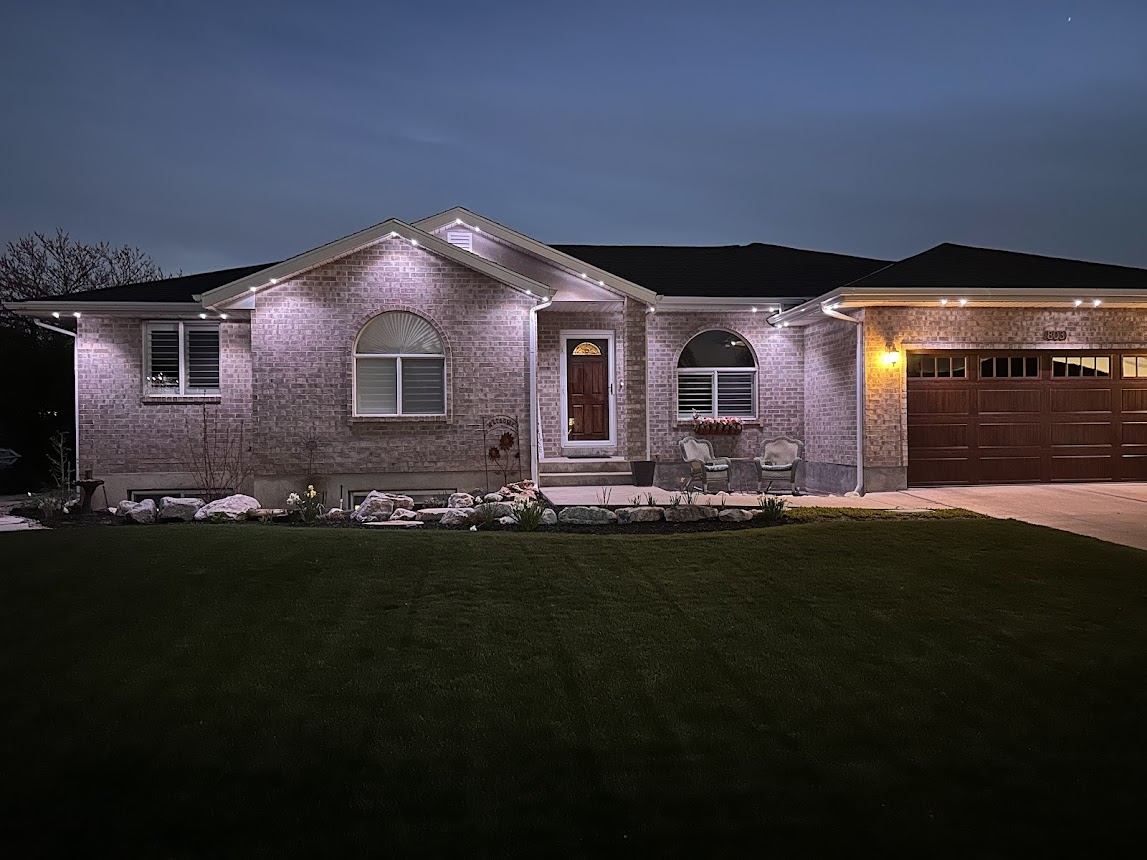
Aluminum Channels: Provide a durable, weather-resistant housing for the LED lights, which helps in maintaining a clean and nearly invisible look during the day.
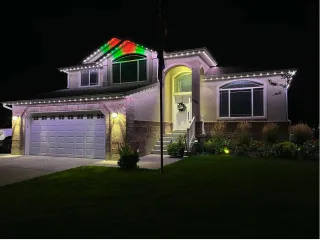
RGBW LED Lights: Offer vibrant, full-spectrum color and white light combinations, making it perfect for any occasion from festive holidays to elegant ambient lighting.
Data Boosters: Ensure that the signal remains strong across longer distances, which is crucial for larger installations.
Power Supply: Designed to efficiently handle the energy needs of the system without overload, ensuring safety and durability.
GFCI Outlet Adapter: Adds an extra layer of safety by protecting against electrical shorts and surges, particularly important in outdoor settings.
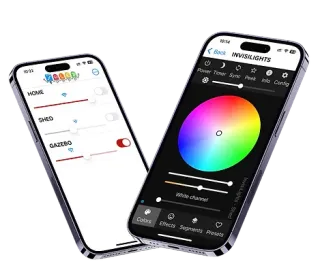
Controller: Provides the flexibility to customize and control the lighting sequences, colors, and patterns right from your smartphone or controller, adding convenience and advanced functionality to your lighting system.
Can I use Invisilights year-round?
Absolutely! Invisilights are designed for versatile use throughout all seasons. Whether you're celebrating a special occasion, setting a mood for a party, Love your favorite sports team, or simply enhancing your home's ambiance, our lighting systems provide the perfect solution for any event, big or small.
Can I set timers and events for Invisilights?
Yes, Invisilights feature advanced programmable settings that allow you to schedule lighting for specific events and automate timers. This functionality ensures that your lighting preferences are perfectly aligned with your lifestyle, turning on and off at predetermined times without any manual intervention.
Is it possible to achieve warm or soft white with Invisilights?
Absolutely, Invisilights are equipped with RGBW technology, which includes a dedicated white LED alongside the standard red, green, and blue LEDs. This addition allows the system to produce authentic warm white, soft white, and various other shades of white with greater accuracy and intensity compared to traditional RGB systems. This capability ensures that you can effortlessly tailor the lighting to fit the desired ambiance and aesthetic of any environment, providing precise control over both vibrant colors and the subtlety of different white tones.
How do you ship your product?
Our products are shipped directly from our warehouse using reliable shipping carriers to ensure timely and safe delivery. Each product is securely packaged to prevent damage during transit, and we provide tracking information so you can follow your order’s journey to your doorstep.
Where are the controller and power supplies installed?
The controller and power supplies for Invisilights are typically installed in an accessible location such as a garage or utility room. These components connect to your home’s WiFi network, allowing seamless control over the lighting system via our user-friendly mobile app.
How long do Invisilights last?
Invisilights are engineered to last, with each LED bulb boasting a lifespan of over 50,000 hours. Given a typical usage of 10 hours per night, this translates to approximately 5,000 nights. This means your Invisilights could illuminate your home's exterior for nearly 14 years under these conditions, ensuring that your investment not only adds beauty but also long-term value to your property.
Are Invisilights dimmable?
Yes, all Invisilights are fully dimmable. This feature allows you to adjust the intensity of the light to suit various occasions, from a soft glow for a romantic evening to bright, vibrant colors for a festive celebration.
What types of custom channels are available?
Invisilights offers two types of custom channels, available in 40 different colors, ensuring a nearly invisible installation. These channels are designed to blend seamlessly with your home’s architecture, providing discreet yet effective lighting.

Can I control different zones independently?
Yes, the Invisilights system supports multiple zones which can be controlled independently or synchronized. This functionality allows for intricate lighting designs that can vary across different areas of your home, enhancing the overall impact and utility of your installation.
What is outdoor permanent lighting?
Permanent lighting refers to architectural-grade lighting systems that are installed permanently on your property to provide year-round illumination.
How does permanent lighting differ from traditional holiday lighting?
Unlike traditional holiday lighting, which is typically temporary and used only during specific seasons, permanent lighting is installed once and can be used throughout the year for various occasions
Discover Expert Tips on Our Blog
Pro Christmas Light Removal: No Ladders Needed
The holidays are over, the joy has been had, and now only one task remains: taking down the Christmas lights. For most, this means a frustrating afternoon on a wobbly ladder, battling a hopelessly knotted nest of wires. It’s the annual chore that sours the end of the season.
But for professionals, it’s just another Tuesday. They can clear an entire house in as little as 15 minutes, and they do it without the stress, mess, or danger. The difference isn't magic; it's a complete system that separates amateurs from the pros. These aren't just "tips"—this is the methodology that makes them fast, safe, and profitable. Here’s how you can adopt their system.

1. The Takedown-First Mindset: Install for Easy Removal
The single biggest secret to a fast takedown begins before you hang the first bulb. Professionals operate with a takedown-first mindset, meaning the entire installation is planned for effortless removal. Amateurs think about how to get the lights up; pros think about how to get them down.
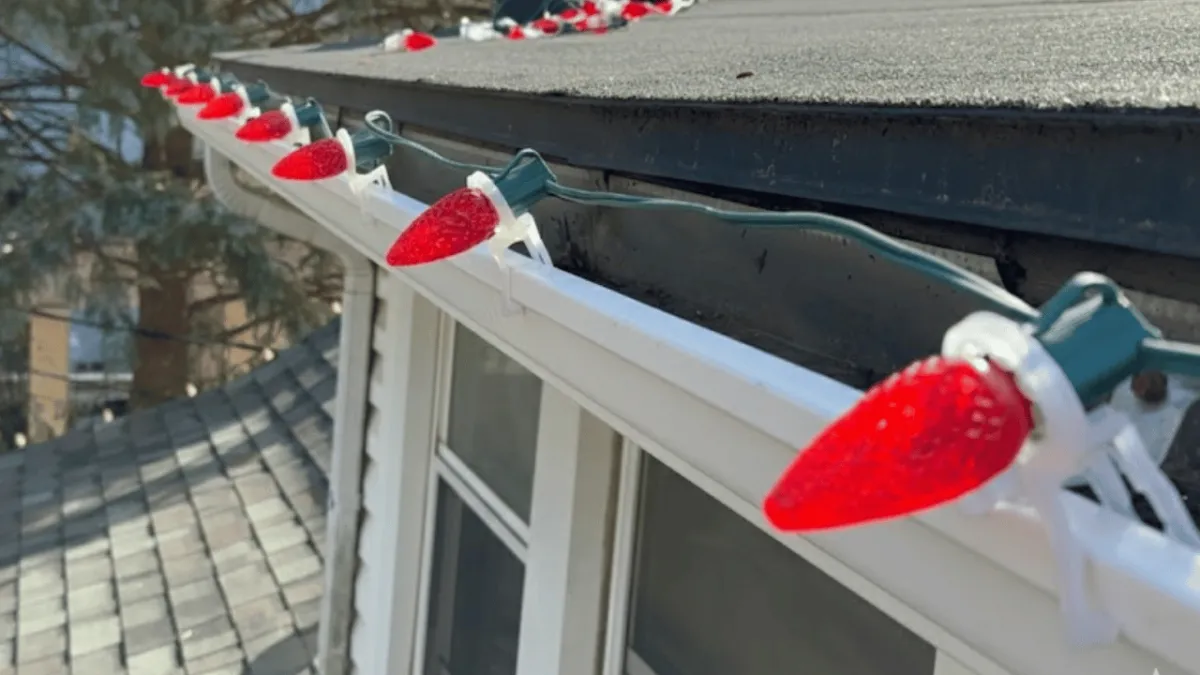
The number one amateur mistake is tightly zip-tying light strings directly to gutters. Every zip tie you add is one you’ll have to hunt down and snip from the top of a ladder. Professionals never do this. Instead of creating a problem, they use a brilliantly simple solution: take a clip and just shove it in behind the gutter. The tension holds it all season, but a gentle tug with a pole makes it fall right out. No climbing, no cutting.
...this is why it's so important that as we install to put up that we take down...
2. The Pro's Primary Tool: Ditch the Ladder for a Pole
Falls from ladders are a serious, costly risk, and for this job, they are almost entirely avoidable. The professional’s primary tool for a swift and safe takedown is not a ladder, but a long extension pole with a simple hook on the end.
This isn’t a specialized piece of equipment. A standard painter's pole (like a "Mr. Long Arm") with a paint roller hook attached is all you need. For higher jobs, a stiffer carbon fiber pole is even better. Using this tool, pros can lift lights from clips and even remove wreaths from as high as 24 feet, all while keeping both feet planted safely on the ground. You simply hook the wire, lift it off its anchor, and guide it down.
3. The Tangle-Free System: A Pro's Guide to Storage
A fast takedown is useless if you create a tangled nightmare for next year. Pros use a methodical system to ensure that when the lights come out of storage, they are perfectly organized and ready to be installed with zero guesswork.
Start in Reverse. The system is simple: take the lights down in the opposite order you put them up. If you started installing on the far right side of the house (when viewed from the street), you begin your takedown on the far left. This way, next year you can grab the first bundle and start on the far right, with every subsequent strand in perfect order.
Create the "Zip Tie Code". This is the organizational trick that makes the system foolproof. Think of it as a coordinate system for your house. Assign a color to each major section—for example, "red zip tie right." You can use pinks or any other color for the left side, front porch, etc. Then, use the number of zip ties to denote the level: one zip tie for the first floor, two for the second. A strand with two red zip ties instantly tells anyone on the crew, "Right side, Second floor." No photos or diagrams are needed.
The Arm's-Length Wrap. To prevent tangles, hold the strand and reach out as far as your arm can go, then bring the wire back to your hand to create a large loop. Repeat this, creating a neat, long bundle. When you reach the end, take the last couple of feet of wire and wrap it tightly around the bundle to secure it. For a final pro touch, tuck the male plug under one of the wraps. That way, you know exactly where the end is next year. This bundle will unspool perfectly, without a single knot.
A Quick Word of Caution from the Pros
While the pole method works for over 90% of the job, there's one critical exception: ridge clips on the peak of your roof. If your lights are attached with clips that go over the very top shingle (the ridge cap), a ladder is required.
Under no circumstances should you yank these with a pole from the ground. Pulling too hard will rip the entire ridge cap off your roof, causing expensive and significant damage. These specific clips must be removed carefully by hand.
Conclusion: Reclaim Your Post-Holiday Sanity
Taking down Christmas lights doesn't have to be your most dreaded annual chore. By adopting a professional system—installing for easy removal, using a pole instead of a ladder, and following a foolproof storage method—you can transform this task into a quick, safe job that takes as little as 15 minutes. A little foresight is all it takes to end the season on a calm and organized note.
Now that you have a professional system for takedown, what other holiday traditions could be simplified with a little more planning?

Why Should You Avoid Ladders for Christmas Light Takedowns?
To significantly reduce the risk of falling from ladders or roofs.
Using a ladder for takedown introduces unnecessary danger. Industry experts have observed several installers falling, which can lead to serious injury. By adopting a ground-based method using an extension pole, you can complete the job safely and efficiently.
What Tools Do You Need for a No-Ladder Takedown?
You primarily need an extension pole with a simple hook attachment for removal and colored zip ties for organization.
Extension Pole: This is the core tool for reaching high areas. Standard poles like "Mr. Long Arm" are sufficient for many jobs, but "carbon fiber" or "waterfed" poles perform much better for higher installations, such as those at 24 feet.
Hook Attachment: A simple hook is used to grab wreaths and pull down light strands. A dedicated tool is not required; a standard "paint roller" attachment works perfectly for this task.
Colored Zip Ties: These are used for organizing light strands during takedown, not for installation. A color-coding system helps identify where each strand belongs for the next season (e.g., red zip ties for the right side of the house).
How Do You Remove High Wreaths Without a Ladder?
Use an extension pole and hook to lift the wreath up and off its hanger, then carefully lower it to the ground.
The success of this method is determined during installation. By hanging the wreath with a simple, loose loop rather than wrapping it tightly around an anchor, you enable a fast, ladder-free removal.
Extend the pole and position the hook to securely grab a sturdy part of the wreath.
Lift the wreath straight up to unhook it from its hanger.
Lower the wreath slowly. It is critical to keep the pole as straight as possible during descent. Allowing the pole to bend sideways, especially when fully extended, can cause it to snap.
What is the Professional Method for Taking Down Light Strands?
Start removal from the opposite side of where the installation began, using a pole and hook to systematically pull lights down from their clips.
- Where Do You Start the Takedown Process?
Begin the takedown from the opposite side of where the installation started.
This simple rule creates a repeatable and efficient system. For example, if your installation process starts on the far right side of the house (when viewed from the street), your takedown process should begin on the far left side. This ensures the lights come down in the correct order for storage and re-installation.
- How Do You Use the Pole to Remove the Lights?
This is where a key installation decision pays off: by not securing the main line with zip ties, you enable a rapid, pole-based removal. Use the hook attachment on the extension pole to grab the light strand and pull it down and away from the gutters and clips.
This technique is effective because the main line is attached with simple clips rather than zip-tied to the gutters. This allows it to be pulled down easily without needing to climb a ladder to cut ties. Once a section is started, the rest of the line will often come down with a gentle pull.
When is a Ladder Still Necessary?
A ladder is only required when removing lights attached with "ridge clips" on the peak of a roof.
Attempting to pull lights from ridge clips with a pole is extremely risky. The force required can pull the entire ridge cap off the roof, causing significant damage. For this specific task, using a ladder is the only safe and correct method, reinforcing the need to plan your installation and takedown strategy together.

How Should You Organize Lights for Next Season?
Use a system of colored zip ties to label each strand by location and wrap them in large, tangle-free bundles.
- The Zip-Tie Labeling System
This system is designed for delegation and scalability. By creating a simple, logical code, you ensure that any crew member—even a new hire—can correctly identify and place each light strand next season without direct supervision, freeing up the business owner to manage other jobs.
The system uses color to denote the side of the house and the quantity of zip ties to denote the floor level. While the examples below use a red/blue system, you can use any consistent color scheme (e.g., pinks, greens) that works for your team.
Code Element
Meaning
Example
Color
Indicates the side of the house (viewed from the street).
Red = Right Side <br> Blue = Left Side
Quantity
Indicates the vertical level.
1 Zip Tie = First Floor <br> 2 Zip Ties = Second Floor
- The Tangle-Free Wrapping Method
This bundling technique ensures that lights can be quickly deployed next season without frustrating tangles.
As the lights come down, take the strand and create a large loop by reaching out as far as you can (e.g., 6 feet).
Continue creating these large, uniform loops along the entire length of the strand.
Once the entire strand is looped, take the final few feet of the light strand (the female plug end) and wrap it tightly around the bundle several times to secure it.
This method ensures the lights will "come right undone" when you unwrap them for the next installation.
Ready to turn seasonal takedowns into a profitable winter business? Learn the complete install-to-takedown system in our Christmas lights training.
Copyright ©2026 All Right Reserved website designed by christmaslights.io
Terms of Service / Privacy Policy
Have questions or need assistance?
Contact us at (855)619-LITE