Invisilights
Permanent Holiday Lighting
Customizable Lights for Any Event
Permanent Christmas Lights 24V Kit
Permanent Christmas Lights 36V Kit

Permanent Christmas Lights
Demo Kit
WHAT YOU NEED TO KNOW BEFORE ORDERING
Total Linear footage of the installation.
This should include footage of lights and channel along with any Extensions or jumps you'll need to make
Where your controller box will be located
This is the most important step to planning out an installation, Without knowing where the controller will be you'll have no way to know the right materials to buy when it comes to extensions and accessories.
What Voltage system you want to use 24V or 36V
This is a decision you will make based on convince and efficiency, the most important factor with this will be the footage of each lighting run. If the total footage of a run is over 100' you'll need to either power inject on that run or switch to the 36V system that can go up to 200' before needing power injection.
Draw a Map
By mapping out the installation you'll be able to better understand and plan out the install giving you a better idea of what all you'll need to purchase to complete the job.
take the measurements from your map and add up the total number of materials you'll need.
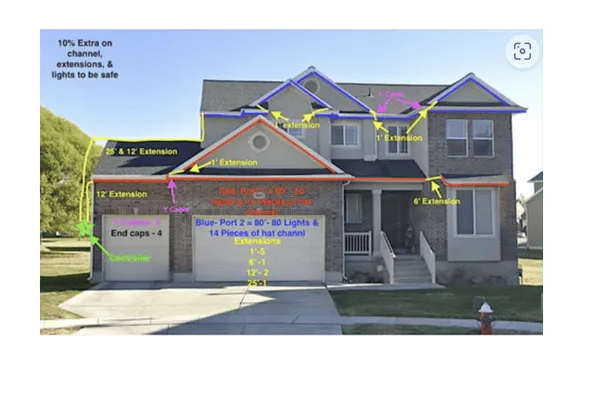
For the Map out example above the total material breakdown is:
System Voltage: 36V
Color of channel: Cameo
Channel Type: Hat
Total Lighted Footage: 160'
Power injection: NO
Controller: 1
Channel: 27- 6' sticks
Screws- 200
Lights: 175
1' extensions-7
6' Extensions-2
12' extensions-2
25- extensions- 1
Y Cables- 3
End caps- pack of 10
Absolute necessities
-Controller
-Lights
-Channel
-Screws
-Extension cables
Other Accessories
-Y Cable
-End Caps
- Signal boosters
-Power injection material
When would you need to power inject?
The controller will come with 3 outputs for your lighting runs, each 36V output can do a Max of 200', the 24V system can do a max of 100'. After that max you'll need to inject power. After you do so you can go an additional 100' with the 24V or 200' with the 36V system.
Power injection is needed due to voltage drop, voltage drop happens due to the length traveled away from the power source along with the gauge of the wire. due to the gauge of wire the lights and extensions run on it drops in voltage enough at 100' with the 24V system and 200' with the 36V system to effect the lights performance requiring a addition of power (Power Injection)
Materials needed for power injection 36V
Power injection pig female pig tale
Power injection Extension cables
Power injection T Cable.
Materials needed to Power inject 24V
16/2 - 12/2 Low voltage landscaping wire
Cut and Splice T cable
Water Proof Wire connectors
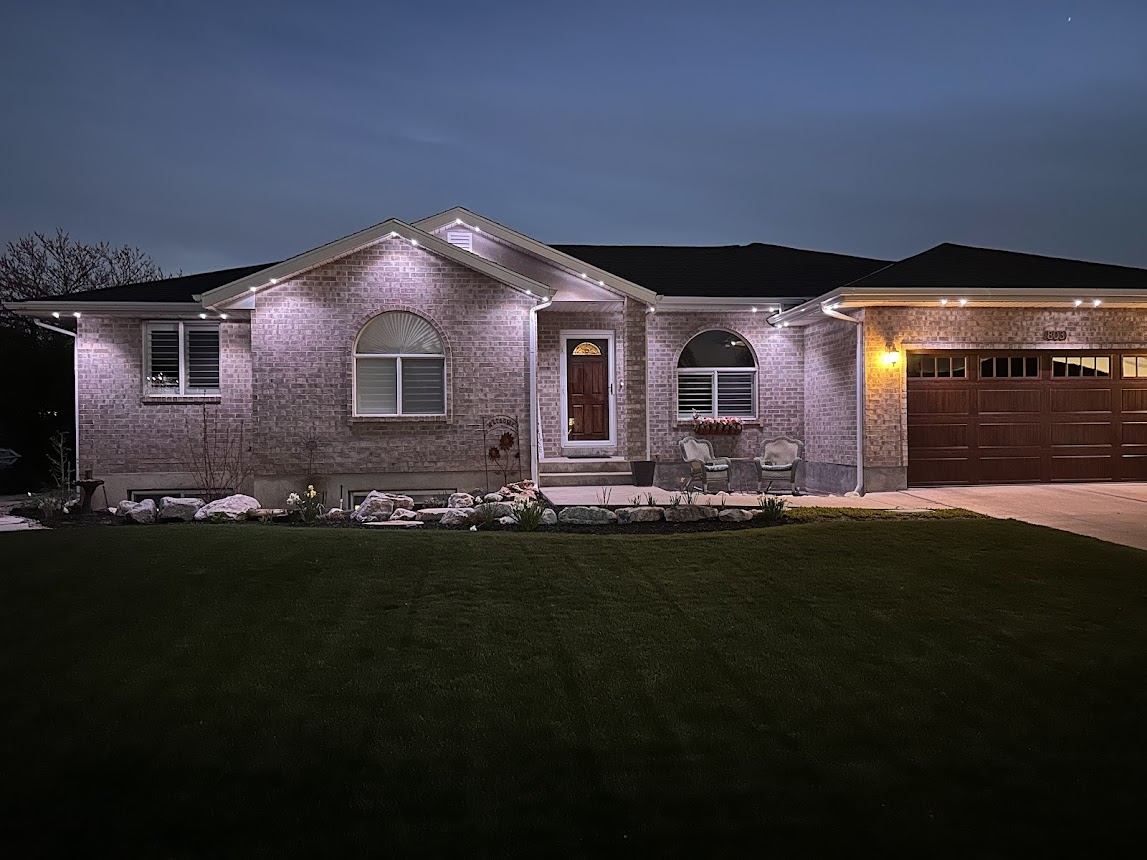
Discover the Transformative Power of Invisilights: Expertly Installed Permanent Lighting Solutions
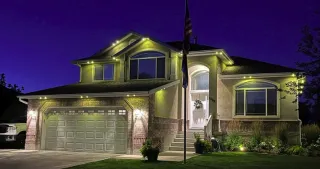
Enhance your installation offerings with Invisilights, the premier permanent lighting solution designed for seamless integration into any property’s exterior architecture.
Crafted with high-quality aluminum channels and advanced LED technology, Invisilights delivers durability and superior energy efficiency—key selling points for your clients seeking long-lasting, cost-effective lighting solutions. Our system not only provides brilliant illumination but also boosts the aesthetic appeal and functionality of any home.
Offer your clients peace of mind with our robust 5-year warranty, ensuring reliable performance and minimal maintenance needs. This warranty supports your commitment to quality and customer satisfaction, making it easier for you to sell and install with confidence.
Our flexible, programmable system allows you to meet any client’s specific desires—from subtle accents to full-scale holiday displays—making it an adaptable choice for various applications. With Invisilights, you can cater to a wide range of preferences and needs, increasing your market reach and customer retention.
Choose Invisilights for your installations and add a transformative product to your portfolio that will impress clients and ensure your services remain in demand for years to come.
Frequently Asked Questions
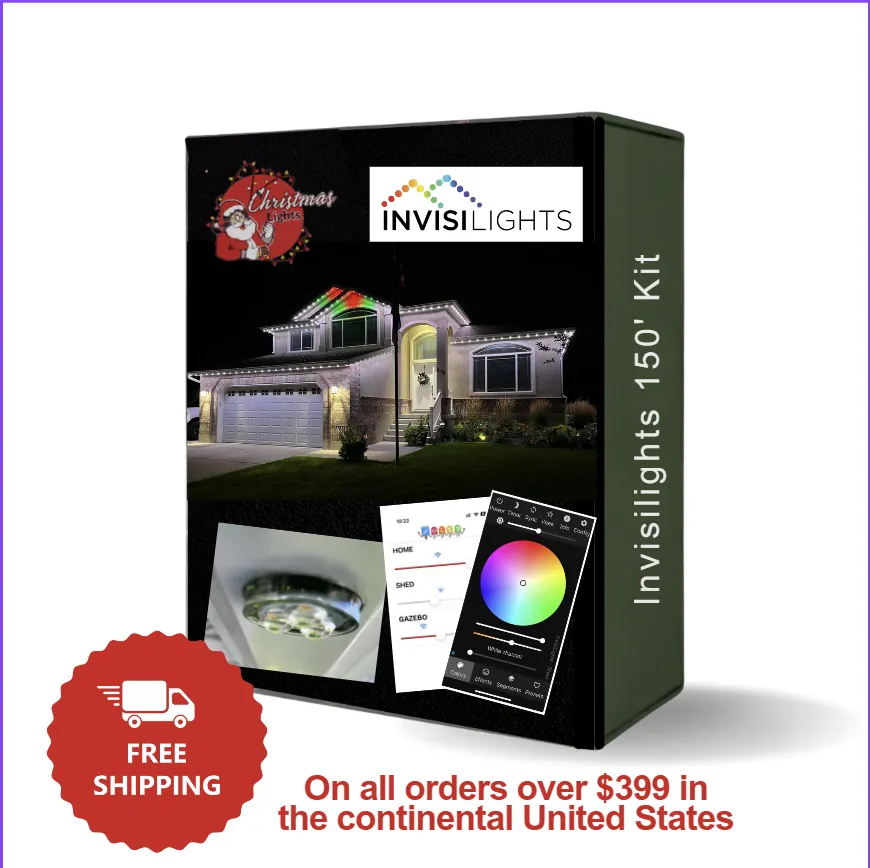
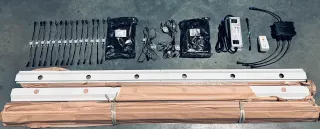
What exactly comes in the 150' InvisiLights permanent outdoor lighting kit?
The InvisiLights kit is comprehensively equipped to ensure you have everything you need for installation. Each kit includes:
27 sticks of 6-foot Aluminum Channel to house and protect the lighting elements.
150 feet of dynamic RGBW LED Lights, which includes 23 sets of 6-count and 14 sets of 1-count lights, allowing for extensive coverage and diverse configuration options.
2 Data Boosters to enhance signal strength across the lighting installation, ensuring consistent control and color output.
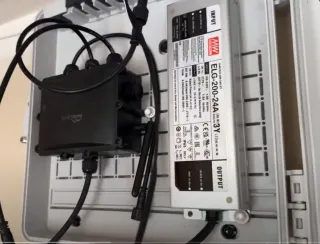
A 320W Power Supply capable of supporting up to 190 puck lights, providing ample power for even the most extensive setups.
1 GFCI Outlet Adapter to ensure safe outdoor electrical connections.
1 Controller that allows you to manage and customize the lighting effects easily.
Will I need any additional components besides what's included in the Invisilights permanent lighting kit?
While the Invisilights kit comes with all the essential components for a standard installation, there are a couple of scenarios where you might need additional items:
Jumper Wires: Depending on the layout of your installation and the number of gaps or 'jumps' between the sections of lights, you may require jumper wires. These wires help bridge the gaps without losing the continuity of the light sequence, ensuring a smooth and uniform display across more complex architectures.
Data Boosters: If any section of your lighting setup is more than 15 feet away from the control box, additional data boosters will be necessary. Data boosters help maintain the integrity and brightness of the lights over longer distances, ensuring consistent performance throughout your installation.
Can I choose the color of the aluminum channel for my InvisiLights kit?
Yes, you can select your preferred color for the aluminum channel to match your home’s exterior or personal taste. Please make sure to specify your color choice in the notes at checkout when you place your order.
How do the included components of the InvisiLights kit enhance the lighting system?
Each component in the InvisiLights kit plays a crucial role in creating an effective and stunning lighting display:
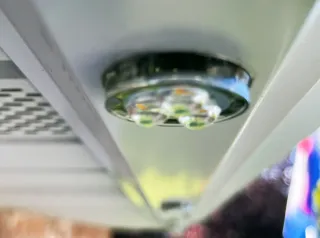
Aluminum Channels: Provide a durable, weather-resistant housing for the LED lights, which helps in maintaining a clean and nearly invisible look during the day.
RGBW LED Lights: Offer vibrant, full-spectrum color and white light combinations, making it perfect for any occasion from festive holidays to elegant ambient lighting.
Data Boosters: Ensure that the signal remains strong across longer distances, which is crucial for larger installations.
Power Supply: Designed to efficiently handle the energy needs of the system without overload, ensuring safety and durability.
GFCI Outlet Adapter: Adds an extra layer of safety by protecting against electrical shorts and surges, particularly important in outdoor settings.
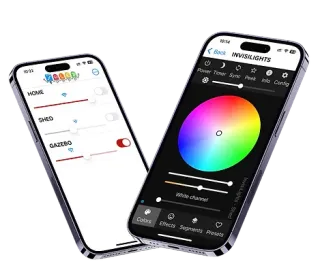
Controller: Provides the flexibility to customize and control the lighting sequences, colors, and patterns right from your smartphone or controller, adding convenience and advanced functionality to your lighting system.
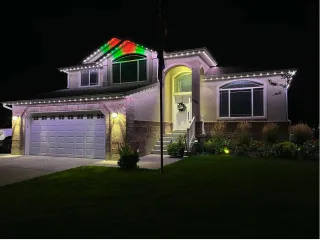
Can I use Invisilights year-round?
Absolutely! Invisilights are designed for versatile use throughout all seasons. Whether you're celebrating a special occasion, setting a mood for a party, Love your favorite sports team, or simply enhancing your home's ambiance, our lighting systems provide the perfect solution for any event, big or small.
Can I set timers and events for Invisilights?
Yes, Invisilights feature advanced programmable settings that allow you to schedule lighting for specific events and automate timers. This functionality ensures that your lighting preferences are perfectly aligned with your lifestyle, turning on and off at predetermined times without any manual intervention.
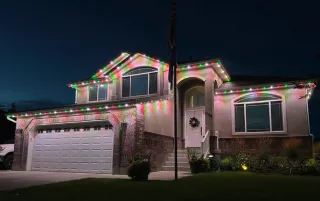
Is it possible to achieve warm or soft white with Invisilights?
Absolutely, Invisilights are equipped with RGBW technology, which includes a dedicated white LED alongside the standard red, green, and blue LEDs. This addition allows the system to produce authentic warm white, soft white, and various other shades of white with greater accuracy and intensity compared to traditional RGB systems. This capability ensures that you can effortlessly tailor the lighting to fit the desired ambiance and aesthetic of any environment, providing precise control over both vibrant colors and the subtlety of different white tones.
How do you ship your product?
Our products are shipped directly from our warehouse using reliable shipping carriers to ensure timely and safe delivery. Each product is securely packaged to prevent damage during transit, and we provide tracking information so you can follow your order’s journey to your doorstep.
Where are the controller and power supplies installed?
The controller and power supplies for Invisilights are typically installed in an accessible location such as a garage or utility room. These components connect to your home’s WiFi network, allowing seamless control over the lighting system via our user-friendly mobile app.
How long do Invisilights last?
Invisilights are engineered to last, with each LED bulb boasting a lifespan of over 50,000 hours. Given a typical usage of 10 hours per night, this translates to approximately 5,000 nights. This means your Invisilights could illuminate your home's exterior for nearly 14 years under these conditions, ensuring that your investment not only adds beauty but also long-term value to your property.
Are Invisilights dimmable?
Yes, all Invisilights are fully dimmable. This feature allows you to adjust the intensity of the light to suit various occasions, from a soft glow for a romantic evening to bright, vibrant colors for a festive celebration.
What types of custom channels are available?
Invisilights offers two types of custom channels, available in 40 different colors, ensuring a nearly invisible installation. These channels are designed to blend seamlessly with your home’s architecture, providing discreet yet effective lighting.

Can I control different zones independently?
Yes, the Invisilights system supports multiple zones which can be controlled independently or synchronized. This functionality allows for intricate lighting designs that can vary across different areas of your home, enhancing the overall impact and utility of your installation.
What is outdoor permanent lighting?
Permanent lighting refers to architectural-grade lighting systems that are installed permanently on your property to provide year-round illumination.
How does permanent lighting differ from traditional holiday lighting?
Unlike traditional holiday lighting, which is typically temporary and used only during specific seasons, permanent lighting is installed once and can be used throughout the year for various occasions
Discover Expert Tips on Our Blog

First Step to a Stunning Christmas Light Display
Before purchasing a single strand of Christmas lights or choosing between LEDs and incandescents, successful outdoor holiday decorating begins with something surprisingly simple: taking a good, long look at your house.
The most beautiful Christmas light displays aren't created by randomly hanging lights wherever they fit. They're carefully planned to enhance your home's natural features and architecture. This essential first step—assessing your canvas—sets the foundation for a cohesive, impressive display that maximizes impact while minimizing frustration.
Why Assessment Matters
Professional Christmas light installers always begin with a thorough assessment of each property. This isn't just a formality—it's what allows them to create custom displays that complement each unique home. By adopting this professional approach, you'll:
Identify the most impactful decorating opportunities
Avoid wasting money on inappropriate lights or decorations
Create a cohesive display that enhances your home's architecture
Prevent installation challenges and safety issues
Develop a comprehensive plan before spending a single dollar
Let's break down exactly how to assess your home like a pro decorator.

Getting the Full Picture of Your Home
The foundation of a beautiful Christmas light display begins with understanding your home's unique features from a decorator's perspective. Start by stepping back—literally.
Walk to the curb or even across the street (safely, of course) to get a comprehensive view of your property. This distance provides the same perspective that neighbors and passersby will have when admiring your display. The view from afar often reveals architectural elements and natural focal points that aren't obvious when you're standing right next to your home.
Take several photographs from different angles, capturing your entire home and yard. These images will serve as invaluable reference points throughout your planning and installation process. You'll refer to them repeatedly when deciding light placement, measuring areas, and creating your shopping list.
This step might seem overly simple, but it's frequently overlooked. Those reference photos become your blueprint, allowing you to make notes, mark measurements, and visualize your completed display before purchasing a single decoration.
Identifying Key Decorating Opportunities
With your reference photos in hand, it's time to identify the architectural and landscape elements that offer decorating potential. Think of your home as a canvas with distinct features that can be highlighted through strategic lighting.
Roofline Features
Examine your roofline in detail, noting the number and height of peaks. Each peak creates a natural point of interest in your display and may require special attention during installation. Notice the length of horizontal eaves and overhangs, as these provide perfect pathways for light strands.
Pay attention to the presence and style of gutters around your roof. The type of gutters you have will determine what kind of clips work best for attaching lights securely. Also note the type of shingles or roofing material, as this affects how (or if) you can attach lights directly to the roof surface.
These details will influence both the types of clips needed and light placement options. The roofline often serves as the framework for your entire display, creating a beautiful outline that defines your home's silhouette against the night sky.
Landscape Elements
Your yard offers numerous decorating opportunities through its natural features. Take inventory of trees on your property, noting their size, type, and accessibility. Deciduous trees with bare branches make perfect canvases for light wrapping, while evergreens might look best with draped lights or spotlighting.
Observe the shape and density of bushes and shrubs around your home. These can be easily decorated with net lights or string lights and create beautiful illuminated shapes in your overall design.
Consider the length and visibility of walkways and driveways. These pathways not only guide visitors to your home but also create natural borders for lighting. Well-lit paths add safety as well as beauty to your display.
Identify any special garden features like statues, beds, or distinctive plantings that could be highlighted. These natural elements provide perfect anchors for lights and decorations, creating depth and dimension in your display.
Windows and Entryways
Windows and doors create natural frames for holiday decor and should be carefully considered in your planning. Count and measure all windows, noting any that have unusual shapes or sizes. Windows can be outlined with lights or decorated with wreaths, garlands, or window clings.
Note door locations and styles, particularly your main entry door which often becomes a focal point. Identify potential wreath placement areas and consider how the door opens to ensure decorations won't interfere with functionality.
Look for special architectural details around windows and doors that might be worth highlighting with specialty lighting. Bay windows, arched doorways, or decorative moldings can become stunning features when accentuated with the right lighting approach.
Illuminating these features draws attention to your home's unique character and creates a welcoming atmosphere for visitors and passersby alike.
Porch and Exterior Structures
The entryway area deserves special attention in your planning process. Columns and posts provide perfect opportunities for spiral wrapping with light strands, creating elegant vertical elements in your display. Railings offer ideal pathways for straight light runs, clearly defining the boundaries of your entry area.
Steps and landings present opportunities for accent lighting that enhances both safety and aesthetics. Small stake lights or tape lighting can illuminate these transition areas beautifully. Don't forget to look up—overhead areas like porch ceilings can be transformed with hanging decorations, icicle lights, or even a festive porch chandelier.
This area often becomes the focal point of your display, creating a magical welcome for visitors and setting the tone for your entire Christmas presentation.

Additional Decorating Opportunities
Don't overlook these often-forgotten elements that can add distinctive touches to your display. Planters and window boxes can be filled with seasonal greenery and lights. Your mailbox and lamp posts provide natural structures for wrapping or accenting with garland and ribbons.
Outdoor furniture like benches or Adirondack chairs can be outlined with lights or festooned with holiday cushions and throws. The garage door frame offers a large surface area that can balance your front door decorations on the opposite side of your home.
Even outbuildings like sheds, pergolas, or gazebos can be incorporated into your overall design. Some creative homeowners even decorate seldom-used vehicles, turning them into whimsical elements like "Santa's sleigh" or a vintage Christmas truck.
These details add personality and completeness to your display, showing attention to the entire property rather than just the most obvious features.
Mapping Your Power Sources
Perhaps the most critical practical aspect of your assessment is locating all exterior electrical outlets. Their positions will significantly influence your design and installation approach.
Mark each outlet location on your reference photos so you can plan light placement accordingly. Note whether they're GFCI-protected (Ground Fault Circuit Interrupter), as this protection is important for outdoor electrical safety during potentially wet winter conditions.
Identify which areas of your property have easy power access and which might require long extension cord runs. Consider whether you'll need to run cords around doorways or walkways, as these create potential tripping hazards that must be addressed in your installation plan.
Power availability often determines which areas you'll prioritize in your design, especially if you're working with a limited budget. Focusing your main display elements near power sources can reduce the need for extensive cord runs and additional outdoor-rated extension cords, which can be a significant part of your decorating budget.
Turning Assessment into Action
After completing your thorough assessment, take time to organize your findings. Many decorators find it helpful to create a simple sketch or mark directly on printed photos, highlighting:
Primary decorating areas (roofline, entryway, featured trees)
Secondary decorating opportunities (smaller landscaping, windows, walkways)
Power source locations and approximate distances to key decorating areas
Potential challenging areas that require special attention
This organized assessment becomes the foundation for all subsequent planning—from choosing a theme to establishing a budget, selecting appropriate light types, and creating a shopping list.

Professional Insight: What the Pros See That Amateurs Miss
Professional Christmas light installers develop an eye for identifying a home's best features and potential challenges. They typically look for:
Natural focal points that visitors' eyes will be drawn to first
Architectural symmetry that can be enhanced with balanced lighting
Unique home features that set the property apart from neighbors
Practical installation challenges like difficult-to-reach areas
Potential safety concerns like steep roofs or electrical limitations
By approaching your assessment with these professional considerations in mind, you'll develop a more sophisticated understanding of your home's decorating potential.
The Foundation of Christmas Light Success
Taking the time to thoroughly assess your home might not seem as exciting as shopping for twinkling lights, but it's truly the foundation of a successful holiday display. This critical first step ensures that when you do start purchasing decorations and installing lights, every decision will be informed by a clear understanding of your home's unique potential.
Remember that Christmas light displays often evolve over multiple seasons. Your assessment might reveal more decorating opportunities than you can address in a single year. That's perfectly fine—you can prioritize the most important areas for this season and expand your display in future years.
The most beautiful Christmas light displays are those that enhance a home's natural architecture rather than fighting against it. By starting with a thoughtful assessment, you're already on your way to creating a display that will bring holiday joy to your family and neighborhood for years to come.

1. Why should I assess my home before buying Christmas lights?
Assessment helps you identify the most impactful decorating opportunities, avoid wasting money on inappropriate decorations, create a cohesive display that enhances your home's architecture, prevent installation challenges, and develop a comprehensive plan before spending any money.
2. What's the best way to get a complete view of my home for planning?
Walk to the curb or across the street to see your home from a distance—the same perspective others will have. Take several photographs from different angles to capture your entire property. These photos will serve as reference points throughout your planning process.
3. What roofline features should I pay attention to during assessment?
Note the number and height of peaks, length of horizontal eaves and overhangs, presence and style of gutters, and type of roofing material. These details determine what clip types you'll need and affect light placement options.
4. How should I approach decorating trees and shrubs in my yard?
Take inventory of trees, noting size, type, and accessibility. Deciduous trees with bare branches work well for light wrapping, while evergreens might look better with draped lights or spotlighting. For bushes and shrubs, consider using net lights based on their shape and density.
5. Why is my front entryway particularly important in Christmas light planning?
The entryway often becomes the focal point of your display, creating a welcoming atmosphere and setting the tone for your entire presentation. It offers multiple decorating opportunities with columns, railings, steps, and overhead areas that can be transformed with lights and decorations.
6. What often-overlooked elements can enhance a Christmas light display?
Consider decorating planters, window boxes, mailboxes, lamp posts, outdoor furniture, garage door frames, outbuildings like sheds or pergolas, and even seldom-used vehicles. These details add personality and completeness to your display.

7. Why is mapping power sources a critical part of assessment?
Power outlet locations significantly influence your design and installation approach. Knowing their locations helps you plan light placement, determine extension cord needs, identify potential tripping hazards, and prioritize decorating areas within your budget.
8. How do I check if my outdoor outlets are safe for Christmas lights?
Check whether your outlets are GFCI-protected (Ground Fault Circuit Interrupter), which is important for outdoor electrical safety during wet winter conditions. Look for "Test" and "Reset" buttons on the outlets, which indicate GFCI protection.
9. How should I organize my findings after completing the assessment?
Create a simple sketch or mark directly on printed photos, highlighting primary decorating areas (roofline, entryway, featured trees), secondary opportunities, power source locations with approximate distances to key areas, and potential challenging spots requiring special attention.
10. What do professional Christmas light installers see that amateurs often miss?
Professionals identify natural focal points, architectural symmetry that can be enhanced with balanced lighting, unique home features that set the property apart, practical installation challenges like hard-to-reach areas, and potential safety concerns like steep roofs or electrical limitations.
Copyright ©2026 All Right Reserved website designed by christmaslights.io
Terms of Service / Privacy Policy
Have questions or need assistance?
Contact us at (855)619-LITE