

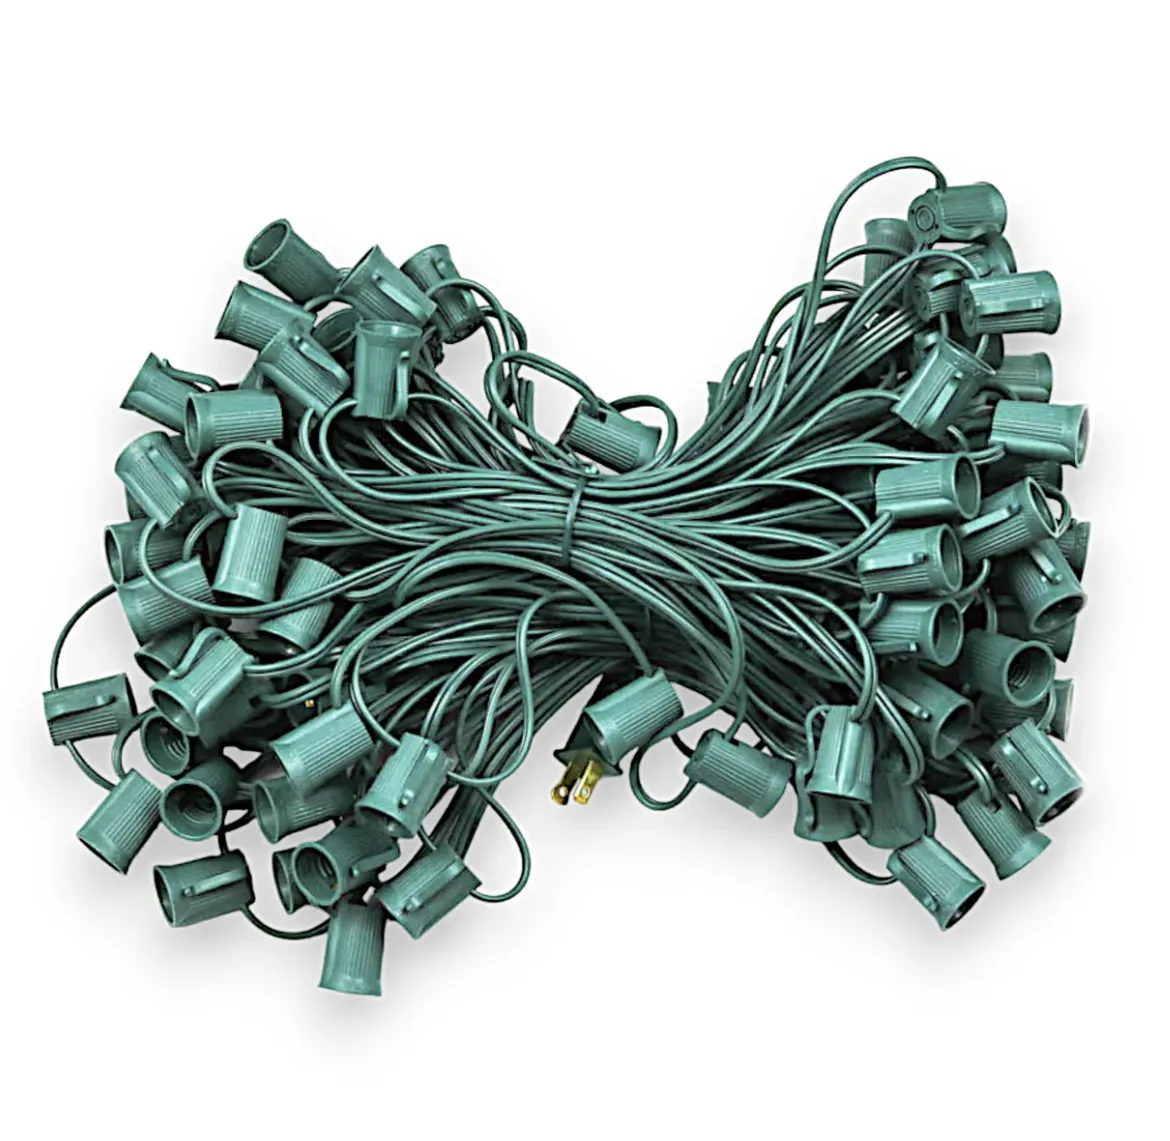
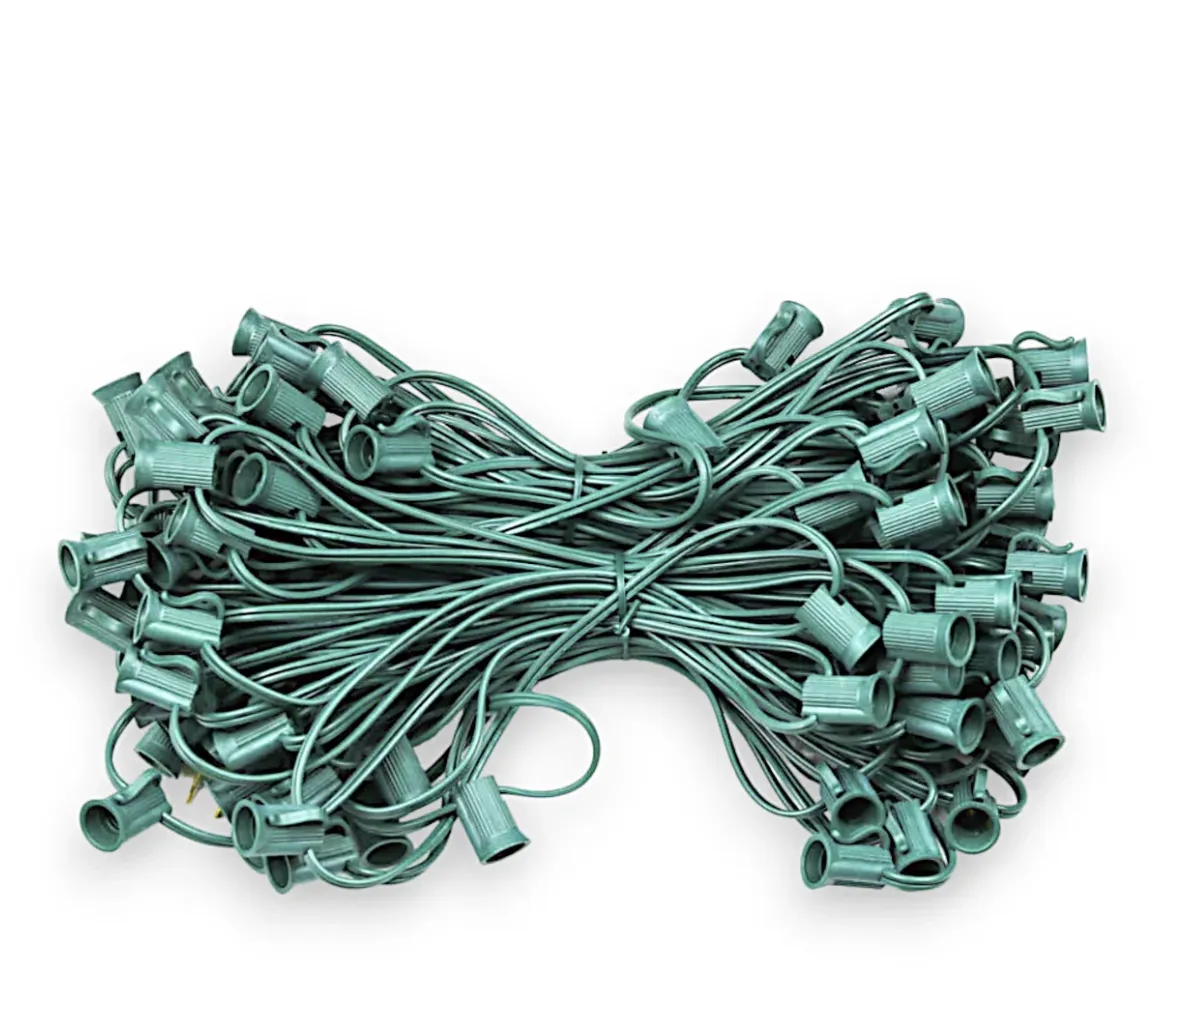
C9 & C7 Socket Spools & Stringers
Discover our premium collection of socket wire spools and stringers, the essential foundation for creating stunning light displays. Designed for both professional installers and ambitious homeowners, our range includes bulk C7 and C9 socket wire spools with flexible spacing options, pre-made light stringers for quick setups, and convenient accessories like spool holders. These versatile, durable components are perfect for residential rooflines, enchanting tree displays, and large-scale commercial projects. Suitable for indoor and outdoor use, and compatible with both incandescent and LED bulbs, our professional-grade products offer the quality and flexibility needed to bring your creative lighting visions to life. Explore our selection and elevate your illumination projects with unmatched versatility and reliability.
Socket Spools
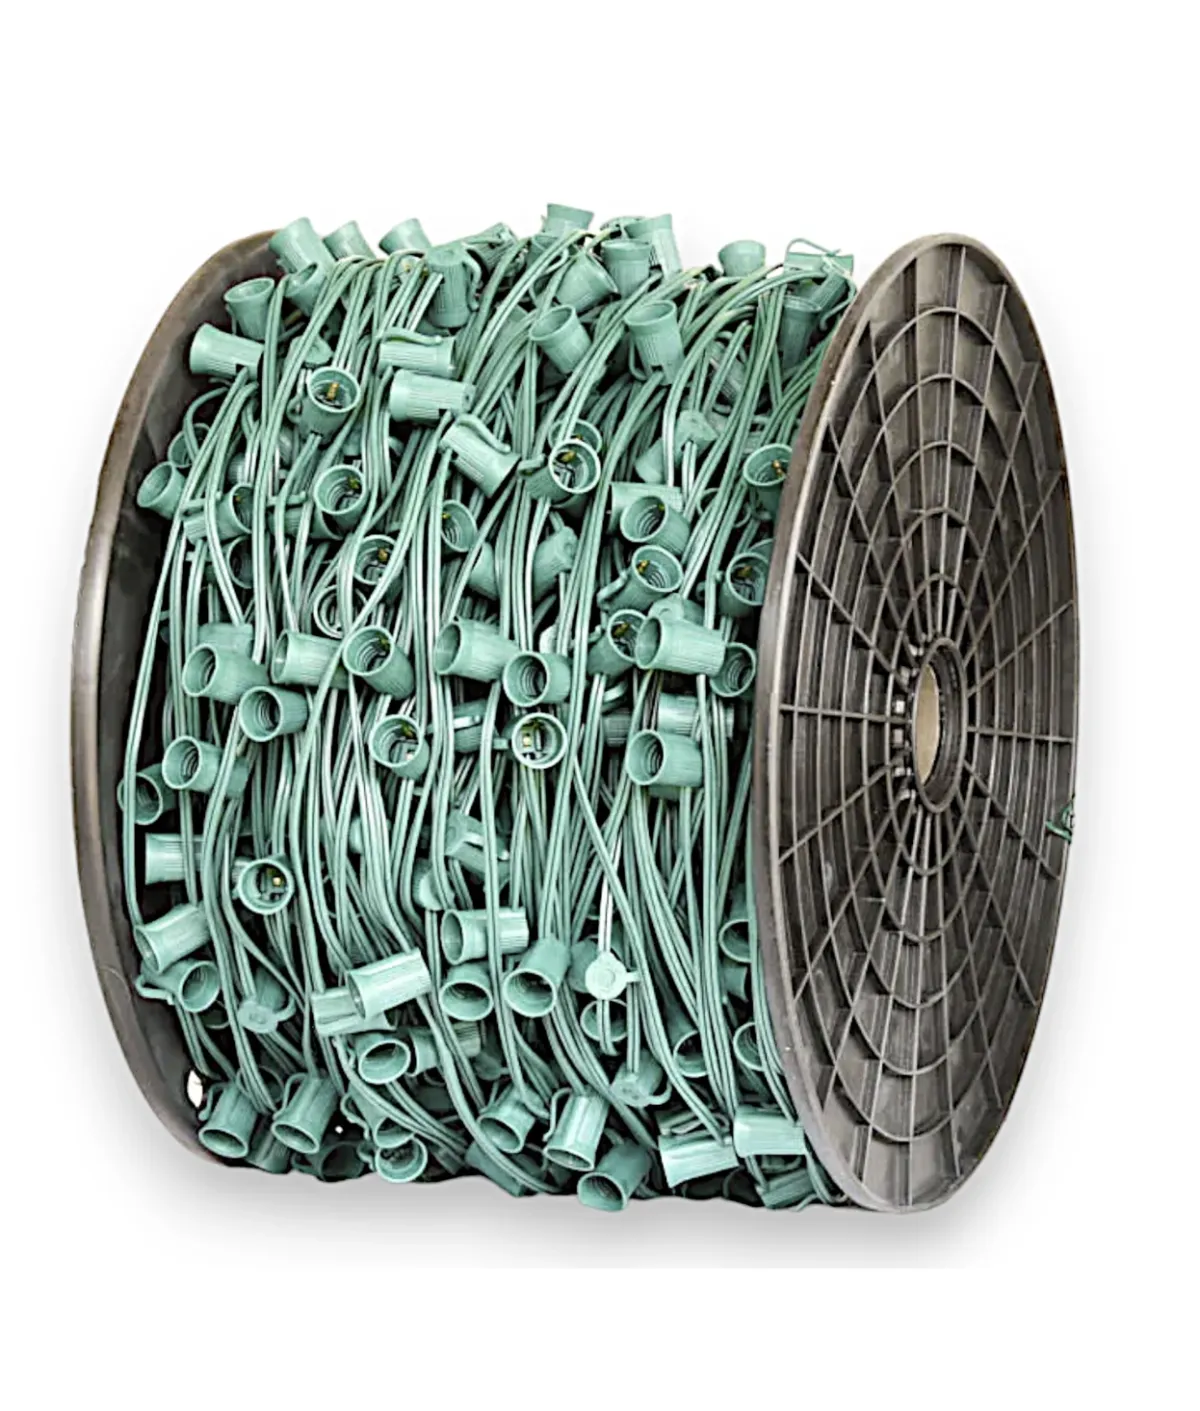
C9 1000' Socket Spool
Our C9 1000' Bulk Spool of Socket Wire, available in green or white, offers professional-grade flexibility for custom lighting projects. With spacing options from 6" to 48", it's ideal for both residential rooflines (12-15" spacing) and tree installations (24-48" spacing). The durable SPT-1 wire withstands outdoor conditions and is compatible with both incandescent and LED C9 bulbs. This customizable spool allows for precise length cutting, minimizing waste and maximizing efficiency for high-quality, adaptable lighting displays.
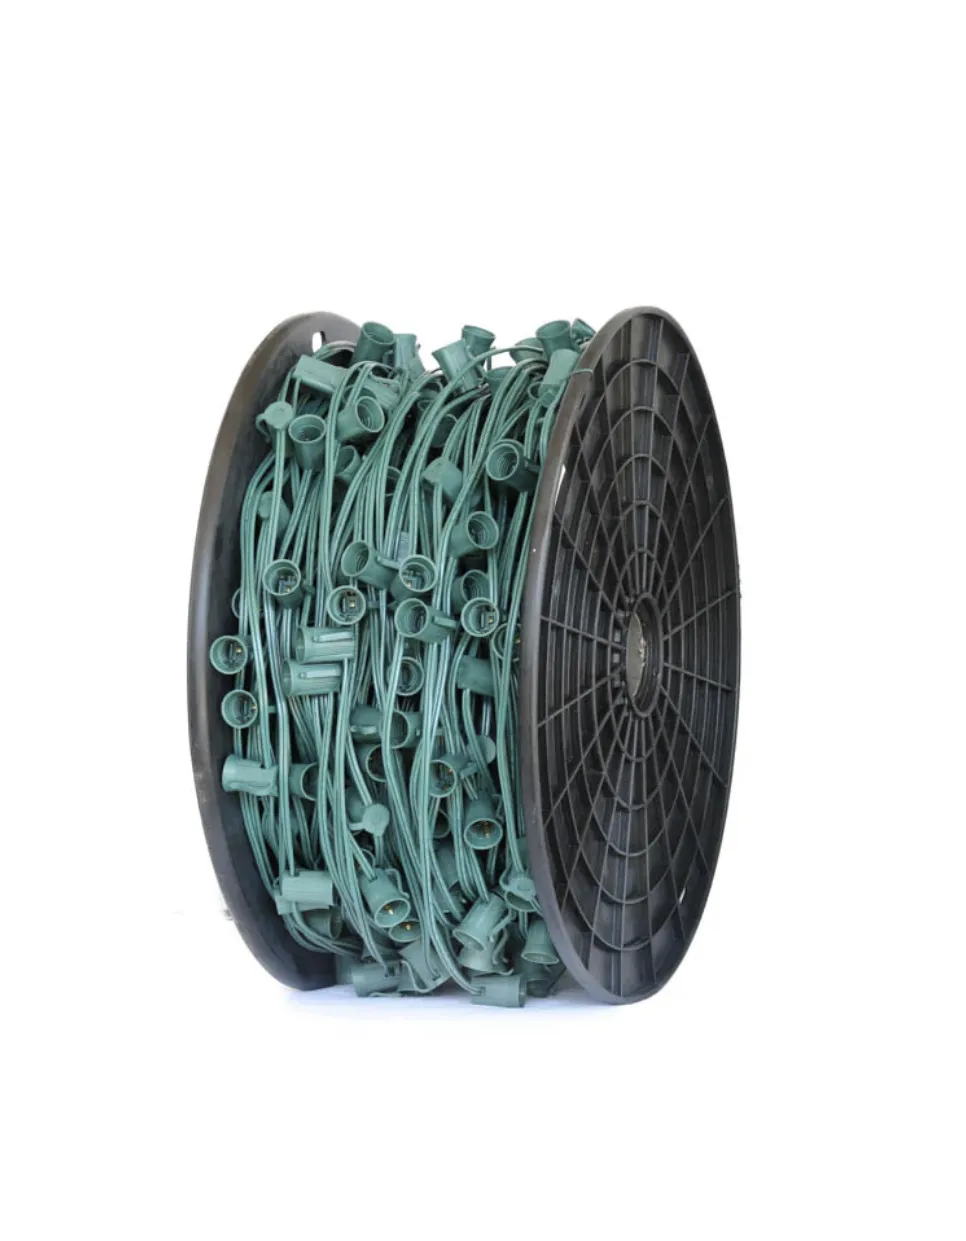
C9 500' Socket Spool
Our C9 500' Bulk Spool of Green Wire, available with 12" (500 sockets) or 15" (400 sockets) spacing, is perfect for professional-grade Christmas lighting installations. Featuring commercial-quality SPT-1, 8-amp wire and durable E17 sockets, this customizable spool is ideal for large-scale outdoor projects. Easily cut to desired lengths and pair with snap-on plugs (sold separately) for tailored lighting solutions in both residential and commercial settings. The 12" spacing offers vibrant, balanced lighting, while the 15" option provides a classic look with fewer bulbs per run.
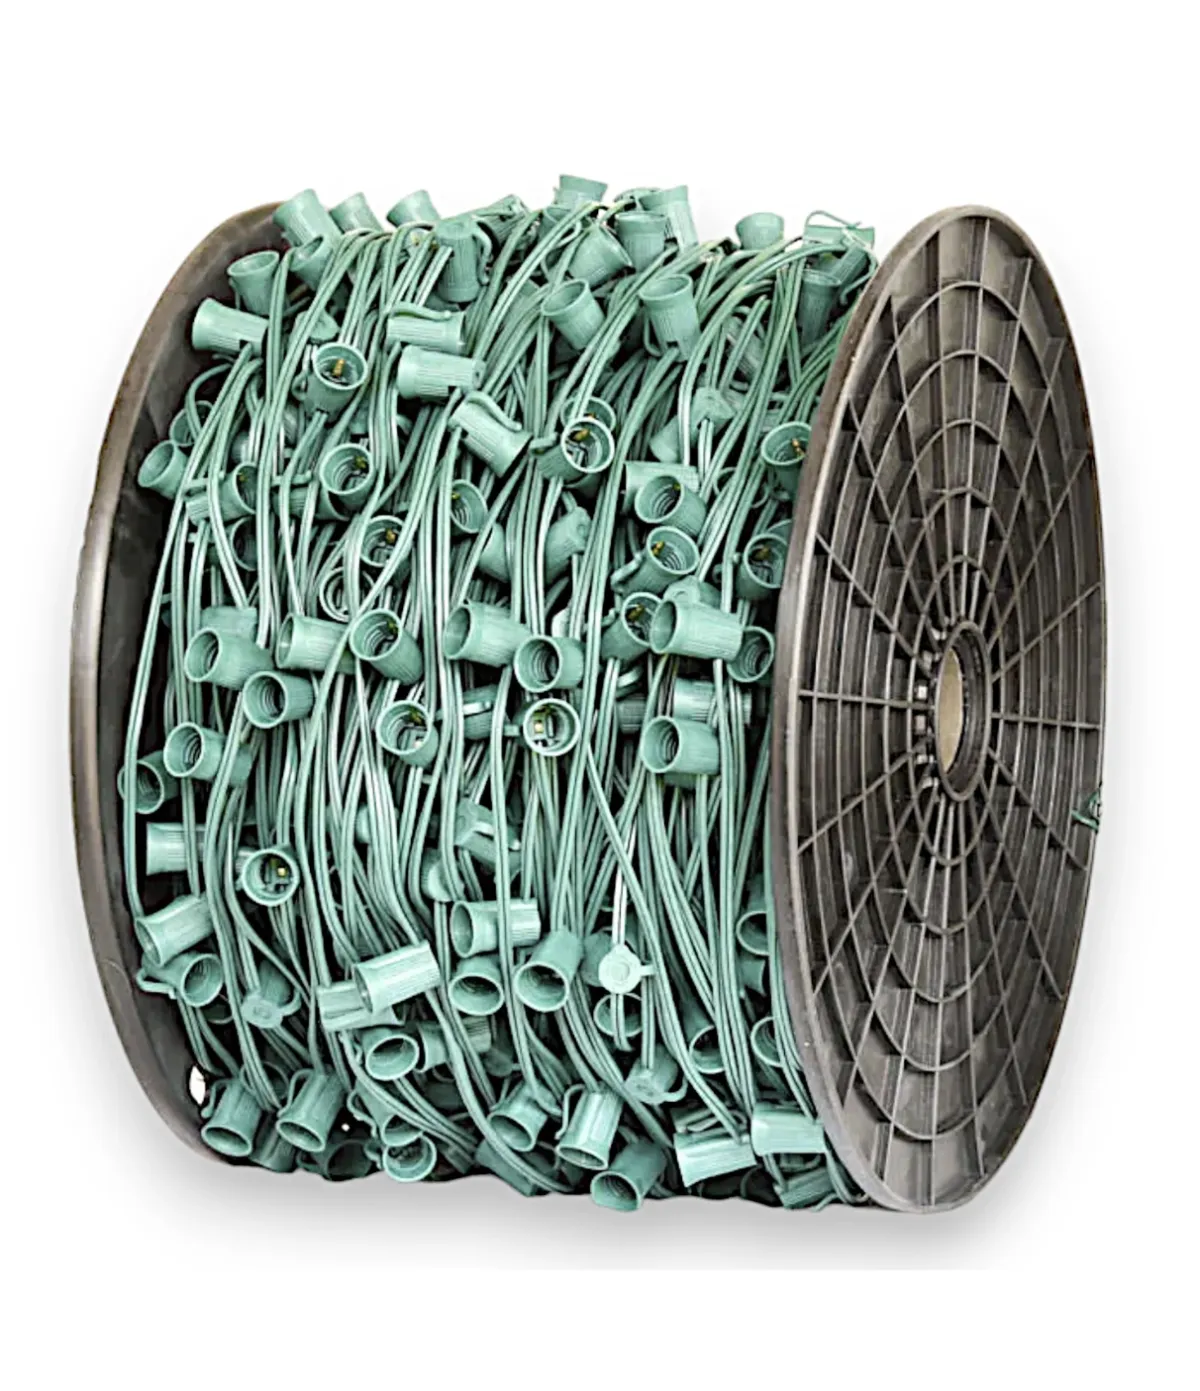
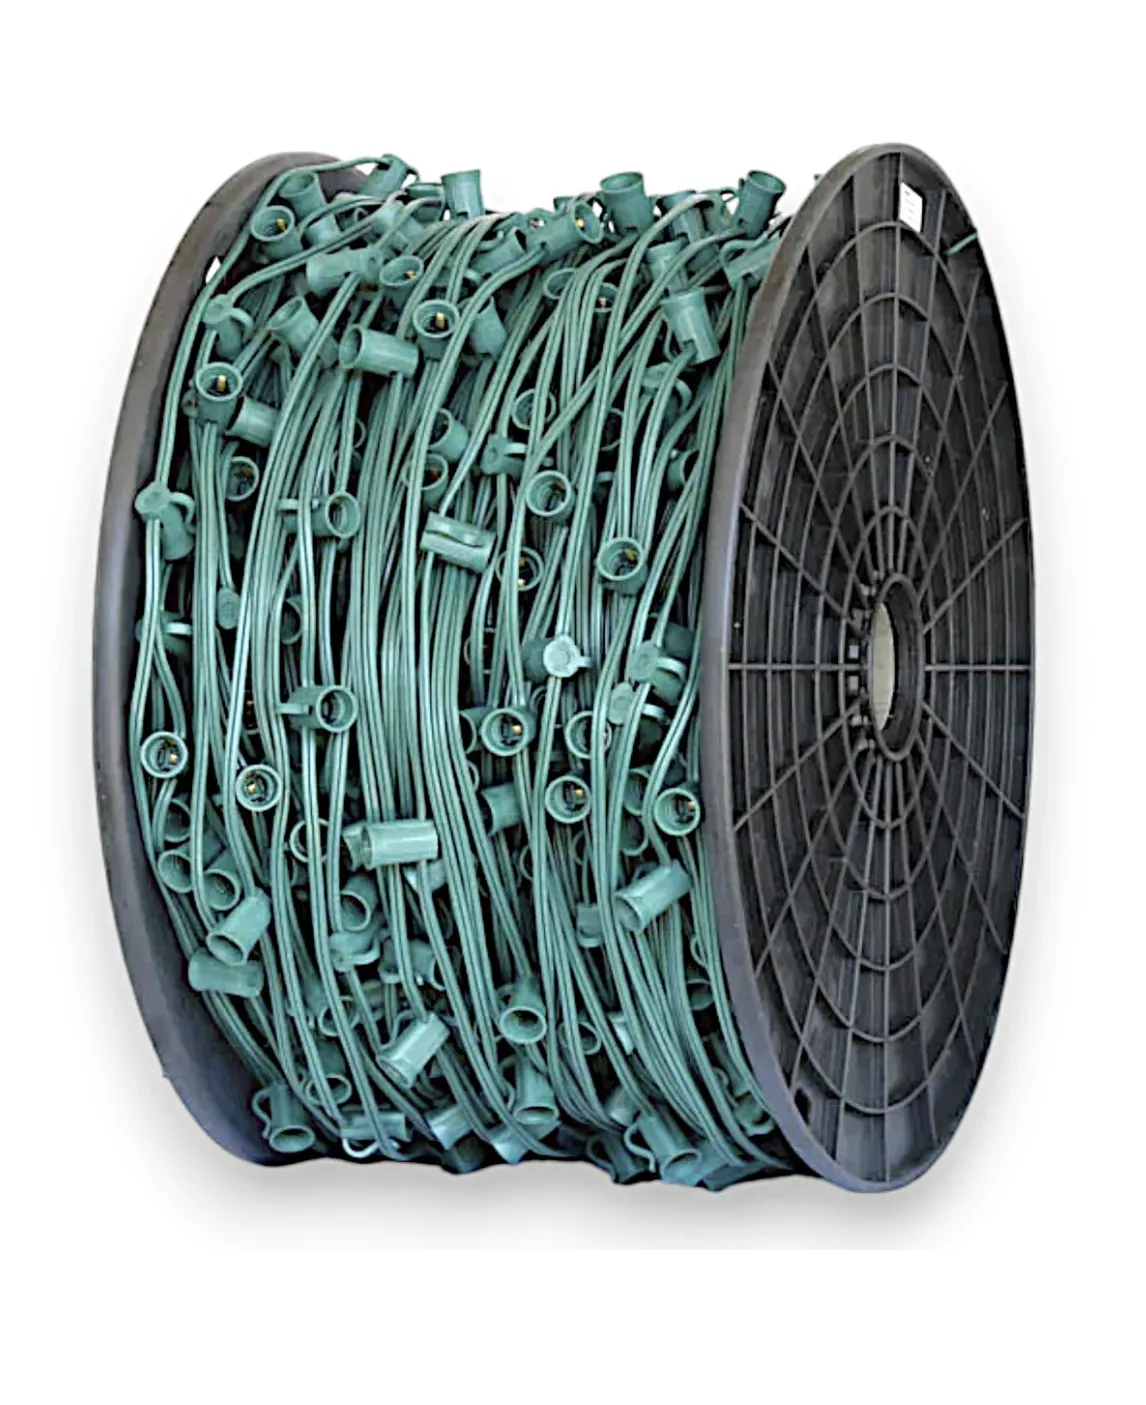
C9 1000' 12"&15" Socket Wire Spool (SPT-2)
Our C9 1000' Socket Wire Spool (SPT-2) offers professional-grade flexibility with dual 12" and 15" spacing options. This customizable spool features heavy-duty SPT-2 wire for enhanced durability in all weather conditions. The 12" spacing is perfect for dense, vibrant displays on rooflines and pathways, while the 15" option provides a classic look with fewer bulbs per run. Compatible with both incandescent and LED C9 bulbs, this 1000' spool allows for precise cutting to fit any residential or commercial lighting project, ensuring efficient and long-lasting installations.
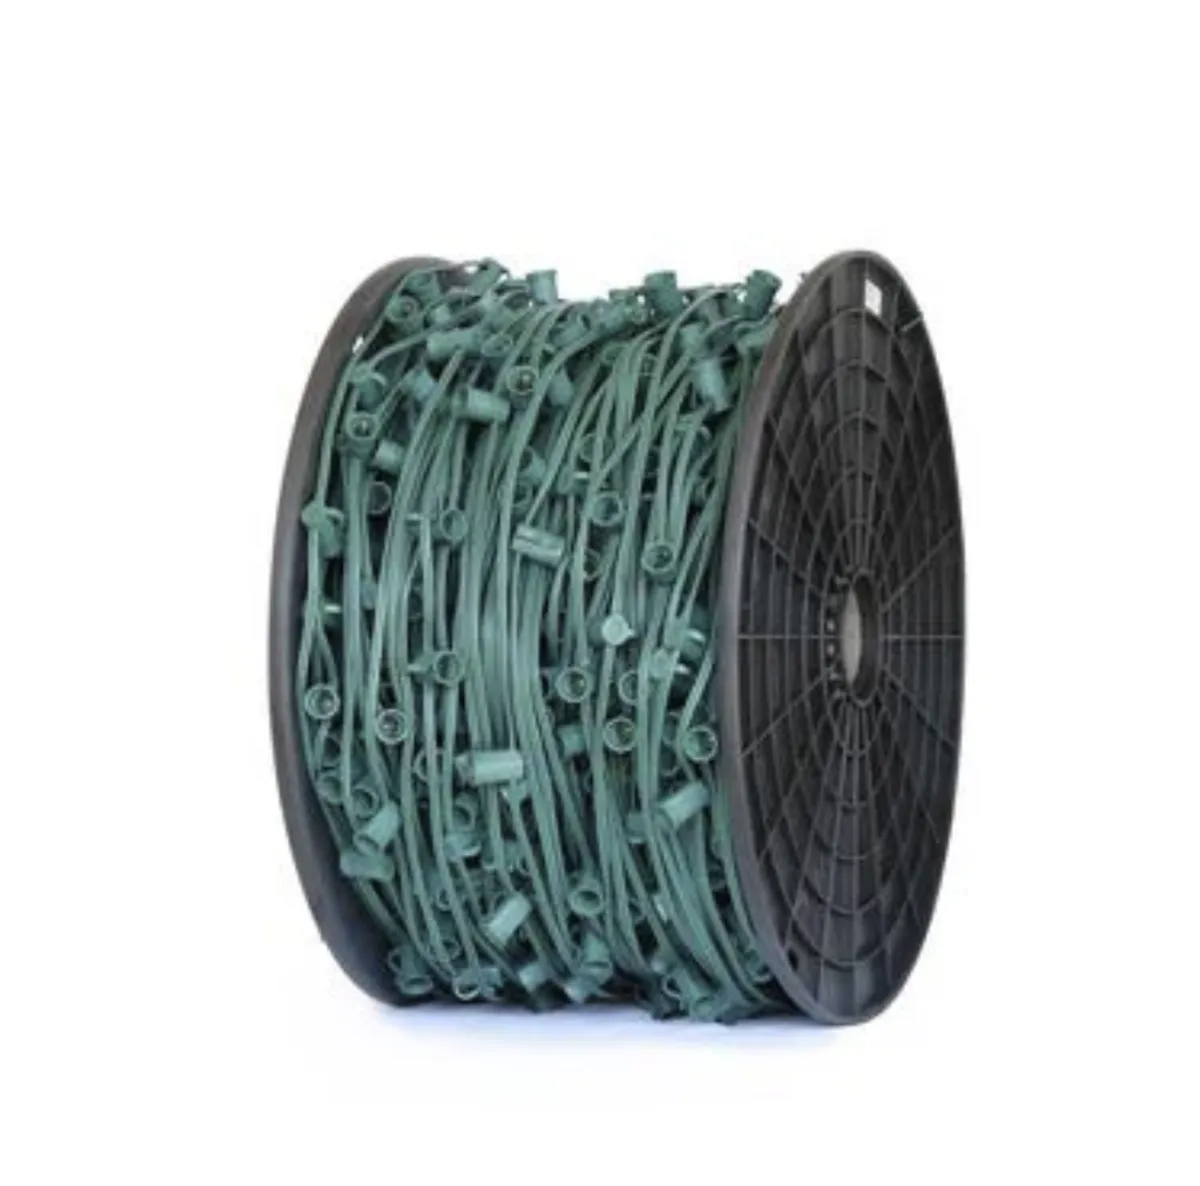
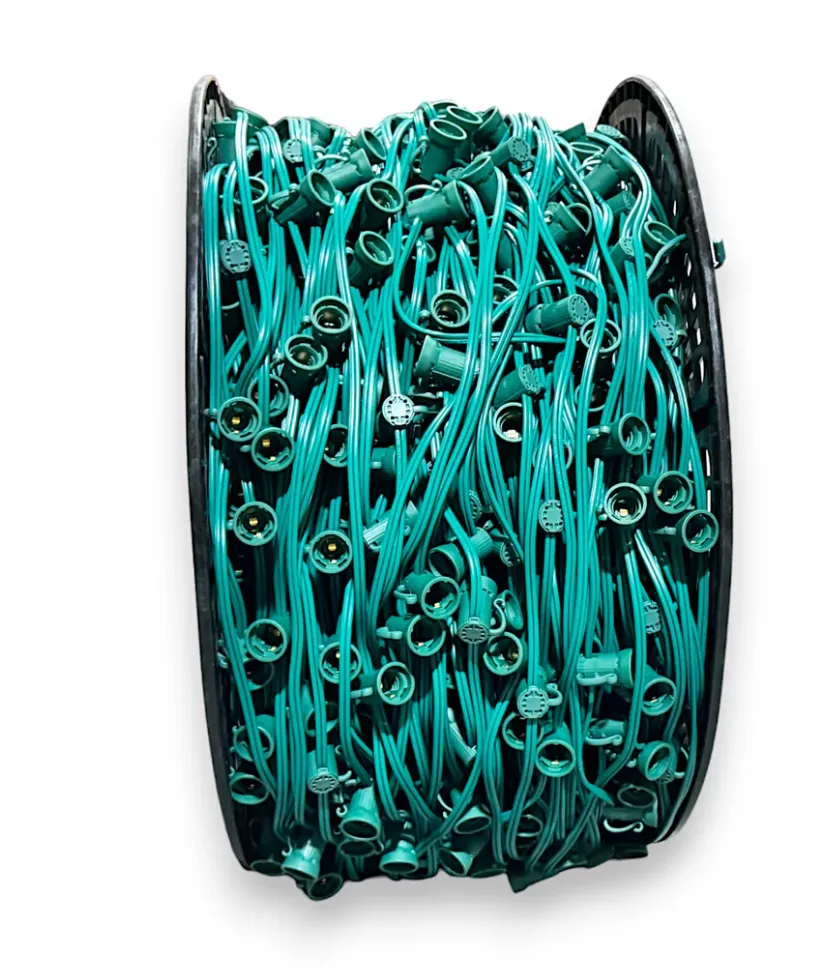
C7 1000' Green Wire Socket Spool (SPT-2)
Our 1000' bulk spool of green SPT-2 wire features 15" spacing with 1000 C7 sockets, ideal for commercial and residential outdoor displays. This 8-amp (960-watt) commercial-grade wire with Admiral Brand sockets allows for custom-length installations using snap-on plugs (sold separately). Suitable for indoor/outdoor use, it accommodates up to 160 sockets with 5-watt incandescent bulbs or 384 sockets with 1-watt LED bulbs per run. This versatile, durable C7 light line is perfect for creating professional-quality lighting displays in various settings.
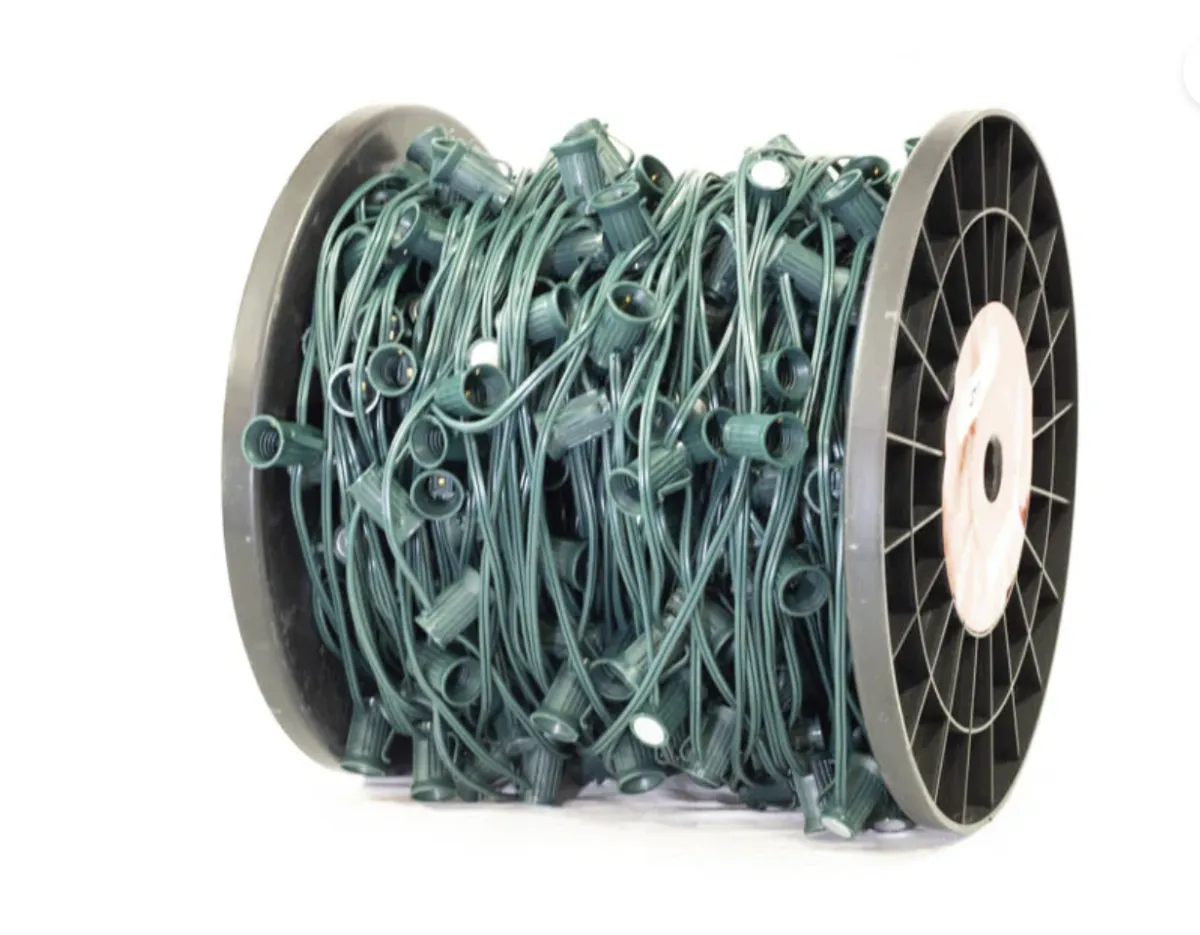
C7 1000' Socket Spool
Our C7 1000' Bulk Spool of Socket Wire offers professional-grade flexibility for custom lighting projects. Available in green or white, with spacing options from 12" to 36", it's ideal for both residential rooflines (12-15" spacing) and tree installations (24-36" spacing). The durable SPT-1 wire withstands outdoor conditions and is compatible with both incandescent and LED C7 bulbs. This customizable spool allows for precise length cutting, minimizing waste and maximizing efficiency for high-quality, adaptable lighting displays in various settings.
C7 1000' Socket Spool
Minleons C7 1000' socket wire spools with options for factory Socket clips
or without factory Socket Clips. Available in 12" or 15" spacing.
C9/C7 500' Magnetic Spool
The Fastest Way to Install Holiday Lights on Metal Surfaces. Save time and effort this holiday season with Magnetic Spools. Designed for quick and easy installation, these magnetic spools are perfect for decorating your home or office building. The magnetic sockets eliminate the need for traditional mounting clips, making your installations faster and more efficient. Whether you’re lining rooflines, gutters, or fences, these spools are ideal for any surface where ferrous metal is present.
Available in 500' & 250', 12" or 15" Spacing.
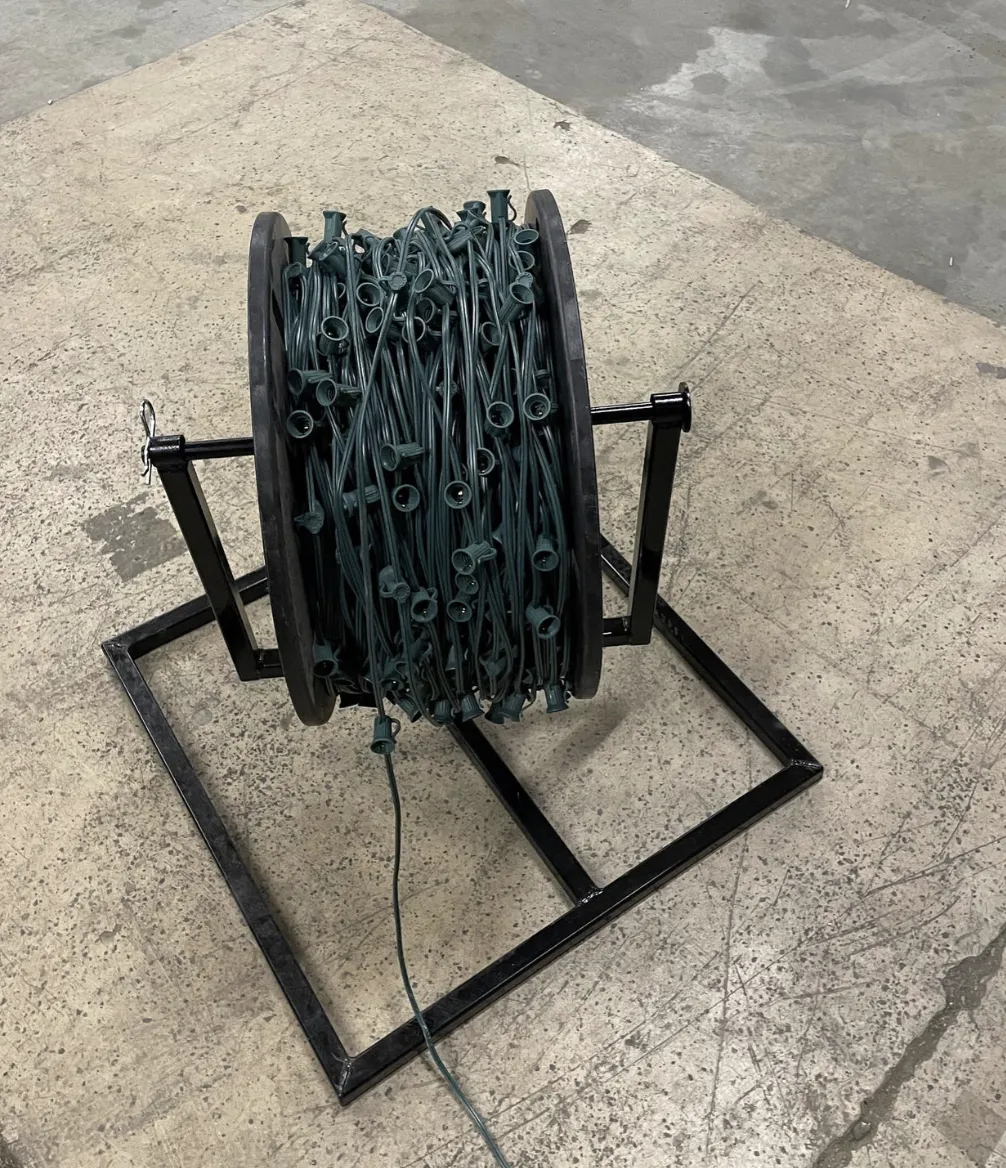
C9/C7 Heavy Duty Swivel Spool Holder
Versatile Wire Spool Holder:
• Compatible with C7 and C9 spools
• 360-degree swivel capability
• Foldable design for compact storage
• Dimensions: 24" x 24" x 20"
Note: Socket wire sold separately.
Socket Wire Stringers
C9 12" Spacing Socket Wire Stringers
Our 25', 50' or 100' Holiday Light String features professional-grade, UV-protected 18-gauge wire with sockets spaced 12" apart. Designed for both indoor and outdoor use, these UL-recognized strings offer 5 Amp capacity SPT-1 insulation and durable sockets with weep holes for all-weather performance. Compatible with E12 Candelabra base bulbs (C7, C9, G30; sold separately), these versatile strings allow end-to-end connectivity for extended displays. Perfect for holiday decorations, event lighting, and year-round use in residential and commercial settings. Available in Green, White, Brown and Black.
C7 12" Spacing Socket Wire Stringers
Our professional-grade 25', 50' or 100' light string features sockets spaced 12" apart, perfect for commercial and residential decorators. Designed for both indoor and outdoor use, it's compatible with incandescent or LED C7, G30, and G40 bulbs (sold separately). The SPT-1 insulated wire offers 5 Amp capacity and includes weep-hole sockets for all-weather performance. With male and female plugs for end-to-end connections, these UL-recognized strings can handle up to 480 watts per run. Ideal for holiday displays, patio lighting, and year-round events, these durable strings ensure long-lasting, brilliant illumination for any occasion. Available in Green, White, Brown and Black.
Frequently Asked Questions
What's the difference between socket wire spools and stringers?
cket wire spools are bulk reels of wire with sockets at regular intervals, allowing for custom-length cuts. Stringers are pre-cut lengths of socket wire, typically with plugs attached, ready for immediate use.
Can I use the same socket wire for both C7 and C9 bulbs?
No, C7 and C9 bulbs require different socket sizes. Always check the product specifications to ensure you're using the correct socket wire for your chosen bulb type.
How do I determine the right spacing for my project?
Common spacings are 12", 15", and 24". Use closer spacing (12"-15") for dense, vibrant displays on rooflines or fences. Wider spacing (24" or more) works well for tree wrapping or creating a more subtle effect.
Are these socket wires suitable for outdoor use?
Most of our socket wires are rated for both indoor and outdoor use. Look for products labeled as "weatherproof" or "outdoor-rated" for the best durability in external conditions.
How many bulbs can I safely connect on a single run?
This depends on the wire's amperage rating and the wattage of your bulbs. For example, on an 8-amp wire, you can typically run up to 160 sockets with 5-watt incandescent bulbs or 384 sockets with 1-watt LED bulbs. Always check the product specifications and local electrical codes for safe operation.
Discover Expert Tips on Our Blog
Pro Christmas Light Removal: No Ladders Needed
The holidays are over, the joy has been had, and now only one task remains: taking down the Christmas lights. For most, this means a frustrating afternoon on a wobbly ladder, battling a hopelessly knotted nest of wires. It’s the annual chore that sours the end of the season.
But for professionals, it’s just another Tuesday. They can clear an entire house in as little as 15 minutes, and they do it without the stress, mess, or danger. The difference isn't magic; it's a complete system that separates amateurs from the pros. These aren't just "tips"—this is the methodology that makes them fast, safe, and profitable. Here’s how you can adopt their system.

1. The Takedown-First Mindset: Install for Easy Removal
The single biggest secret to a fast takedown begins before you hang the first bulb. Professionals operate with a takedown-first mindset, meaning the entire installation is planned for effortless removal. Amateurs think about how to get the lights up; pros think about how to get them down.
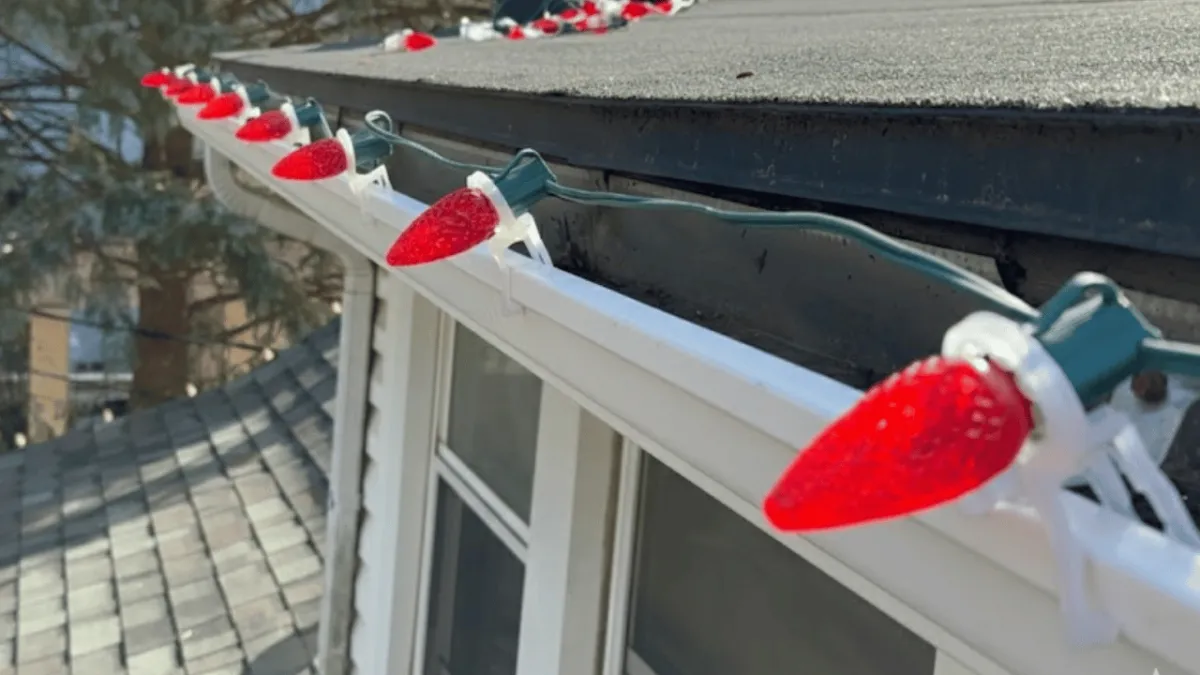
The number one amateur mistake is tightly zip-tying light strings directly to gutters. Every zip tie you add is one you’ll have to hunt down and snip from the top of a ladder. Professionals never do this. Instead of creating a problem, they use a brilliantly simple solution: take a clip and just shove it in behind the gutter. The tension holds it all season, but a gentle tug with a pole makes it fall right out. No climbing, no cutting.
...this is why it's so important that as we install to put up that we take down...
2. The Pro's Primary Tool: Ditch the Ladder for a Pole
Falls from ladders are a serious, costly risk, and for this job, they are almost entirely avoidable. The professional’s primary tool for a swift and safe takedown is not a ladder, but a long extension pole with a simple hook on the end.
This isn’t a specialized piece of equipment. A standard painter's pole (like a "Mr. Long Arm") with a paint roller hook attached is all you need. For higher jobs, a stiffer carbon fiber pole is even better. Using this tool, pros can lift lights from clips and even remove wreaths from as high as 24 feet, all while keeping both feet planted safely on the ground. You simply hook the wire, lift it off its anchor, and guide it down.
3. The Tangle-Free System: A Pro's Guide to Storage
A fast takedown is useless if you create a tangled nightmare for next year. Pros use a methodical system to ensure that when the lights come out of storage, they are perfectly organized and ready to be installed with zero guesswork.
Start in Reverse. The system is simple: take the lights down in the opposite order you put them up. If you started installing on the far right side of the house (when viewed from the street), you begin your takedown on the far left. This way, next year you can grab the first bundle and start on the far right, with every subsequent strand in perfect order.
Create the "Zip Tie Code". This is the organizational trick that makes the system foolproof. Think of it as a coordinate system for your house. Assign a color to each major section—for example, "red zip tie right." You can use pinks or any other color for the left side, front porch, etc. Then, use the number of zip ties to denote the level: one zip tie for the first floor, two for the second. A strand with two red zip ties instantly tells anyone on the crew, "Right side, Second floor." No photos or diagrams are needed.
The Arm's-Length Wrap. To prevent tangles, hold the strand and reach out as far as your arm can go, then bring the wire back to your hand to create a large loop. Repeat this, creating a neat, long bundle. When you reach the end, take the last couple of feet of wire and wrap it tightly around the bundle to secure it. For a final pro touch, tuck the male plug under one of the wraps. That way, you know exactly where the end is next year. This bundle will unspool perfectly, without a single knot.
A Quick Word of Caution from the Pros
While the pole method works for over 90% of the job, there's one critical exception: ridge clips on the peak of your roof. If your lights are attached with clips that go over the very top shingle (the ridge cap), a ladder is required.
Under no circumstances should you yank these with a pole from the ground. Pulling too hard will rip the entire ridge cap off your roof, causing expensive and significant damage. These specific clips must be removed carefully by hand.
Conclusion: Reclaim Your Post-Holiday Sanity
Taking down Christmas lights doesn't have to be your most dreaded annual chore. By adopting a professional system—installing for easy removal, using a pole instead of a ladder, and following a foolproof storage method—you can transform this task into a quick, safe job that takes as little as 15 minutes. A little foresight is all it takes to end the season on a calm and organized note.
Now that you have a professional system for takedown, what other holiday traditions could be simplified with a little more planning?

Why Should You Avoid Ladders for Christmas Light Takedowns?
To significantly reduce the risk of falling from ladders or roofs.
Using a ladder for takedown introduces unnecessary danger. Industry experts have observed several installers falling, which can lead to serious injury. By adopting a ground-based method using an extension pole, you can complete the job safely and efficiently.
What Tools Do You Need for a No-Ladder Takedown?
You primarily need an extension pole with a simple hook attachment for removal and colored zip ties for organization.
Extension Pole: This is the core tool for reaching high areas. Standard poles like "Mr. Long Arm" are sufficient for many jobs, but "carbon fiber" or "waterfed" poles perform much better for higher installations, such as those at 24 feet.
Hook Attachment: A simple hook is used to grab wreaths and pull down light strands. A dedicated tool is not required; a standard "paint roller" attachment works perfectly for this task.
Colored Zip Ties: These are used for organizing light strands during takedown, not for installation. A color-coding system helps identify where each strand belongs for the next season (e.g., red zip ties for the right side of the house).
How Do You Remove High Wreaths Without a Ladder?
Use an extension pole and hook to lift the wreath up and off its hanger, then carefully lower it to the ground.
The success of this method is determined during installation. By hanging the wreath with a simple, loose loop rather than wrapping it tightly around an anchor, you enable a fast, ladder-free removal.
Extend the pole and position the hook to securely grab a sturdy part of the wreath.
Lift the wreath straight up to unhook it from its hanger.
Lower the wreath slowly. It is critical to keep the pole as straight as possible during descent. Allowing the pole to bend sideways, especially when fully extended, can cause it to snap.
What is the Professional Method for Taking Down Light Strands?
Start removal from the opposite side of where the installation began, using a pole and hook to systematically pull lights down from their clips.
- Where Do You Start the Takedown Process?
Begin the takedown from the opposite side of where the installation started.
This simple rule creates a repeatable and efficient system. For example, if your installation process starts on the far right side of the house (when viewed from the street), your takedown process should begin on the far left side. This ensures the lights come down in the correct order for storage and re-installation.
- How Do You Use the Pole to Remove the Lights?
This is where a key installation decision pays off: by not securing the main line with zip ties, you enable a rapid, pole-based removal. Use the hook attachment on the extension pole to grab the light strand and pull it down and away from the gutters and clips.
This technique is effective because the main line is attached with simple clips rather than zip-tied to the gutters. This allows it to be pulled down easily without needing to climb a ladder to cut ties. Once a section is started, the rest of the line will often come down with a gentle pull.
When is a Ladder Still Necessary?
A ladder is only required when removing lights attached with "ridge clips" on the peak of a roof.
Attempting to pull lights from ridge clips with a pole is extremely risky. The force required can pull the entire ridge cap off the roof, causing significant damage. For this specific task, using a ladder is the only safe and correct method, reinforcing the need to plan your installation and takedown strategy together.

How Should You Organize Lights for Next Season?
Use a system of colored zip ties to label each strand by location and wrap them in large, tangle-free bundles.
- The Zip-Tie Labeling System
This system is designed for delegation and scalability. By creating a simple, logical code, you ensure that any crew member—even a new hire—can correctly identify and place each light strand next season without direct supervision, freeing up the business owner to manage other jobs.
The system uses color to denote the side of the house and the quantity of zip ties to denote the floor level. While the examples below use a red/blue system, you can use any consistent color scheme (e.g., pinks, greens) that works for your team.
Code Element
Meaning
Example
Color
Indicates the side of the house (viewed from the street).
Red = Right Side <br> Blue = Left Side
Quantity
Indicates the vertical level.
1 Zip Tie = First Floor <br> 2 Zip Ties = Second Floor
- The Tangle-Free Wrapping Method
This bundling technique ensures that lights can be quickly deployed next season without frustrating tangles.
As the lights come down, take the strand and create a large loop by reaching out as far as you can (e.g., 6 feet).
Continue creating these large, uniform loops along the entire length of the strand.
Once the entire strand is looped, take the final few feet of the light strand (the female plug end) and wrap it tightly around the bundle several times to secure it.
This method ensures the lights will "come right undone" when you unwrap them for the next installation.
Ready to turn seasonal takedowns into a profitable winter business? Learn the complete install-to-takedown system in our Christmas lights training.
Copyright ©2026 All Right Reserved website designed by christmaslights.io
Terms of Service / Privacy Policy
Have questions or need assistance?
Contact us at (855)619-LITE