Secure your Christmas lights effortlessly with our selection of professional grade clips
Secure Your Shine: Professional-Grade Christmas Light Clips for Every Surface
Click on any category below to jump directly to that section
Sturdy clips designed specifically for larger C9 bulbs. Perfect for rooflines and creating bold, visible displays.
Versatile clips tailored for medium-sized C7 bulbs. Ideal for various applications, from windows to outdoor structures.
Christmas Light Clips: Innovative clips with strong magnets for easy, damage-free installation on metal surfaces like gutters and downspouts.
Specialized clips for secure attachment along roof ridges and peaks, ensuring a perfectly straight light line on difficult angles.
Convenient pre-spaced clip strips for quick and uniform installation of light strings, saving time and effort.
Unique clips designed for specific surfaces or applications, such as brick, stucco, or wrapping lights around columns.
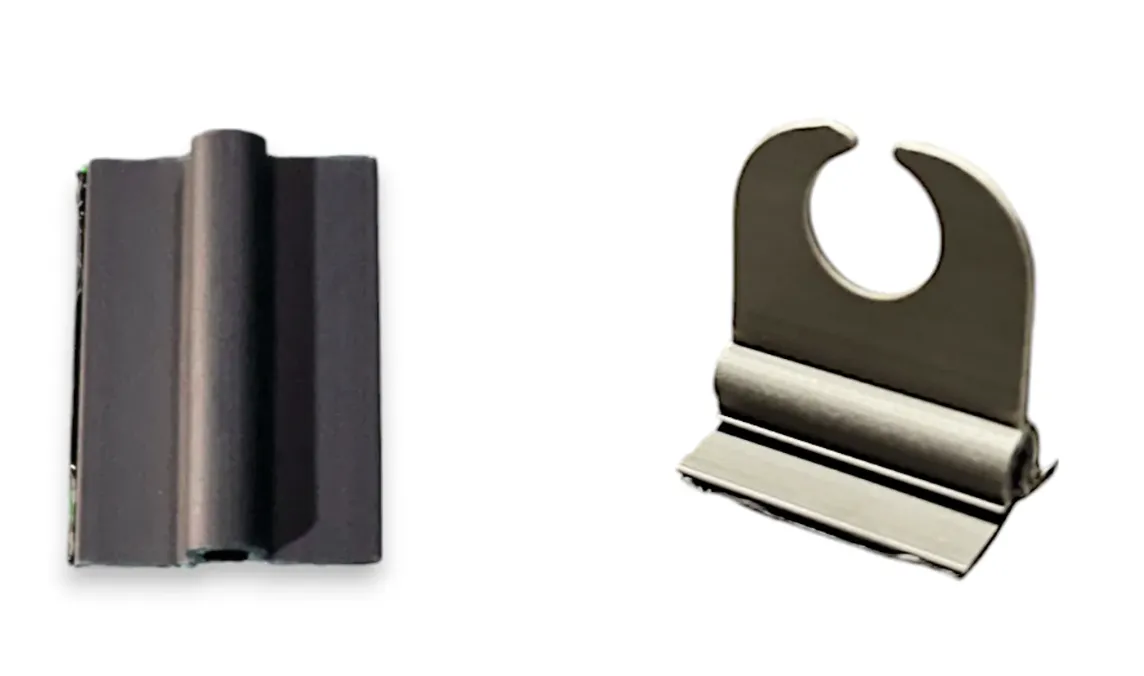
C9 Christmas Light Clips
C9 Flex Clip
These flexible circle clips for C9 bulbs and sockets ensure your Christmas lights stay securely in place, offering easy installation by inserting the bulb through the clip before screwing into the socket.

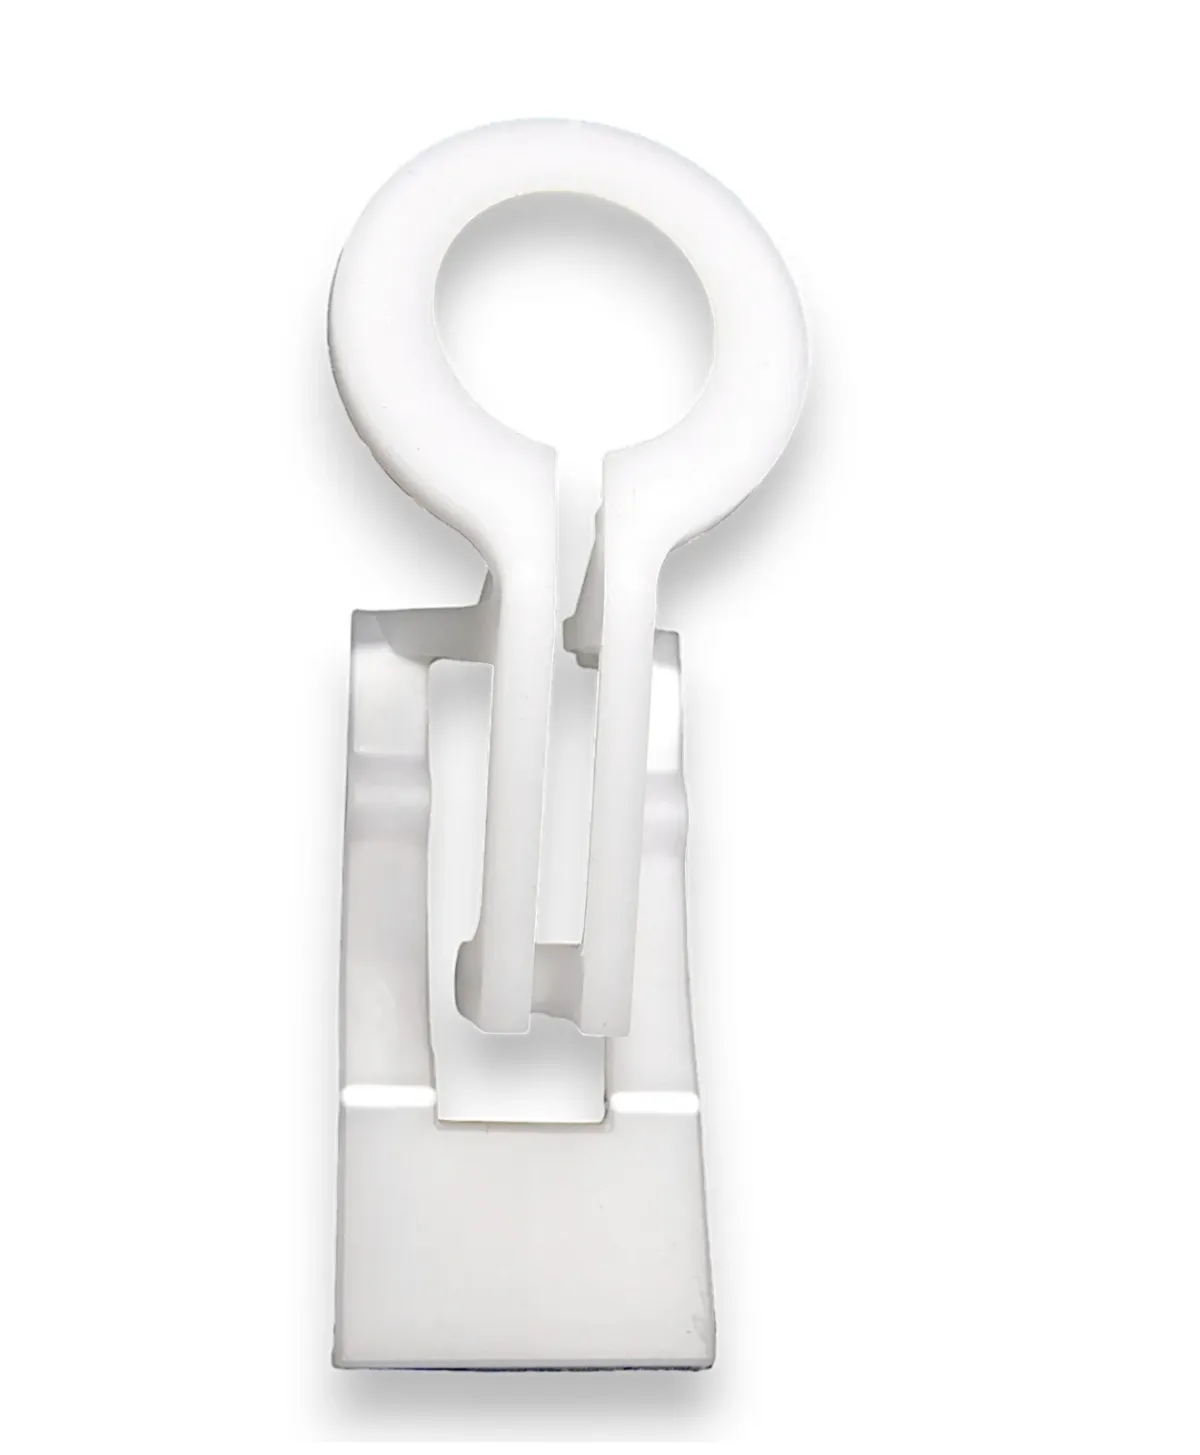
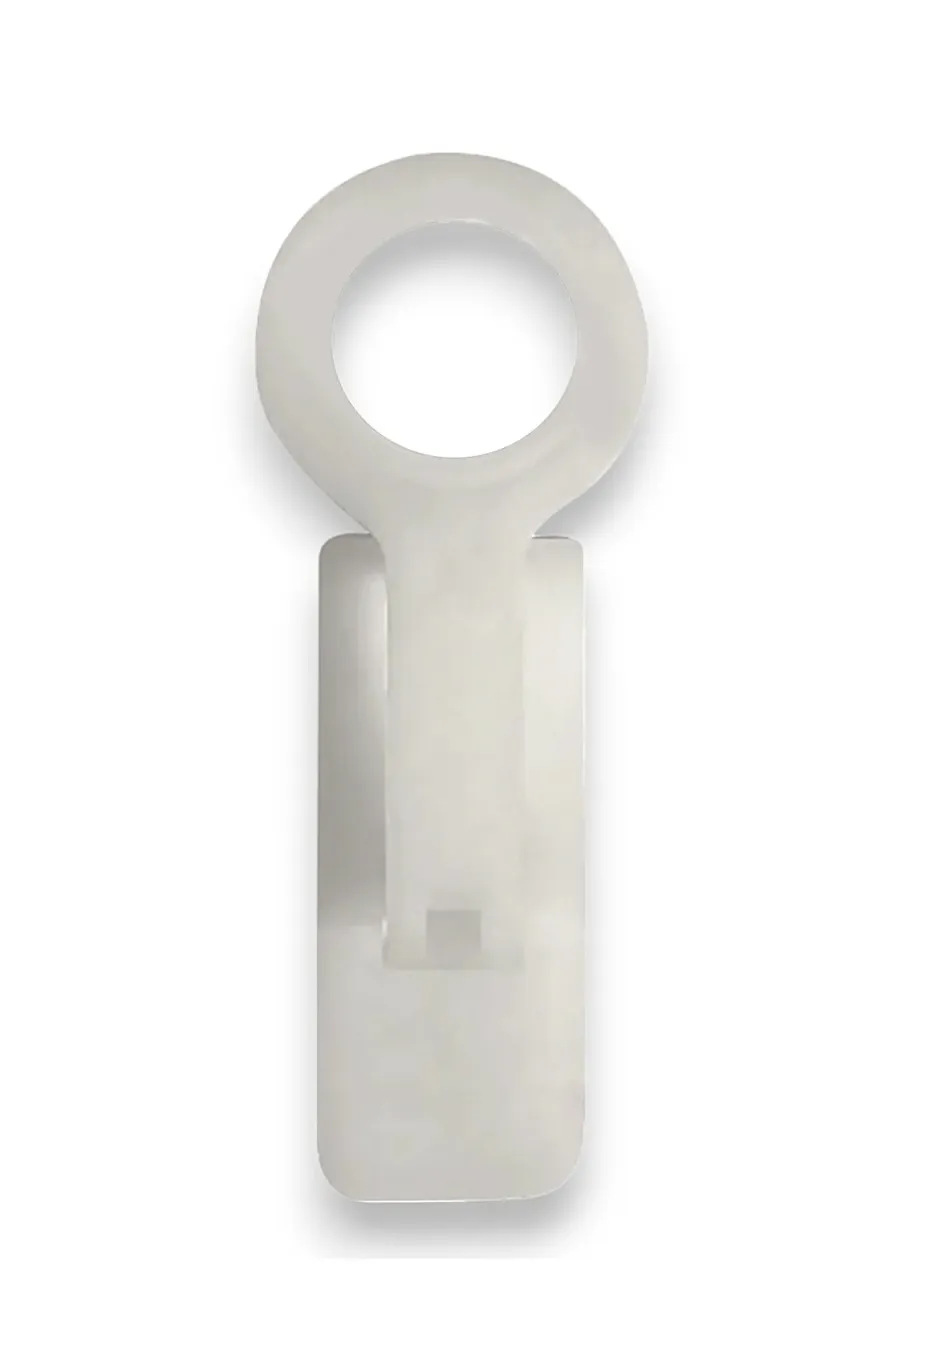
C9 White Best Wedge Clip
These white circle clips for C9 bulbs and sockets ensure your Christmas lights stay securely in place, offering easy installation by inserting the bulb through the clip before screwing into the socket.
C9 Wedge Clip
The C9 Wedge Clips, a top choice for professional installers, offer versatile installation options and a secure "sandwich style" design, reducing seasonal install and removal time by 50% for C9 light lines.
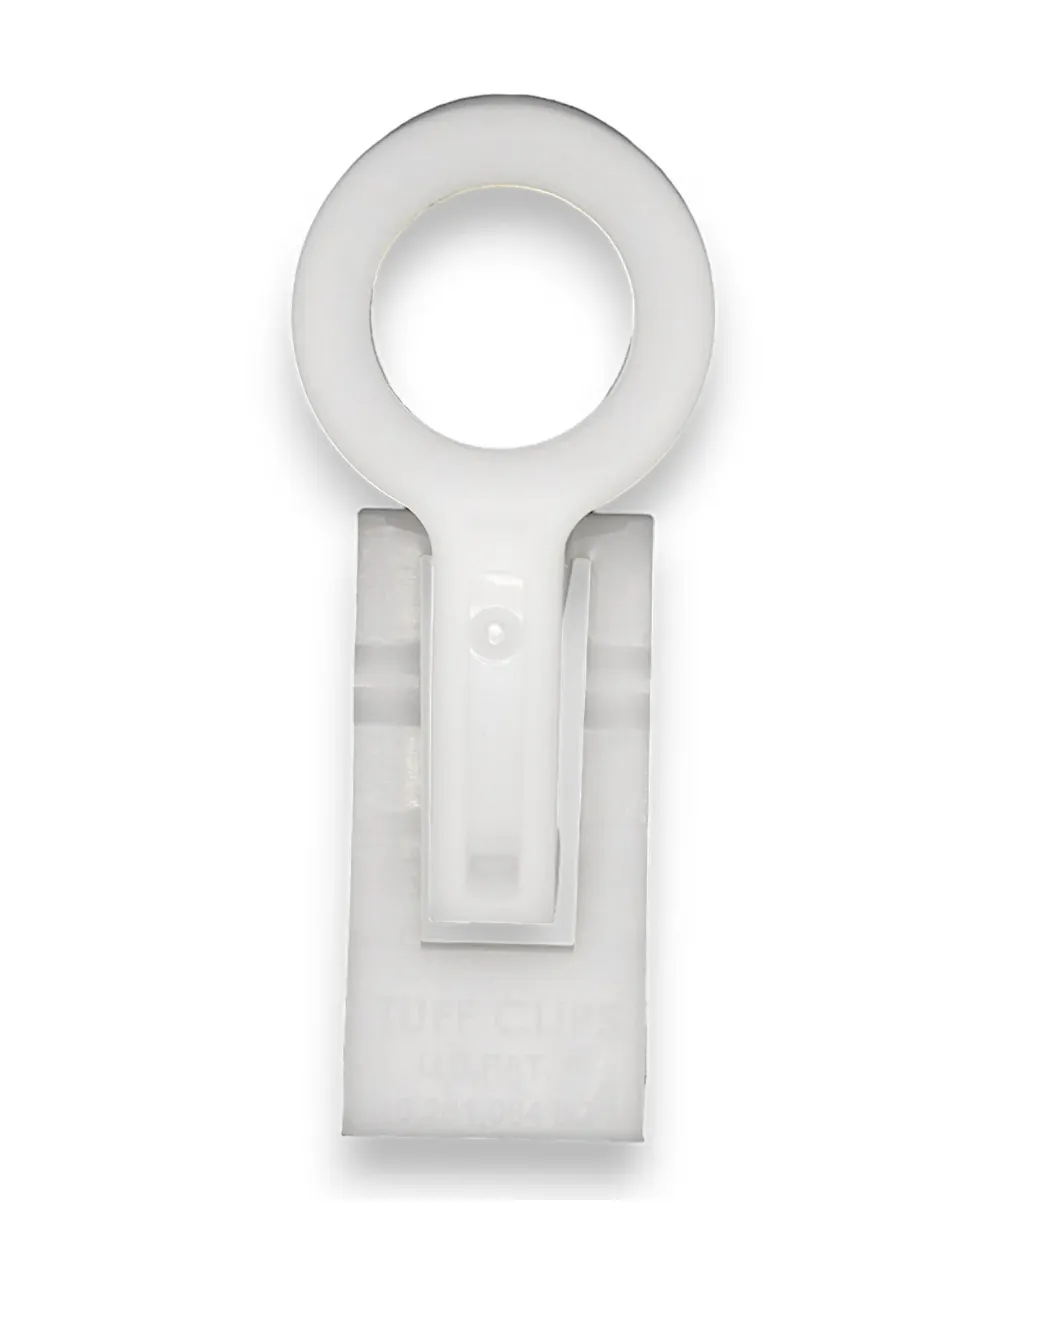
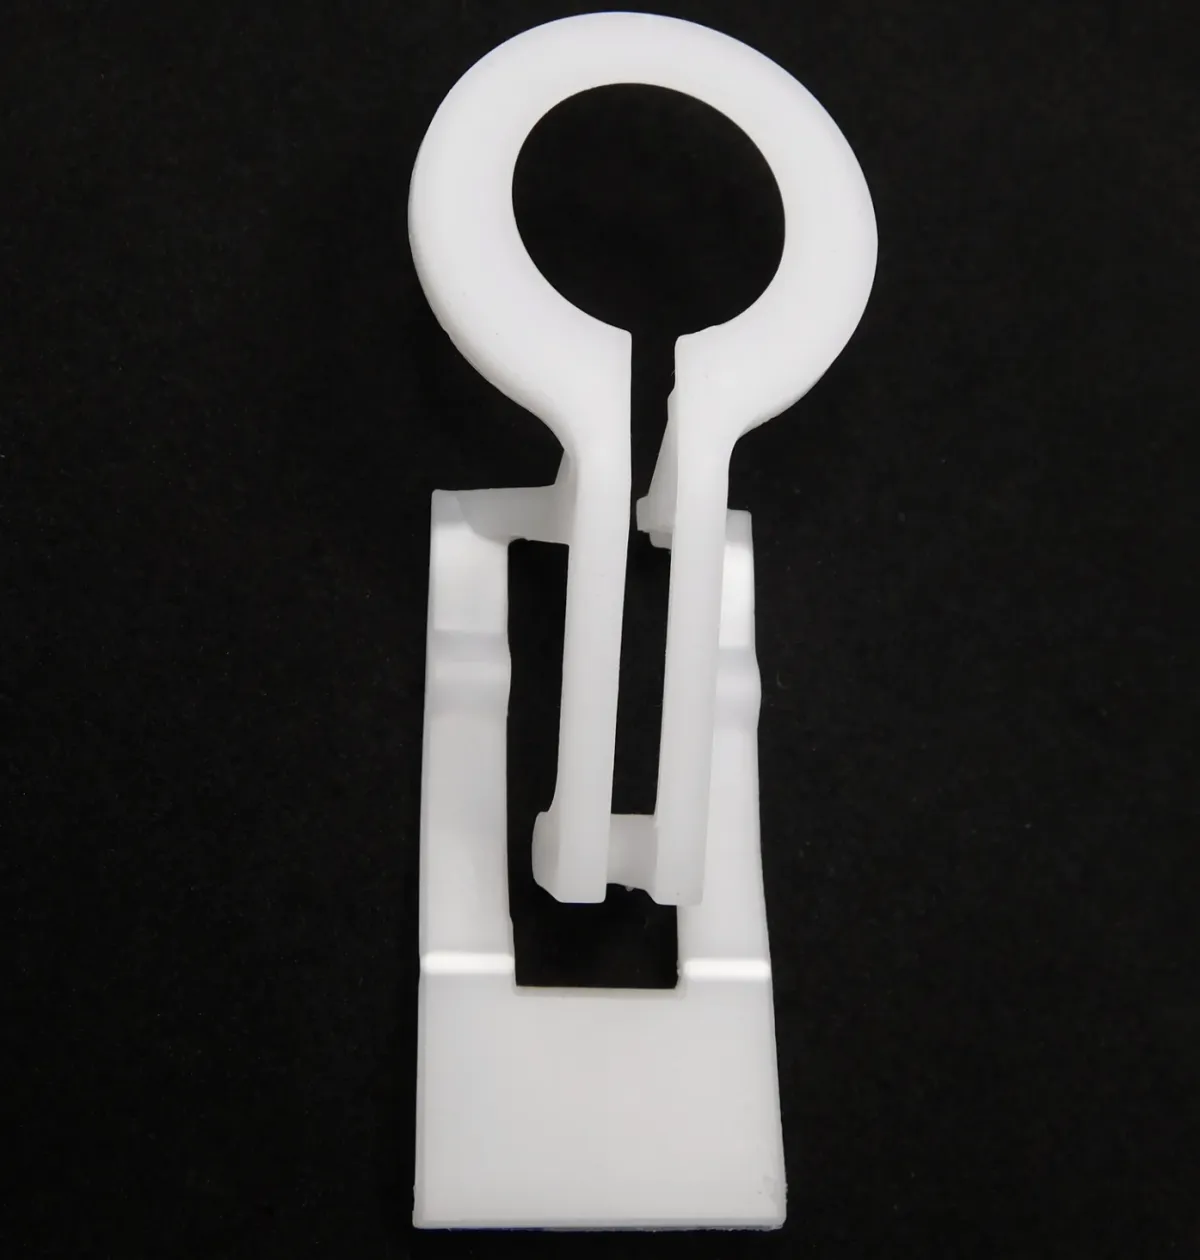
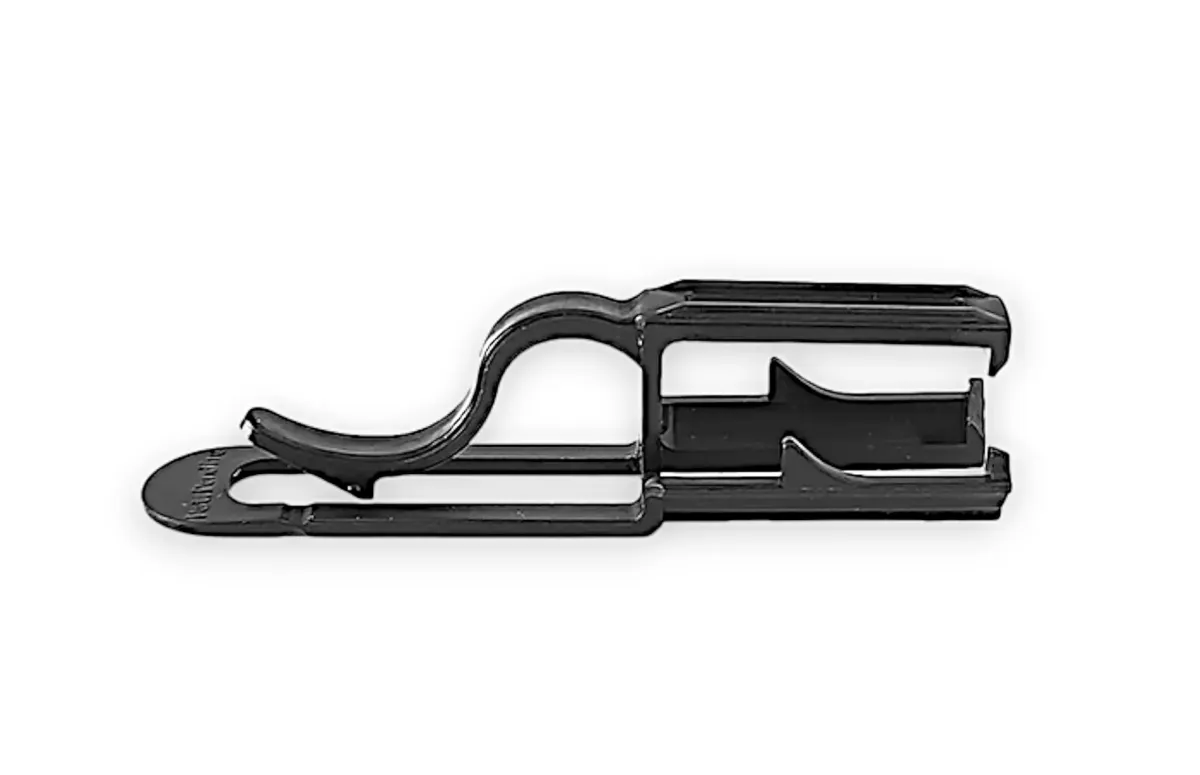
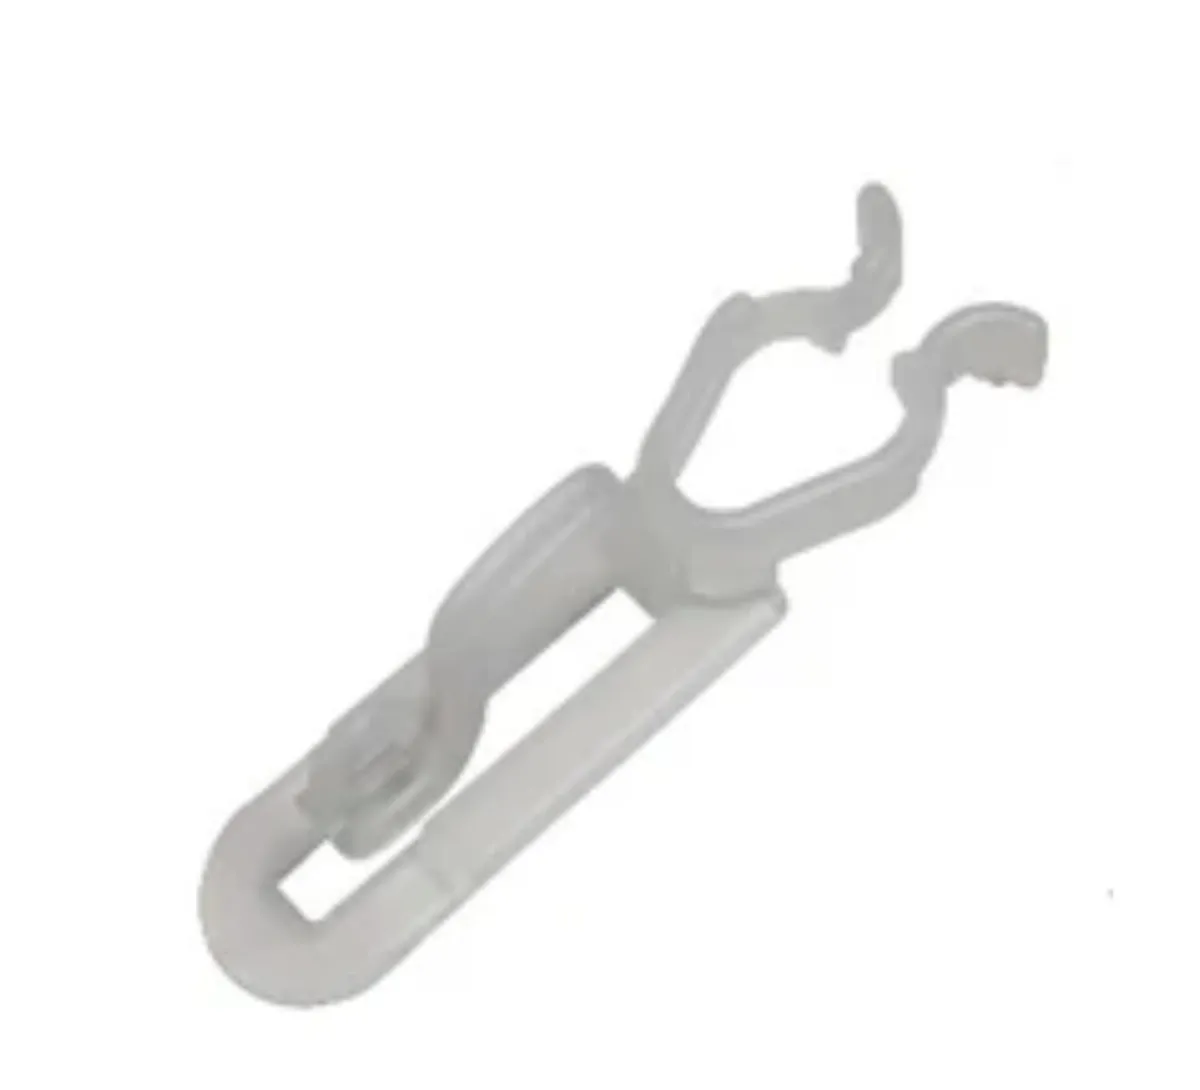
C9 Tuff Clip
The C9 Wedge Clips, a top choice for professional installers, offer versatile installation options and a secure "sandwich style" design, reducing seasonal install and removal time by 50% for C9 light lines.
C7 Christmas Light Clips
C7 Flex Clip
These flexible circle clips for C7 bulbs and sockets ensure your Christmas lights stay securely in place, offering easy installation by inserting the bulb through the clip before screwing into the socket,
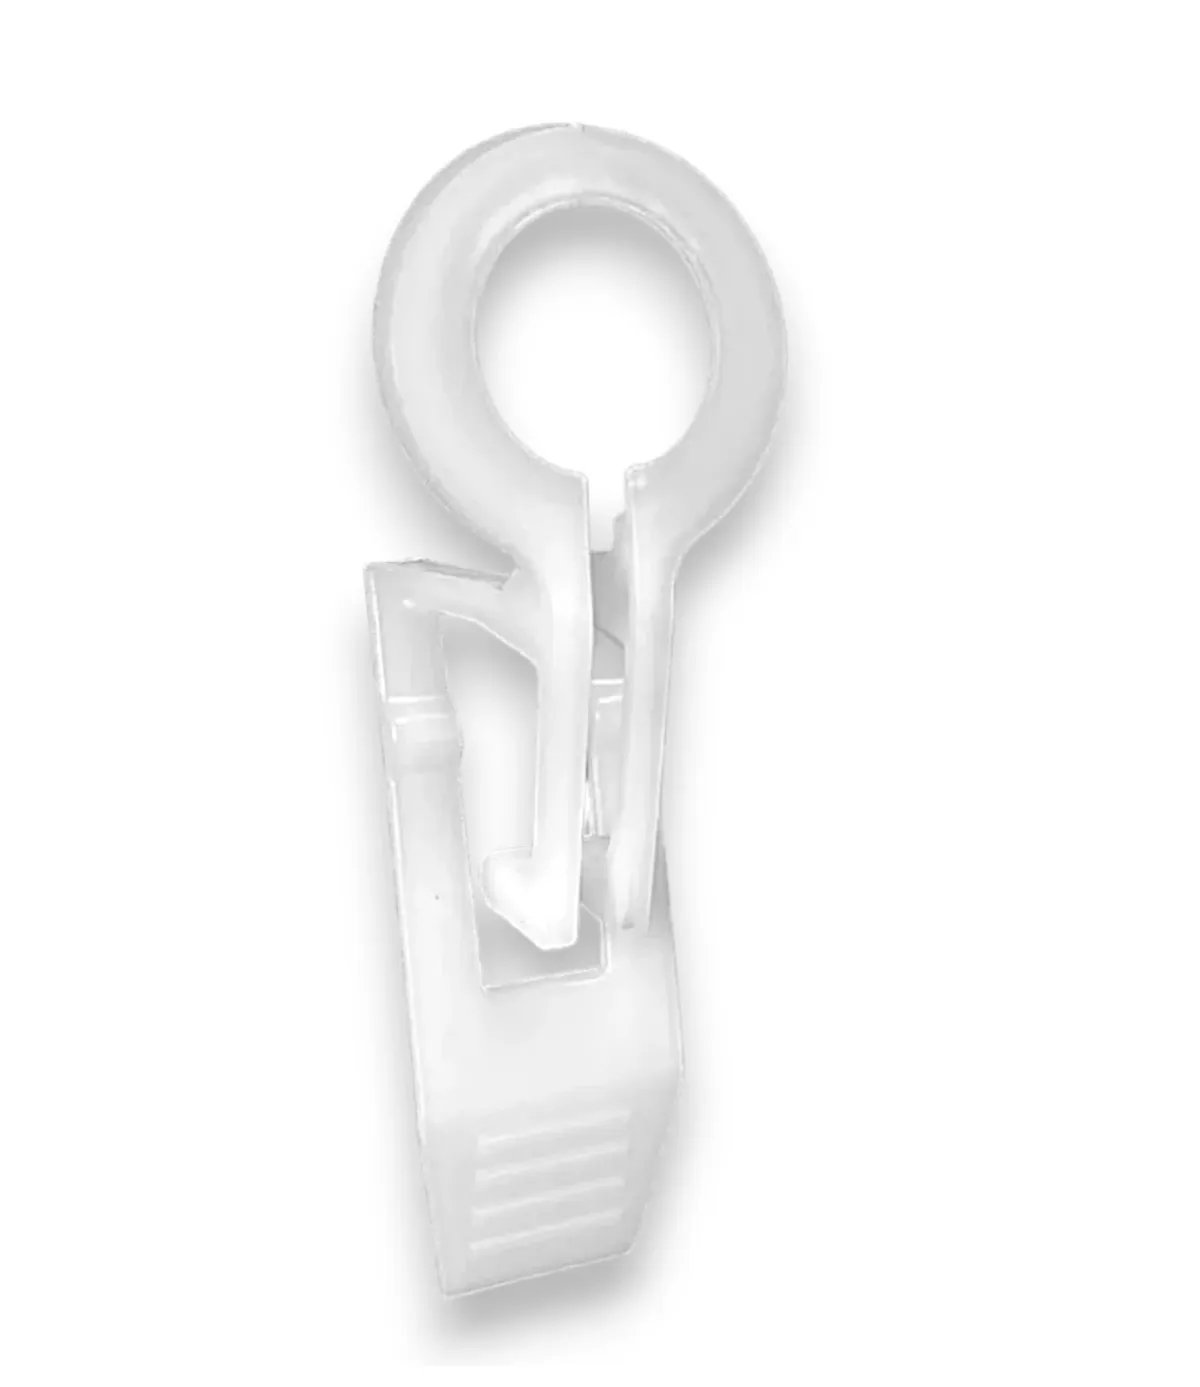
C7 White Best Wedge Clip
These white circle clips for C7 bulbs and sockets ensure your Christmas lights stay securely in place, offering easy installation by inserting the bulb through the clip before screwing into the socket.
Christmas LiteClip & Strips
Streamline your holiday light installation with our commercial-grade LiteClips. Available for both C9 and C7 bulbs, these versatile clips easily secure between the socket and bulb, allowing for downward, upward, or straight-out positioning. For a complete, safe, and secure setup, pair with our LiteClipStrip mounting system. These efficient tools ensure quick and professional-looking installations for homes and businesses alike. Available in White or Brown.
C7 White LiteClips with Strips
C7 Brown LiteClips with Strips
C9 White LiteClips with Strips
C9 Brown LiteClips with Strips
Speciality Christmas Lights Clips
Canny Systems
Pro Clip
This versatile clip offers horizontal mounting on shingles and vertical on gutters, featuring a sleek, low-profile design for minimal daytime visibility, a secure grip that keeps the clip attached during bulb removal, and ensures quick, effortless installation and takedown.
Canny Systems
Shingle V-Clip
This sleek clip securely holds bulbs vertically on shingles and horizontally on gutters, offering minimal daytime visibility, staying attached during bulb removal, and allowing for quick and easy installation and takedown.
Canny Systems
Pro Clip Plus
This versatile clip points lights outward on shingles and upward on gutters, featuring a sleek, low-visibility design, secure bulb/socket grip for easy removal, quick installation and takedown
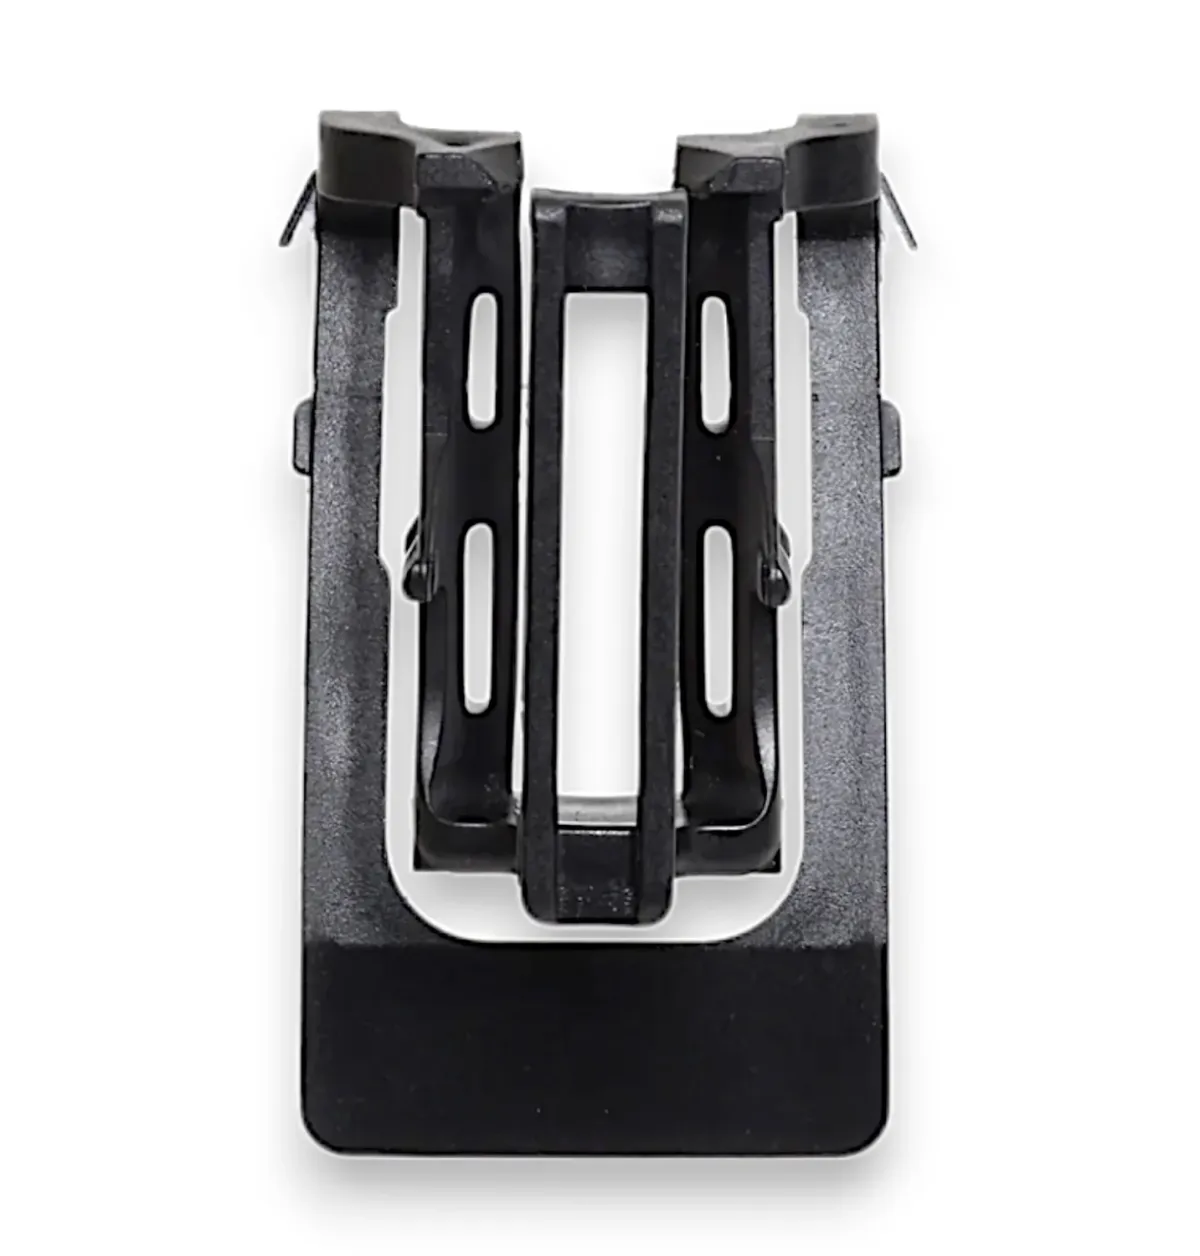
All-Purpose
Clip
The All-in-One Plus clip, favored by professional installers, accommodates C7, C9, C6, mini, and icicle lights, offering versatile horizontal gutter and vertical shingle mounting options, a tight grip for mini lights, layering capabilities for unique designs, and the ability to hang two light strings simultaneously, ensuring a perfect roof display.
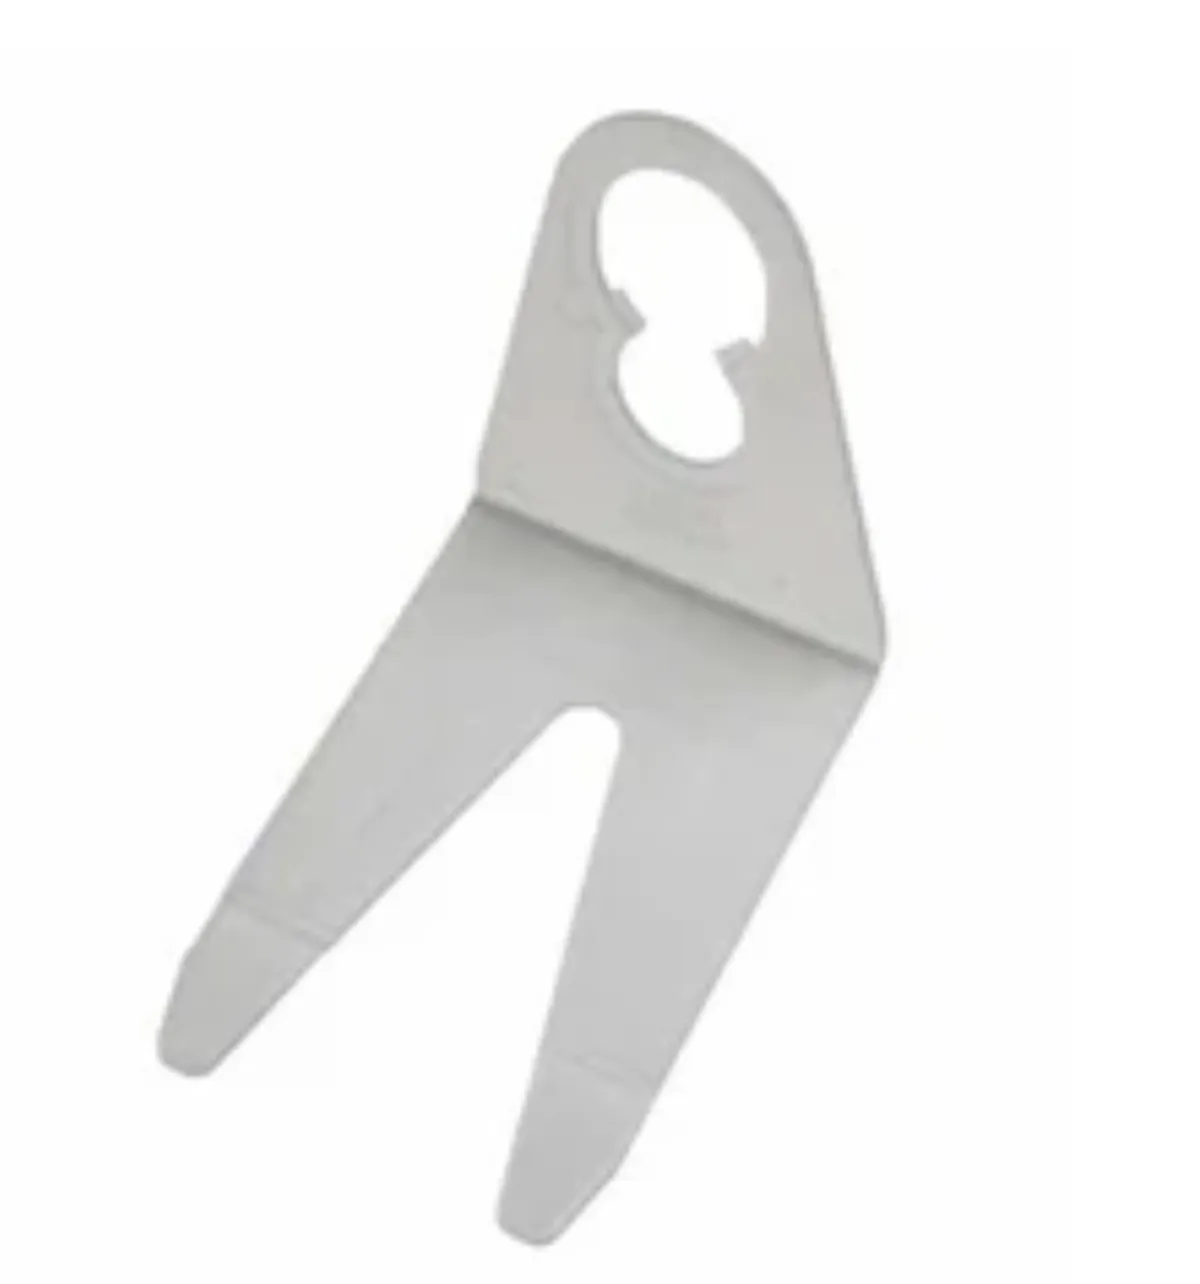
Best Tuff Shingle
Tab Clip
This durable plastic shingle tab, more robust than standard versions, securely holds both C7 and C9 sockets, easily slides under shingles, and versatilely attaches to gutters, decks, and flat surfaces (when paired with a parapet clip), making it the perfect Christmas light accessory for various installation needs.
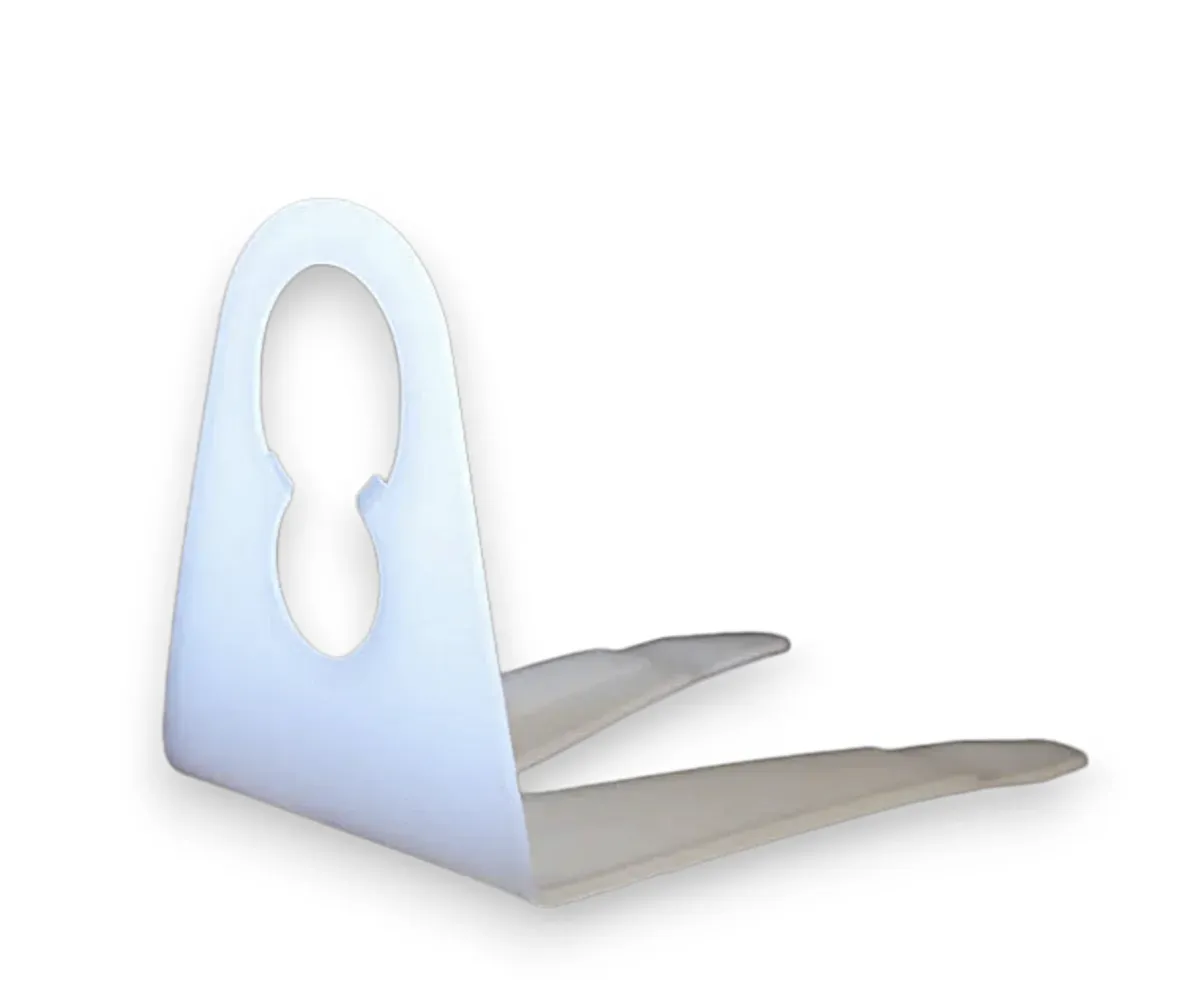
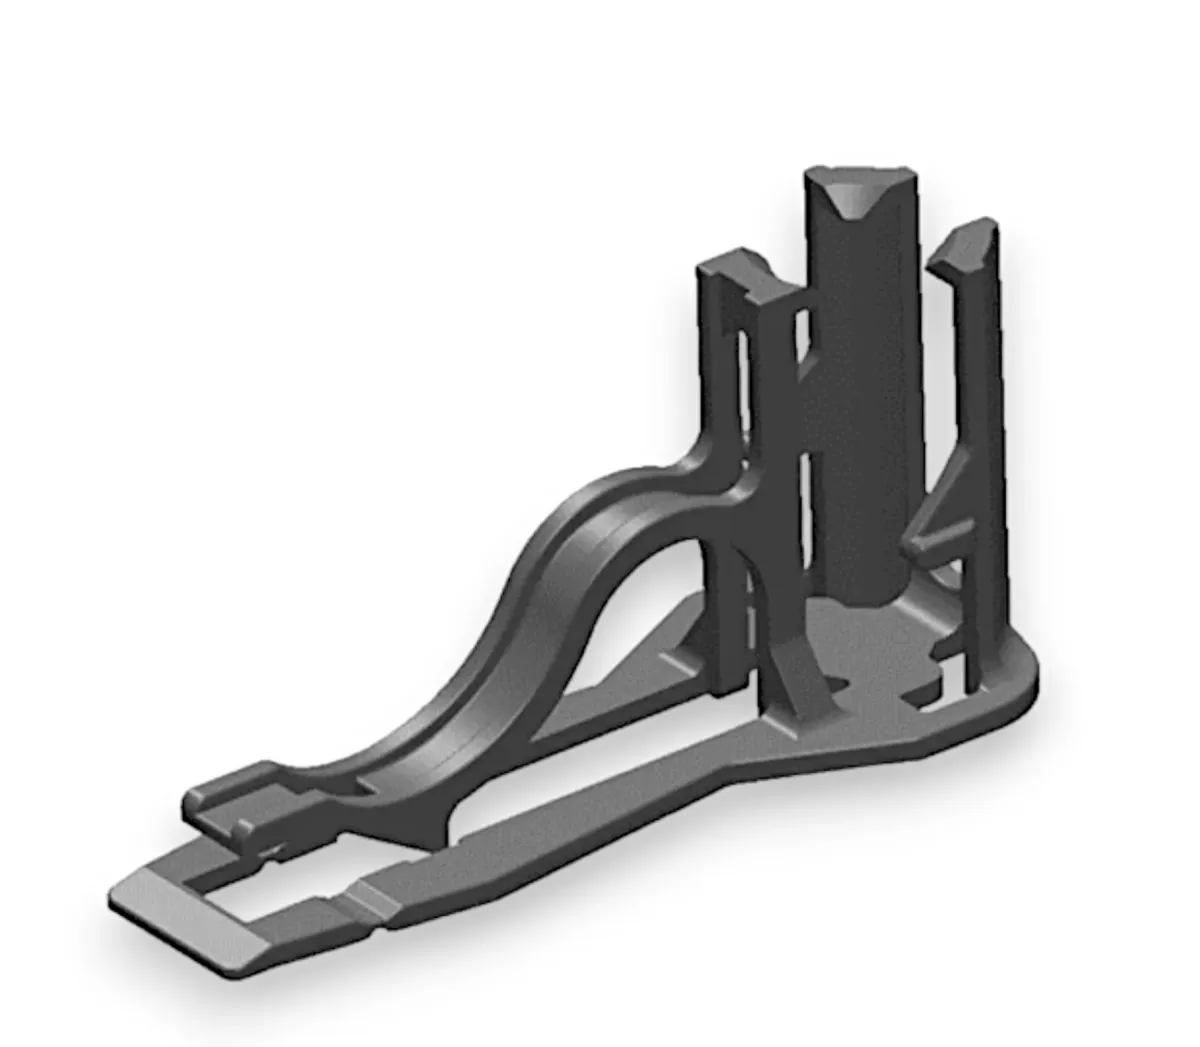
Tuff Tab
Clip
The durable Tuff Tabs, designed for C7 or C9 bulbs, feature Flex technology for easy installation over socketed bulbs, 360-degree rotation, outward-facing positioning on shingles or cedar shakes, two living hinges for secure hold, and weather-resistant construction for professional-grade Christmas light displays.
Christmas Light Ridge Clips

Canny Systems
Ridge Clip Pro
This patent-pending clip securely holds most bulb/socket sizes on asphalt shingles and ridge vents (10", 12") without damaging the roof or compromising shingle integrity, withstanding high winds while eliminating the need to "peel up" shingles during installation.
Magnetic Christmas Lights Clips
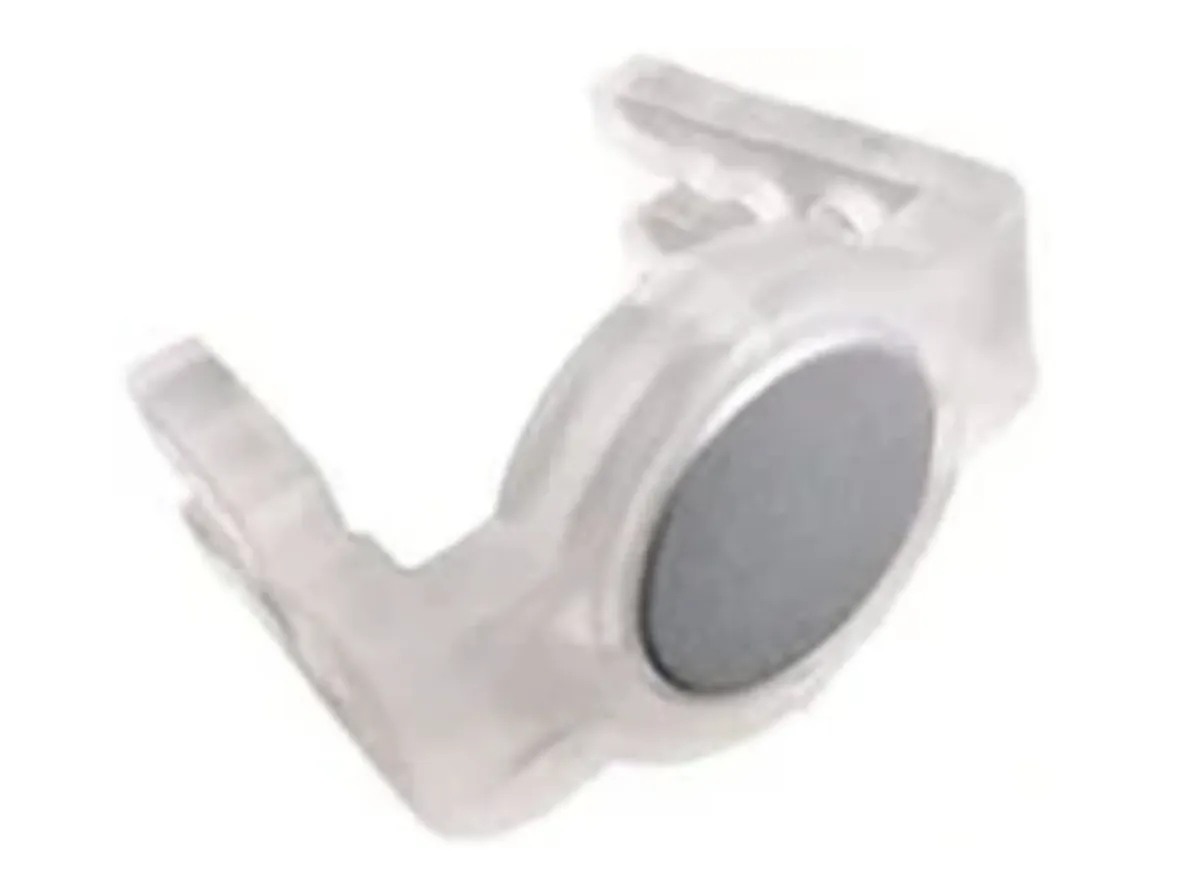
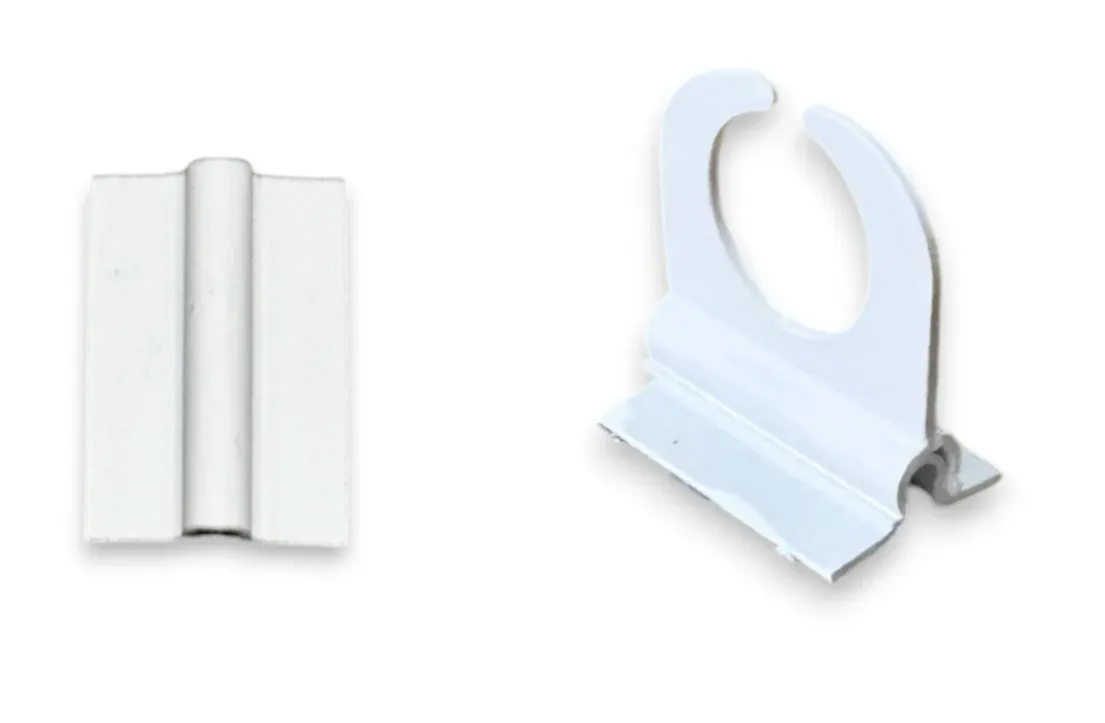
Magnet Clip for C7/C9
Socket Wire
The Magnetic Clip for C7 or C9 Sockets, designed exclusively for SPT-1 wire (not compatible with LED stringer sets), features a high-strength solid magnet that securely holds lights horizontally or vertically on metal surfaces (excluding aluminum), allowing for quick, reusable installations year after year.
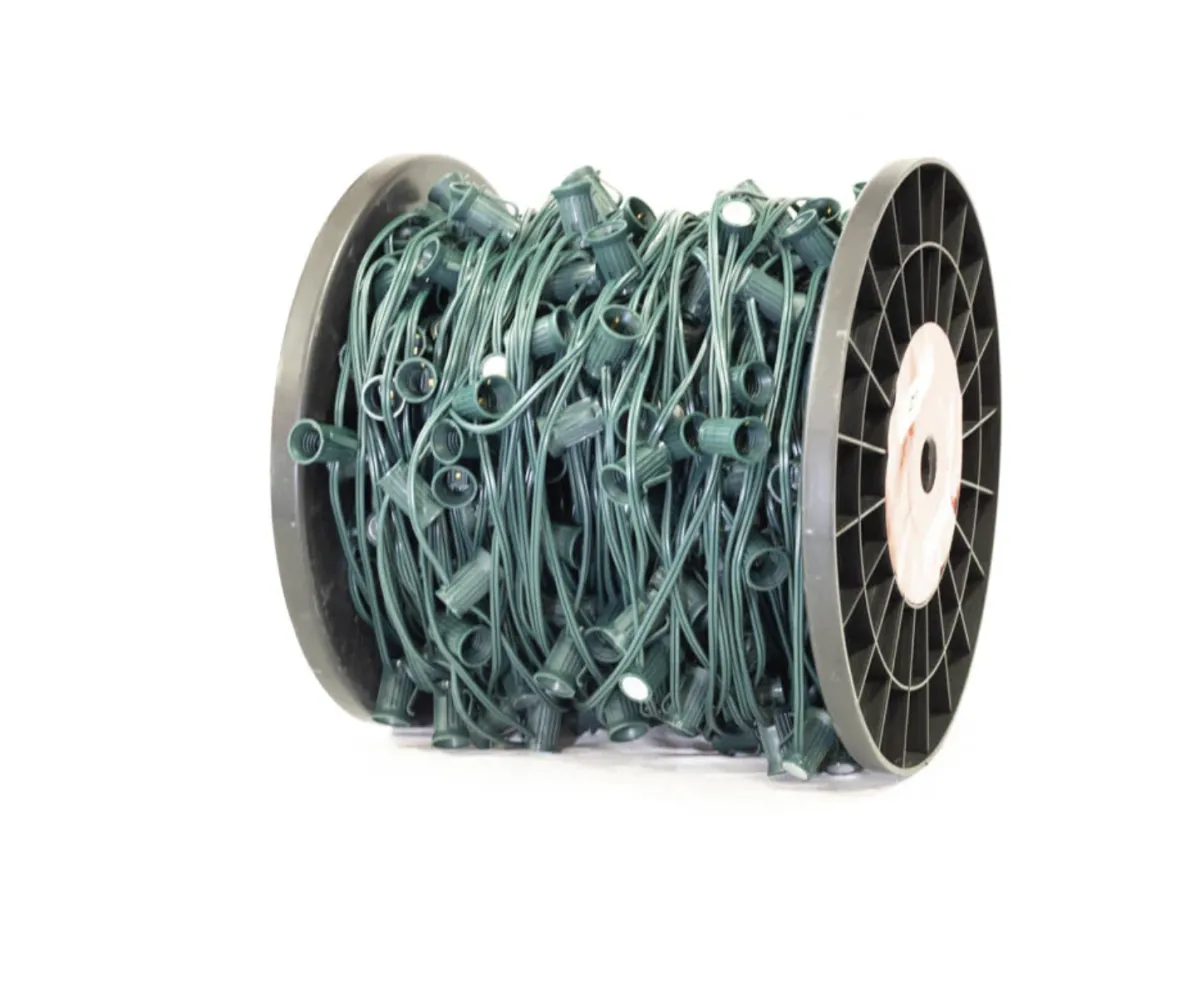
C9 Magnetic Spool
12" Spacing
This versatile lighting solution features heavy-duty, UV-protected 18-gauge SPT-1 wire rated for 840 watts, equipped with rust-resistant nickel-plated C9 magnetic sockets for secure attachment to ferrous metals, 12" spacing, 250' or 500' foot spool, compatible with E17 base incandescent and LED bulbs (sold separately), and suitable for both indoor and outdoor use.
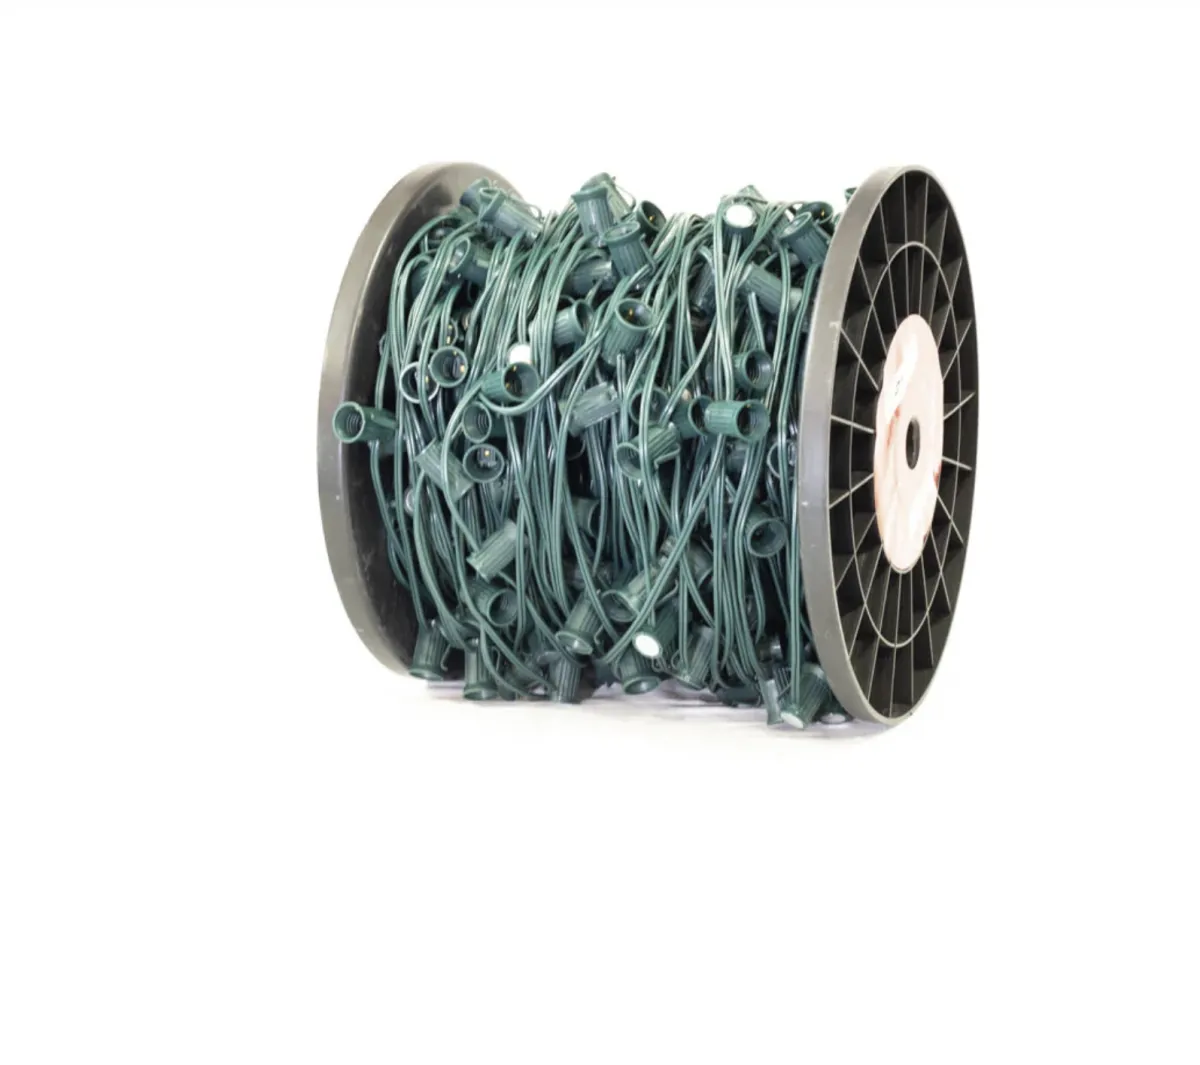
C9 Magnetic Spool
15" Spacing
This versatile lighting solution features heavy-duty, UV-protected 18-gauge SPT-1 wire rated for 840 watts, equipped with rust-resistant nickel-plated C9 magnetic sockets spaced 15" apart on 250' or 500' spools, securely attaching to ferrous metals and compatible with E17 base incandescent and LED bulbs (sold separately) for both indoor and outdoor use.
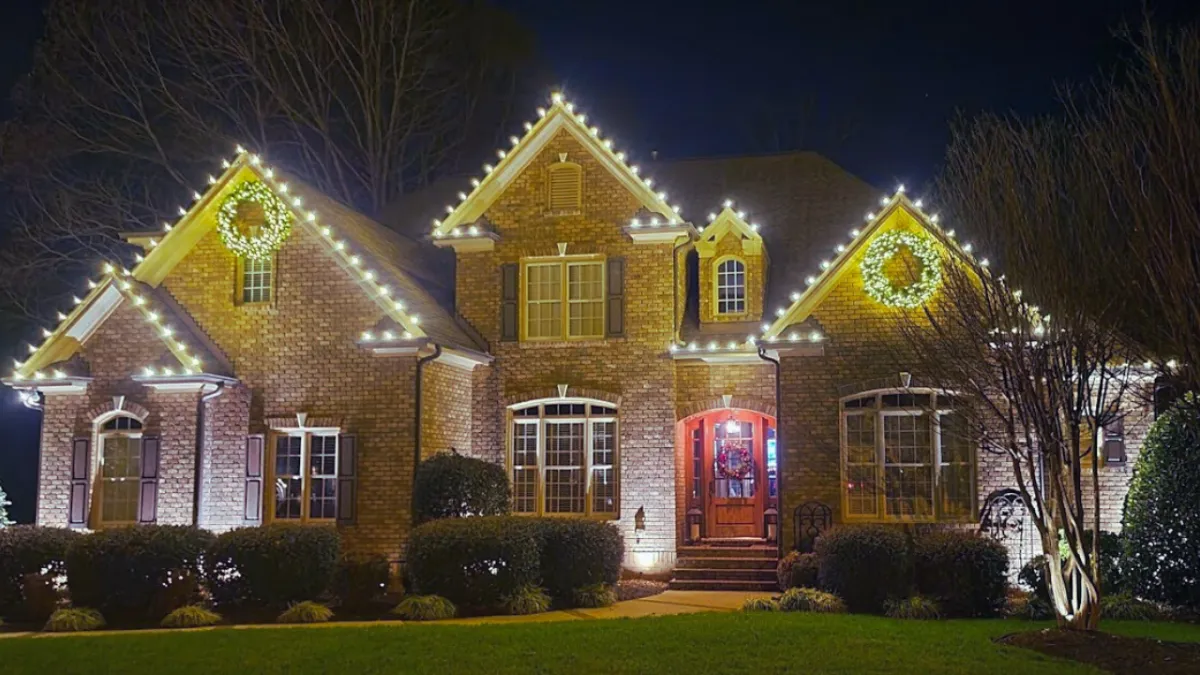
Why Christmas Light Clips Are a Game-Changer
Transform your holiday decorating experience with professional-grade Christmas light clips. These versatile tools are the secret to creating clean, polished displays that withstand the elements all season long. Designed for various surfaces and bulb sizes, quality clips ensure your lights stay securely in place, avoiding the sloppy appearance and frequent adjustments often associated with cheaper alternatives. Easy to install and remove, these clips are favored by professionals nationwide for their durability and neat finish. By investing in commercial-grade clips, you'll save valuable time during both setup and takedown, allowing you to focus more on enjoying the festive season rather than fussing with your decorations. Make your holiday lighting effortless and impressive with the right clips, and elevate your display to a professional standard with minimal hassle.
Christmas Light Clips
for Damage-Free, Professional Displays
Upgrade your holiday decorating technique by replacing staple guns and nails with versatile Christmas light clips. These innovative tools not only protect your home and lights from damage but also allow for easy adjustments after installation. Available in various designs to suit different surfaces like gutters, shingles, and flat areas, light clips can securely hold multiple bulb sizes, including C7, C9, icicle, and mini lights. By switching to clips, you'll preserve your property's integrity, extend the life of your lights, and gain the flexibility to perfect your holiday illumination with ease. Embrace this simple yet effective solution to elevate your decorating process and achieve professional-looking results without the hassle and potential harm of traditional fastening methods.
Frequently Asked Questions
How do Christmas light clips compare to traditional methods like staples or nails?
Christmas light clips are superior to staples or nails because they don't damage your home or lights, allow for easy adjustments and removal, and provide a cleaner, more professional look. They also make it easier to reuse your lights year after year without causing additional wear and tear.
Can using Christmas light clips save time during installation and removal?
Yes, using Christmas light clips can significantly reduce setup and takedown time. They're designed for easy installation and removal, allowing you to spend less time on decorating and more time enjoying the holiday season.
How do Christmas light clips improve the longevity of my holiday lights?
By securely holding your lights in place without pinching or damaging the wires, Christmas light clips help extend the life of your holiday lights. They also protect lights from harsh weather conditions, reducing the need for frequent replacements.
How do professional-grade Christmas light clips contribute to a better overall display?
Professional-grade clips ensure your lights stay in place, creating a neat and uniform appearance. They allow for precise positioning and spacing of lights, resulting in a polished, high-quality display that enhances your home's festive appeal.
What surfaces can Christmas light clips be used on?
Christmas light clips are designed for use on various surfaces, including gutters, shingles, and flat areas. There are also specialized clips for different applications, such as ridge clips and all-purpose clips.
How do Christmas light clips benefit holiday decorating?
Christmas light clips offer several benefits: they protect your home and lights from damage, allow for easy adjustments after installation, work on various surfaces, securely hold multiple bulb sizes, and help achieve a professional-looking display without the hassle of traditional fastening methods.
Discover Expert Tips on Our Blog

Your First Outdoor Christmas Light Display Guide
Welcome to the magical world of outdoor Christmas lights! Transforming your home into a festive wonderland is a cherished holiday tradition, but for first-timers, it can seem overwhelming. This comprehensive guide will walk you through every step of creating your first Christmas light display, from planning to storage, with expert advice to ensure a safe, beautiful, and stress-free experience.
Why Create an Outdoor Christmas Light Display?
An outdoor Christmas light display does more than just decorate your home—it creates lasting memories, spreads holiday cheer throughout your neighborhood, and establishes a tradition you can build upon year after year. Even simple displays can make a significant impact and bring joy to everyone who passes by.
Part 1: Planning Your Christmas Light Display
Step 1: Assess Your Home's Design
Before purchasing any lights or decorations, take time to evaluate your home's exterior:
Walk to the curb and photograph your home from different angles to use as a reference
Identify key features to decorate:
Roofline and eaves
Windows and door frames
Trees, bushes, and landscaping elements
Porch columns and railings
Walkways and driveways
Mailbox, planters, and other accents
Locate all outdoor electrical outlets as these will determine your power distribution plan
Step 2: Choose a Theme or Style
While not mandatory, selecting a theme helps create a cohesive look:
Winter Wonderland: Blue and white lights with snowflake accents
Classic Christmas: Red, green, and white with traditional elements
Elegant Monochrome: All white lights for a sophisticated appearance
Colorful and Playful: Multi-colored lights with whimsical decorations
Red and White: A candy cane inspired palette
Step 3: Set a Realistic Budget
Christmas light displays can range from less than $100 to several thousand dollars. As a beginner, establish a firm budget before shopping to avoid impulse purchases:
Entry-level display ($100-$200): Focus on a few high-impact areas like your entryway and one prominent tree
Mid-range display ($200-$500): Add roofline lighting and several landscape elements
Larger investment ($500+): Comprehensive coverage of multiple areas
Remember that investing in quality lights initially may save money long-term through durability and energy efficiency.
Step 4: Measure Everything
Take accurate measurements of all areas you plan to decorate:
Roofline length (each section separately)
Window and door perimeters
Porch railing and column lengths
Tree trunk circumference and branch reach
Bush dimensions
Walkway and driveway lengths
Record these measurements on your reference photos or a sketch of your home.
Step 5: Create a Shopping List
Based on your measurements, budget, and design plan, create a prioritized list that includes:
Lights by location (type and quantity needed)
Installation supplies (clips, stakes, extension cords)
Safety equipment (GFCI adapters, timers)
For beginners, we recommend starting with a smaller, manageable display and expanding in future years.

Part 2: Choosing the Right Christmas Lights
Types of Christmas Lights
Understanding different light types will help you select the right options for your display:
LED vs. Incandescent Lights
LED Christmas Lights:
Pros: Energy-efficient (using up to 90% less electricity), cooler-burning (safer), extremely durable, long-lasting (25,000+ hours), permit connecting many strands
Cons: Higher initial cost, different light quality than traditional incandescents
Incandescent Christmas Lights:
Pros: Lower initial cost, traditional warm glow, nostalgic appeal
Cons: Higher energy consumption, shorter lifespan (1,000-2,000 hours), fragile bulbs, generate heat (potential fire risk), limited connectivity between strands
For most beginners, the safety features and longevity of LED lights make them the recommended choice despite the higher upfront cost.
Common Christmas Light Styles
Mini Lights: Versatile small bulbs perfect for wrapping trees, outlining windows, or decorating railings
C7 and C9 Bulbs: Larger, traditional bulbs ideal for rooflines and pathways
Icicle Lights: Cascading strands that simulate icicles, perfect for eaves and overhangs
Net Lights: Pre-arranged grid of lights that easily drape over bushes and shrubs
Rope Lights: Flexible tube lighting perfect for outlining paths or creating shapes
Projection Lights: Cast patterns on large surfaces with minimal installation effort
Outdoor Safety Essentials
For outdoor installations, always choose:
Lights and extension cords explicitly labeled for "outdoor use"
UL-approved products (look for the UL label)
GFCI (Ground Fault Circuit Interrupter) protection for all outlets
Commercial-grade lights for better durability if budget allows

Part 3: Essential Tools and Supplies
Having the right tools and supplies before you begin will make installation much easier and safer:
Must-Have Items:
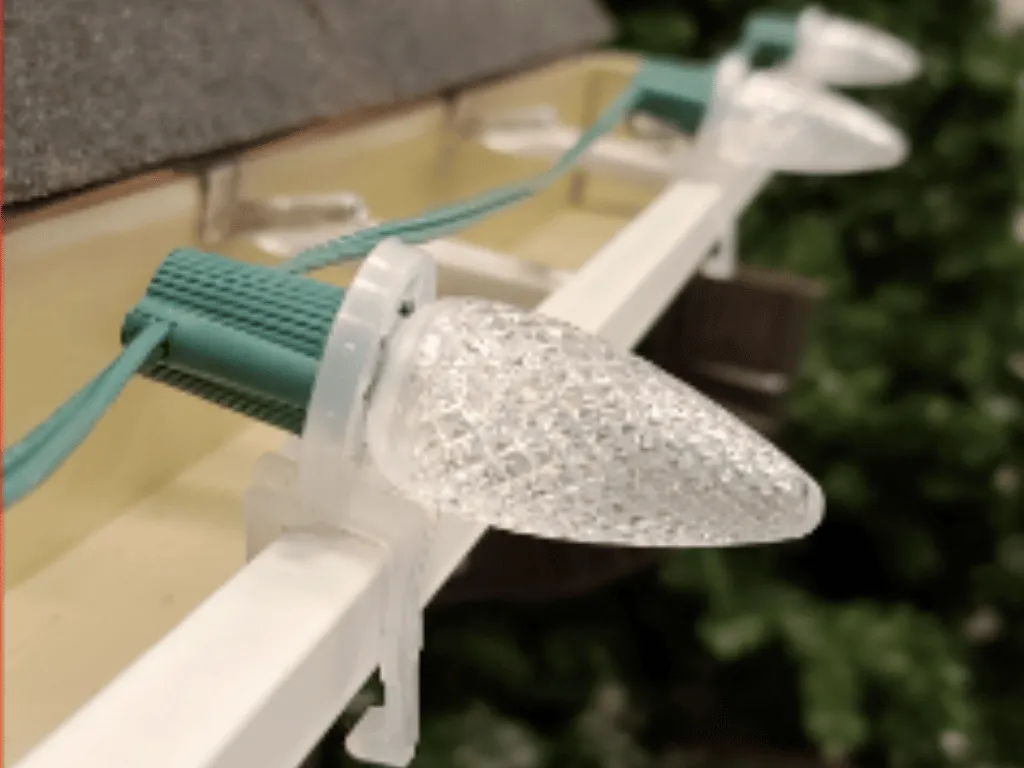
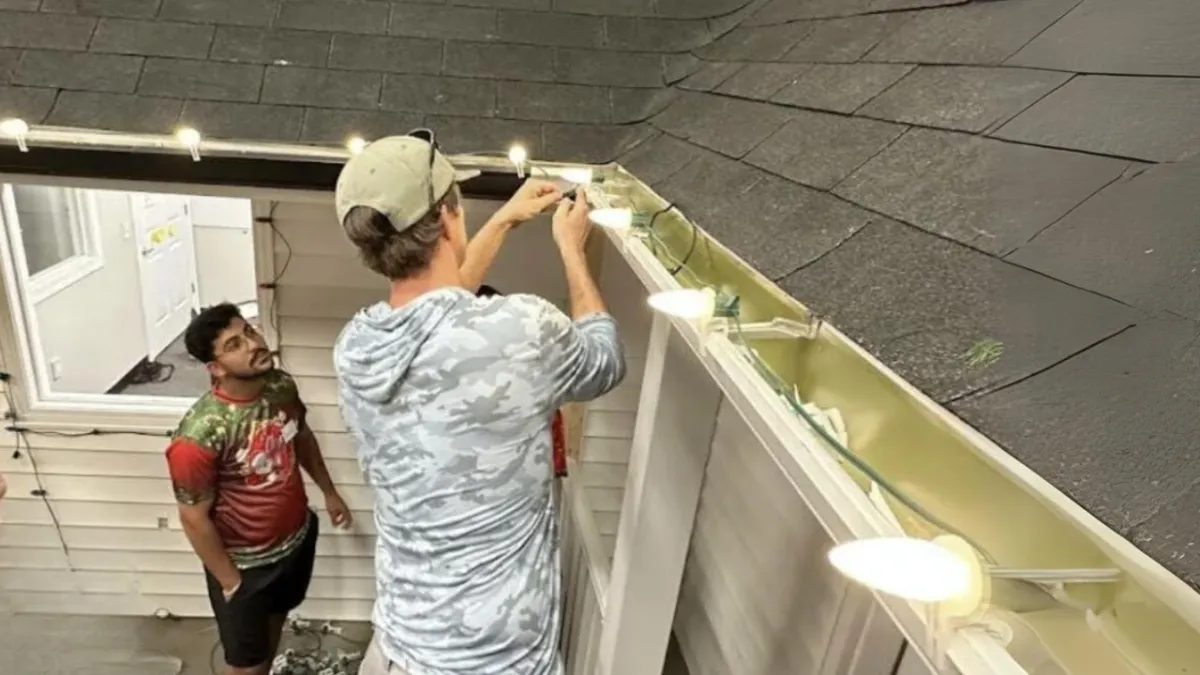
Light Clips: The proper attachment method for various surfaces:
All-in-one clips for rooflines (gutter and shingle)
Adhesive clips for smooth surfaces
Specific clips for railings and other special areas
Outdoor-Rated Extension Cords: Select cords that are:
Specifically labeled for outdoor use
Heavy-duty (14 or 12-gauge)
Long enough to reach outlets without connections
Matching or complementary colors to your home (green, brown, white)
Ladder(s):
Step ladder for lower areas
Extension ladder for reaching rooflines (use fiberglass or wood near electrical installations)
Ladder stabilizers and levelers for safety
Timers or Smart Controls:
Outdoor-rated timers to automate your display
Photocell options that respond to darkness
Smart plugs for remote control via smartphone
Helpful Extras:
Measuring tape
Light-hanging pole (extension pole)
Zip ties for securing lights
Outdoor electrical tape
Work gloves
Weatherproof connection covers
GFCI tester

Part 4: Installation Best Practices
Safety First
Before beginning installation:
Never work alone—have a helper spot your ladder
Check weather forecasts and avoid installation during wet or windy conditions
Inspect all lights and cords for damage before hanging
Test lights on the ground before installation
Verify all outlets have GFCI protection
Always be aware of power lines and maintain safe distances
Installation Techniques by Location
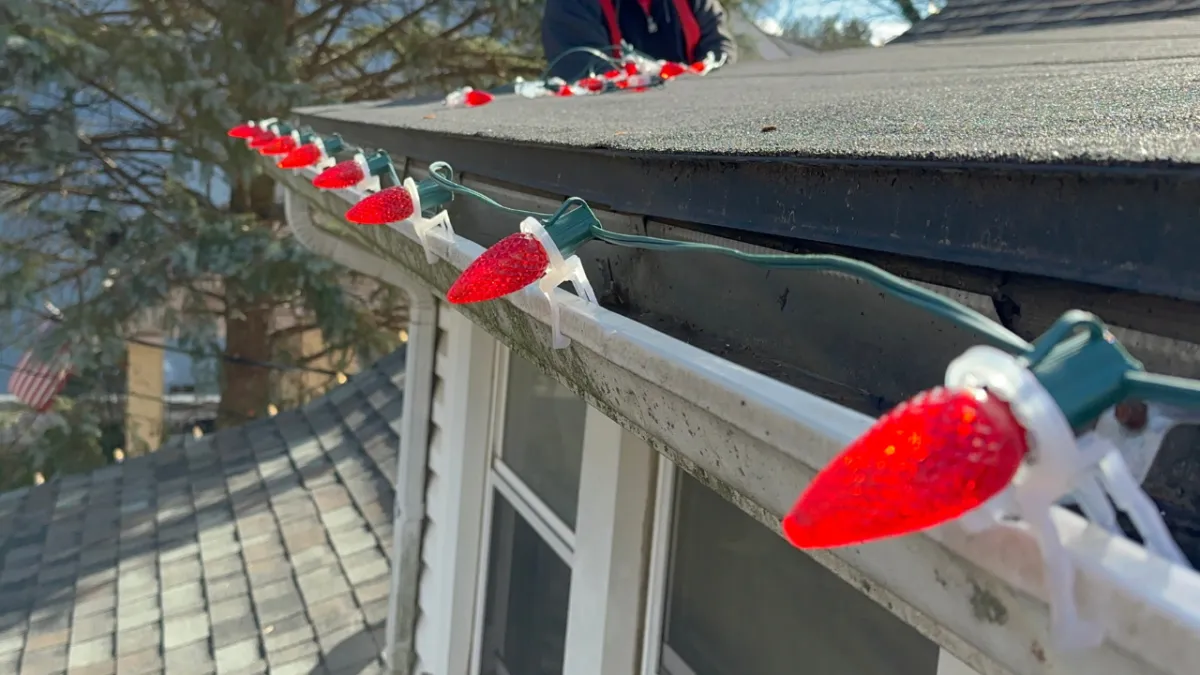
Rooflines and Gutters
Use proper clips designed for gutters or shingles
Space clips 8-12 inches apart for a clean line
Work methodically from one end to the other
Keep light strands reasonably taut without stretching
For icicle lights, ensure the "drops" hang straight down
Trees and Bushes
Trees:
Start at the base near a power source
Wrap the trunk in a spiral pattern, maintaining even spacing
For branches, work from trunk to tip and back
Consider 5mm wide-angle LED mini lights for tree wrapping
Bushes:
Use net lights for easiest application
Drape nets evenly over the bush, tucking edges slightly underneath
For string lights, weave in and out of the foliage with consistent spacing
Porches and Railings
Wrap lights securely around railings or use dedicated railing clips
For columns, spiral lights from bottom to top with even spacing
Secure loose ends with zip ties if needed
Windows and Door Frames
Use adhesive clips designed for temporary installation
Apply clips at regular intervals around the frame
Press light strings gently into clips
Walkways and Driveways
Use stake lights pushed firmly into ground along the edges
Keep cords off walking surfaces to prevent tripping
Space stakes evenly for a professional appearance
Connecting Your Display to Power
Run extension cords from light strands to outlets in the most direct, unobtrusive path
Never exceed the manufacturer's recommendations for connected strands
Use outdoor-rated timers to automate your display
Keep all connections elevated off the ground and protected from moisture

Part 5: Protecting Your Display from the Elements
Weatherproofing Connections
Moisture is the enemy of electrical connections. Protect them with these methods:
Elevation: Keep all connections off the ground
Connection Covers: Use specially designed weatherproof covers or sealed plastic containers
Strategic Placement: Position connections under eaves or other protected areas when possible
Securing Against Wind
Prevent decorations from being damaged by wind:
Use additional anchoring for inflatables and yard decorations
Secure light strands with extra clips in high-wind areas
Consider the placement of decorations relative to prevailing winds
Part 6: Simple Ideas for Maximum Impact
For beginners, these high-impact, lower-effort decorating ideas create beautiful results:
Focus on the Entryway
Frame your front door with garland and mini lights
Hang a pre-lit wreath
Add symmetrical decorations on either side of the entrance
Illuminate your walkway with simple stake lights
Choose One Standout Feature
Instead of trying to decorate everything, select one focal point:
A fully-wrapped prominent tree
Well-defined roofline with C9 bulbs
A cluster of lighted yard decorations
Easy Yet Effective Options
Use projection lights to cover large areas with minimal effort
Drape net lights over bushes for instant coverage
Place pre-lit potted arrangements on the porch
Add large, simple bows to existing features like mailboxes or lampposts

Part 7: Storage Solutions for Next Year
After the holidays, proper removal and storage ensures your lights will be ready for next season:
Careful Removal
Unplug everything before starting
Remove lights in reverse order of installation
Detach clips gently to avoid damaging lights or your home
Have storage containers ready before you begin
Proper Storage Methods
For Light Strands:
Cardboard Method: Wrap strands around rectangular cardboard pieces
Reel Storage: Use dedicated light storage reels
Hand-Wrap Method: Create neat bundles secured with twist ties
Store each strand in individual bags to prevent tangling
For Decorations:
Clean all items before storage
Store wreaths on hangers covered with garbage bags or in dedicated containers
Store inflatables fully dry and folded in their original boxes
Use clear, labeled storage bins for categorized organization
Choose a cool, dry storage location away from extreme temperatures and humidity.
Conclusion: Enjoy the Magic
Creating your first Christmas light display should be enjoyable, not stressful. Start small, prioritize safety, and remember that even simple displays can create beautiful results and wonderful memories.
Each year, you can build on your experience, adding new elements and refining your technique. The most important part is enjoying the process and the festive atmosphere you create for yourself, your family, and your community.

10 FAQs About Installing Christmas Lights for Beginners
1. What types of Christmas lights are best for beginners?
LED Christmas lights are generally best for beginners due to their safety (they run cooler), energy efficiency, durability, and ability to connect more strands together. Net lights for bushes and C9 bulbs for rooflines are particularly beginner-friendly options.
2. How many lights do I need for my roofline?
Measure your roofline in feet and multiply by 1.5 for C9 bulbs or by 2 for mini lights to determine how many lights you'll need. For example, a 40-foot roofline would require about 60 feet of C9 lights or 80 feet of mini lights.
3. How do I attach Christmas lights without damaging my house?
Use appropriate light clips rather than nails, staples, or tacks. All-in-one clips work for gutters and shingles, adhesive clips work for windows and door frames, and special clips exist for railings and vinyl siding. Never puncture wires or surfaces.
4. Can I connect multiple strands of Christmas lights together?
Yes, but follow the manufacturer's guidelines. LED lights typically allow more connections (often 40+ strands) while incandescent lights usually permit only 3-5 strands per circuit. Never mix LED and incandescent lights on the same circuit.
5. What should I do if some of my lights aren't working?
Always test lights before installation. For incandescent strands, check for and replace burned-out bulbs. For LED strands, check fuses in the plug. If a section isn't working, it could be a break in the wire. Consider replacing problematic strands rather than extensive troubleshooting.

6. Do I need special outdoor outlets for Christmas lights?
Regular outdoor outlets work, but they must have GFCI (Ground Fault Circuit Interrupter) protection. If your outlets don't have built-in GFCI protection, use portable GFCI adapters between your outlet and extension cord for safety.
7. What's the easiest way to decorate bushes and shrubs?
Net lights are by far the easiest option for bushes and shrubs. Simply drape the pre-connected grid of lights over the foliage for instant, even coverage with minimal effort.
8. How do I protect my outdoor light connections from weather?
Keep connections elevated off the ground, use weatherproof connection covers or gaskets, and position connections under eaves when possible. Some people use self-sealing silicone tape or plastic bags secured with zip ties as DIY solutions.
9. How long should I leave my Christmas lights on each day?
Using a timer is recommended to run lights for 6-8 hours daily (typically 5-11pm or dusk to midnight). This conserves energy and extends bulb life. Always turn off lights when leaving home or sleeping if not using a timer.
10. What's the best way to store Christmas lights to prevent tangling?
Wrap light strands around rectangular pieces of cardboard with notches cut at the ends to secure plugs, use dedicated light storage reels, or create neat hand-wrapped bundles secured with twist ties. Store each strand in its own bag and keep in labeled containers in a cool, dry place.

Copyright ©2026 All Right Reserved website designed by christmaslights.io
Terms of Service / Privacy Policy
Have questions or need assistance?
Contact us at (855)619-LITE