Secure your Christmas lights effortlessly with our selection of professional grade clips
Secure Your Shine: Professional-Grade Christmas Light Clips for Every Surface
Click on any category below to jump directly to that section
Sturdy clips designed specifically for larger C9 bulbs. Perfect for rooflines and creating bold, visible displays.
Versatile clips tailored for medium-sized C7 bulbs. Ideal for various applications, from windows to outdoor structures.
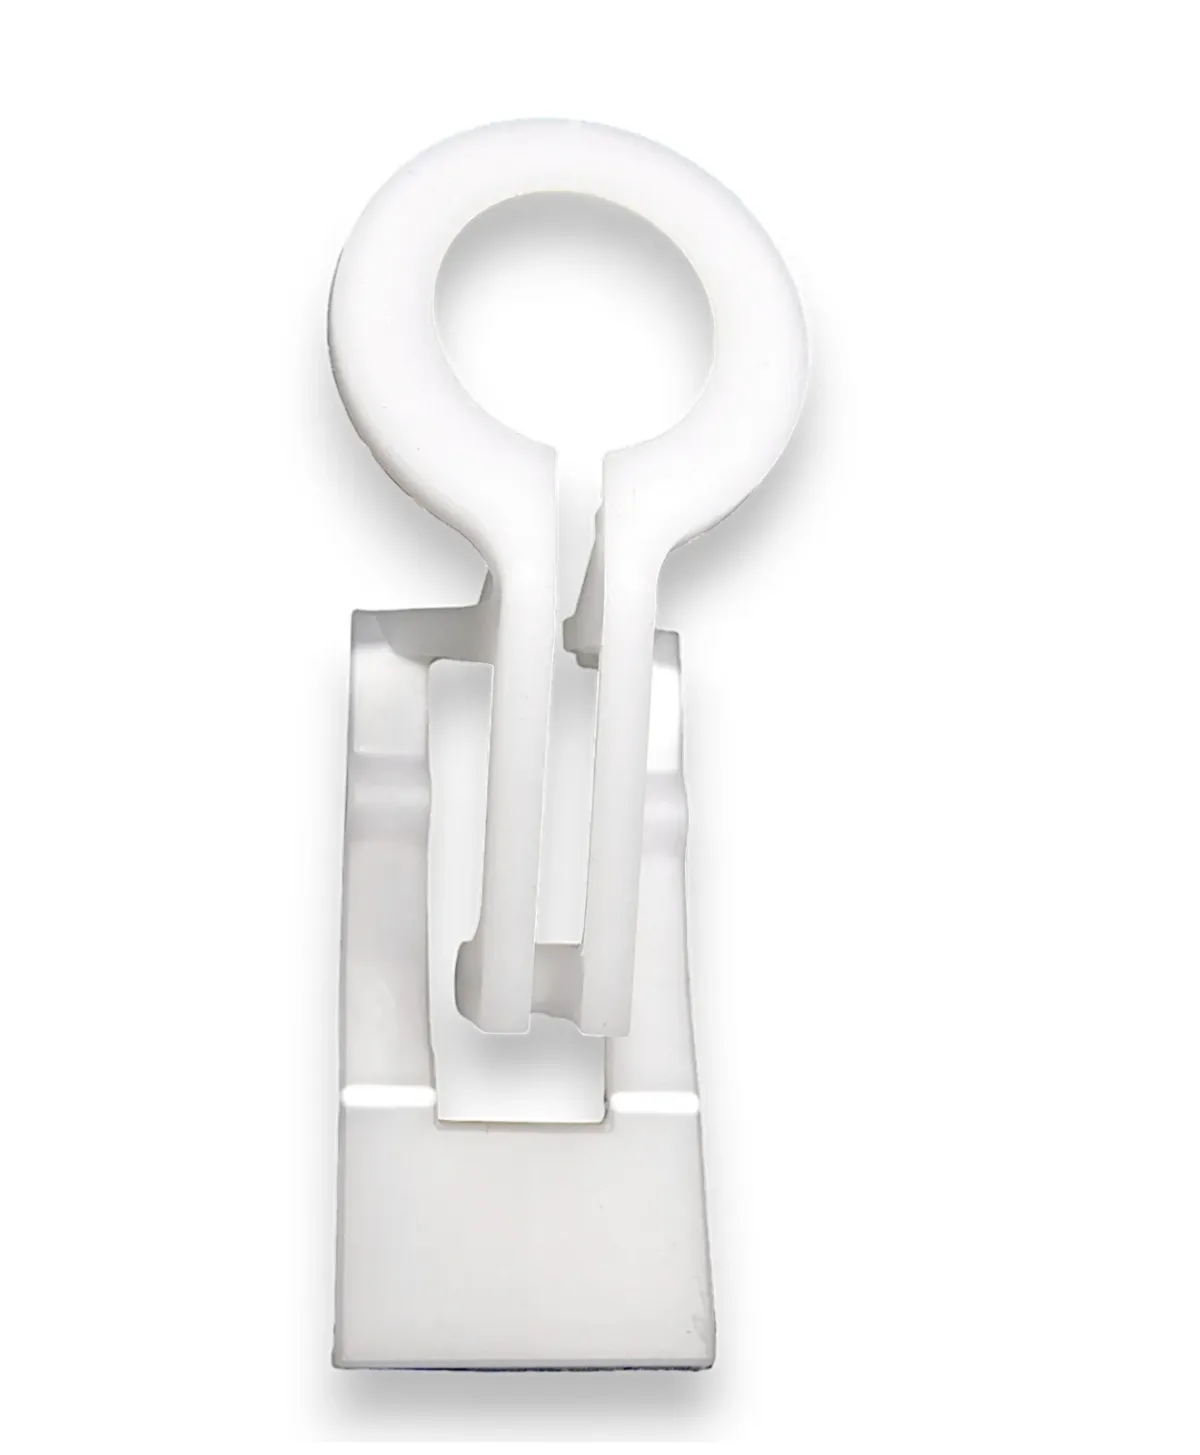
Christmas Light Clips: Innovative clips with strong magnets for easy, damage-free installation on metal surfaces like gutters and downspouts.
Specialized clips for secure attachment along roof ridges and peaks, ensuring a perfectly straight light line on difficult angles.
Convenient pre-spaced clip strips for quick and uniform installation of light strings, saving time and effort.
Unique clips designed for specific surfaces or applications, such as brick, stucco, or wrapping lights around columns.
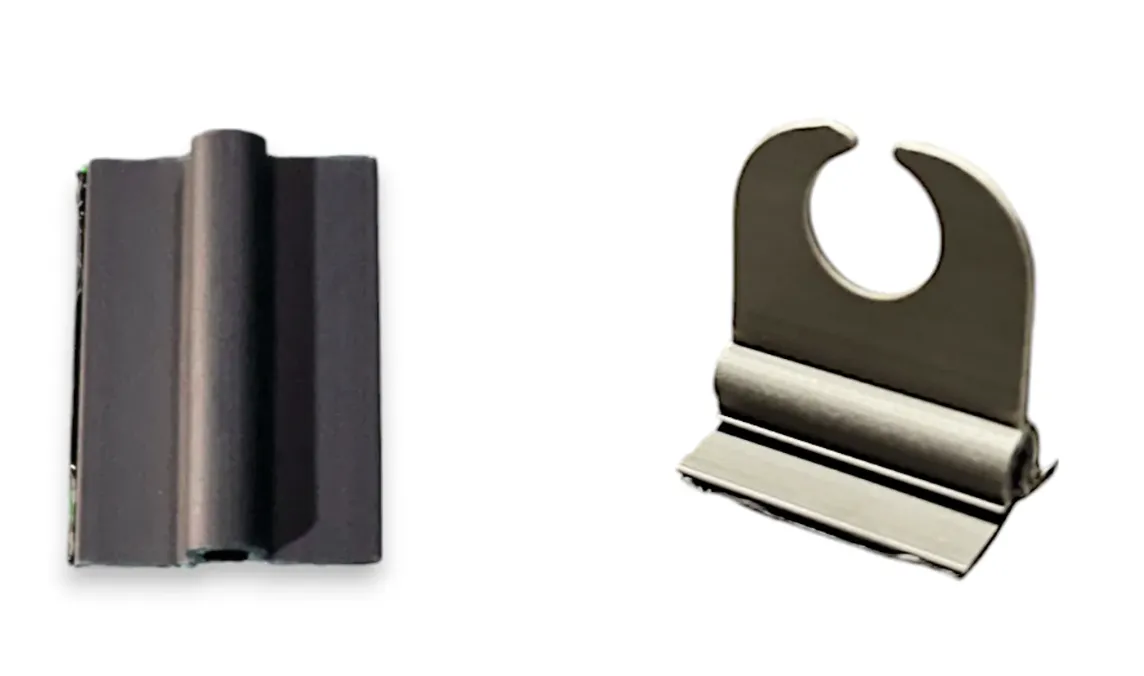
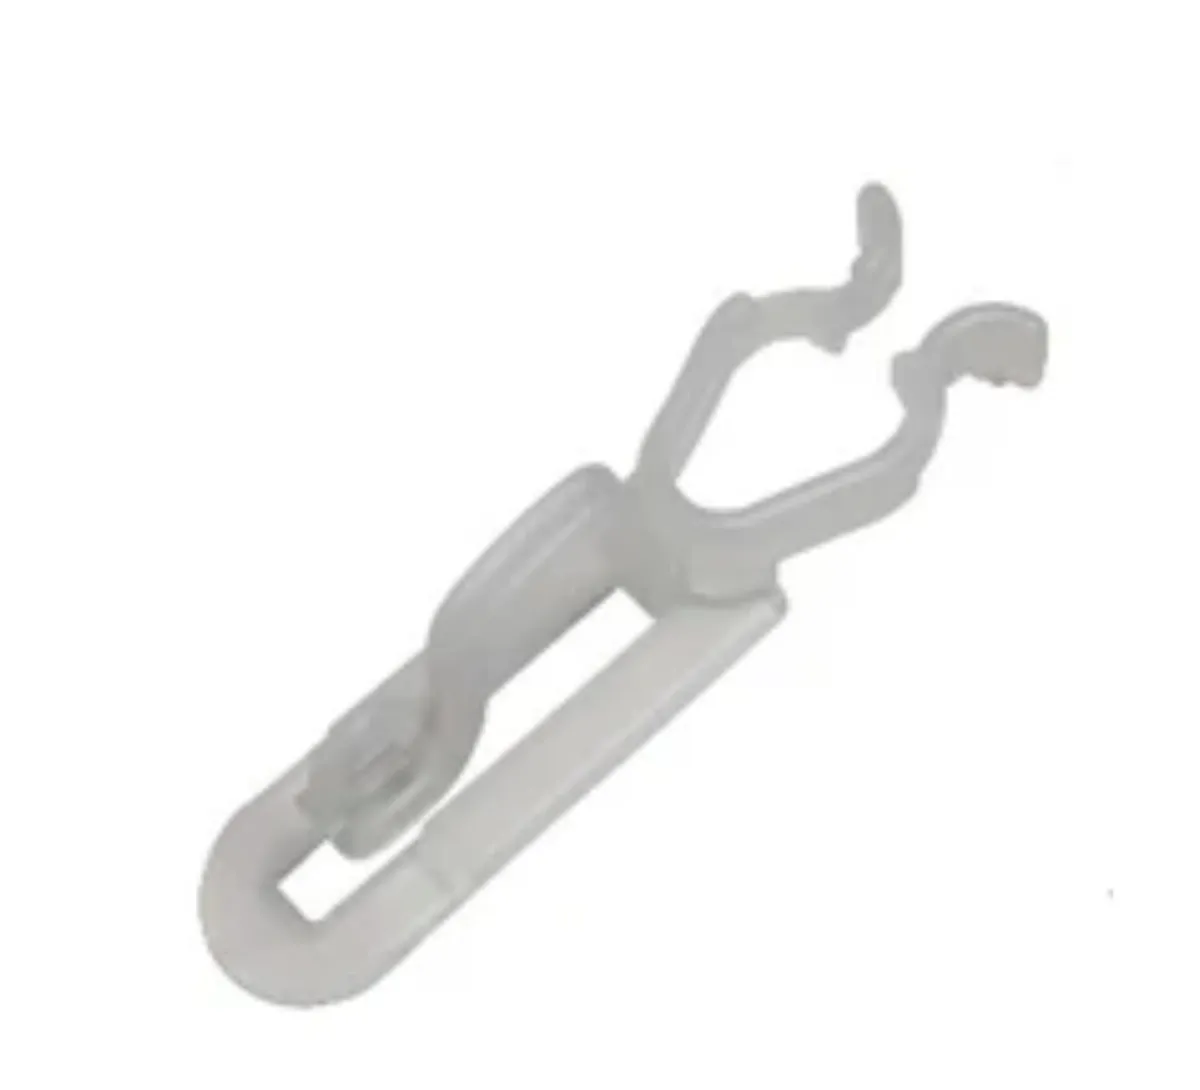
C9 Christmas Light Clips
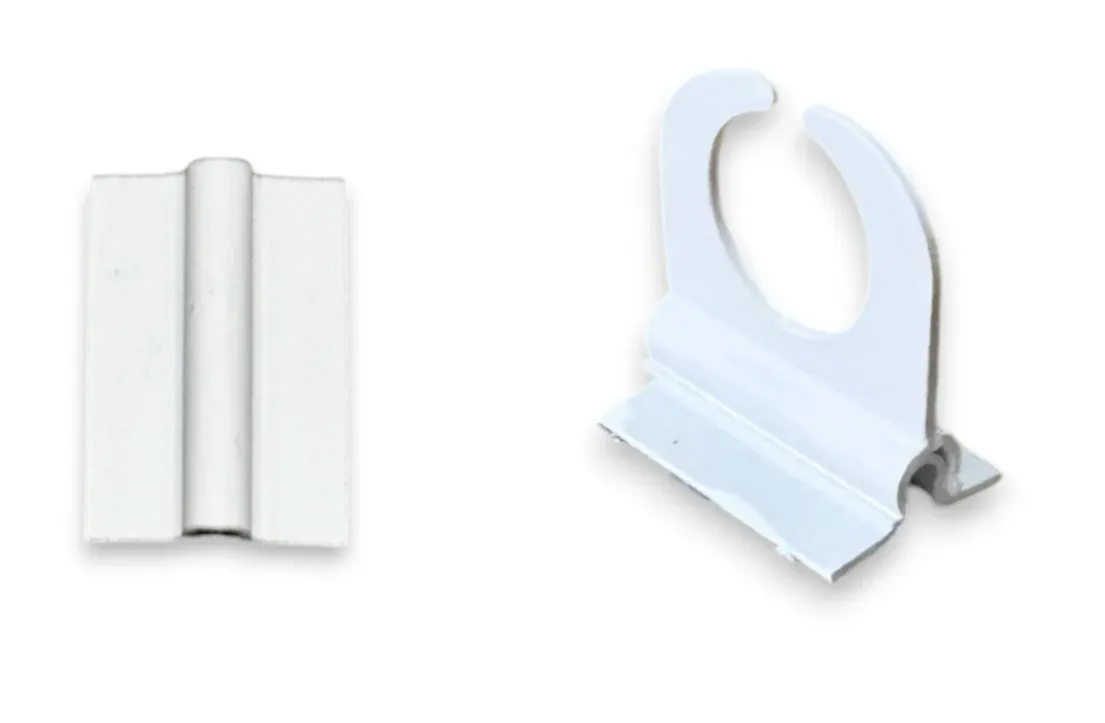
C9 Flex Clip
These flexible circle clips for C9 bulbs and sockets ensure your Christmas lights stay securely in place, offering easy installation by inserting the bulb through the clip before screwing into the socket.

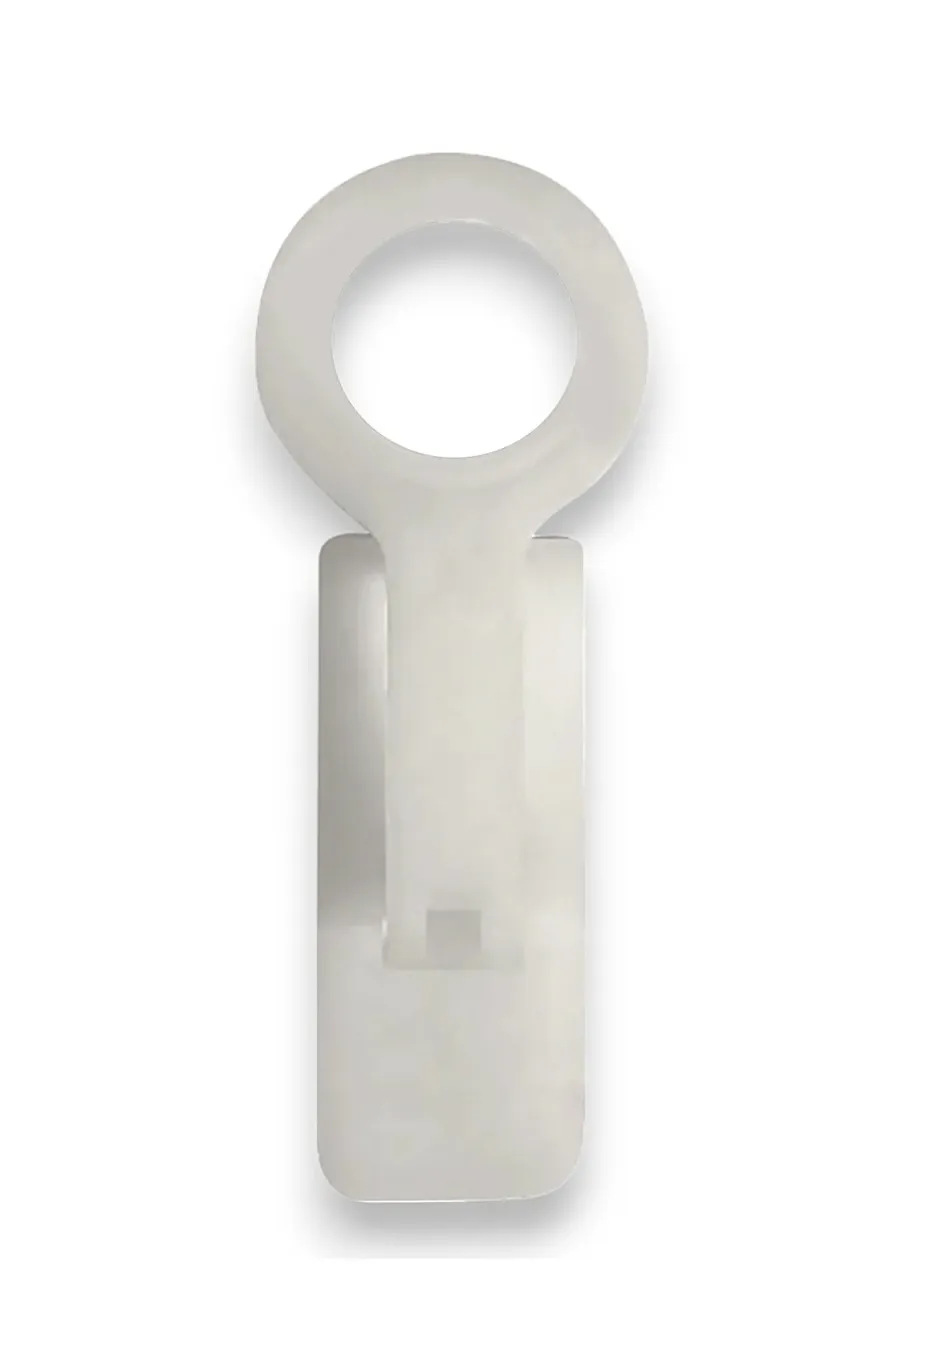
C9 White Best Wedge Clip
These white circle clips for C9 bulbs and sockets ensure your Christmas lights stay securely in place, offering easy installation by inserting the bulb through the clip before screwing into the socket.
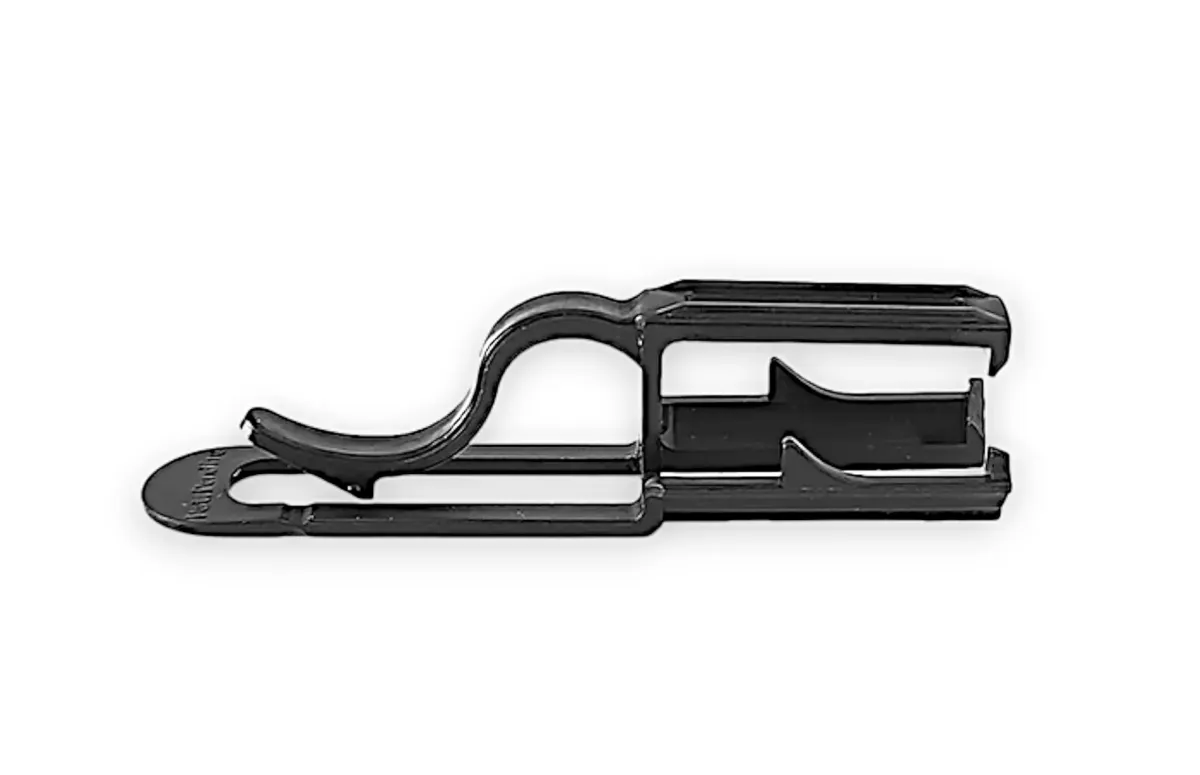
C9 Wedge Clip
The C9 Wedge Clips, a top choice for professional installers, offer versatile installation options and a secure "sandwich style" design, reducing seasonal install and removal time by 50% for C9 light lines.
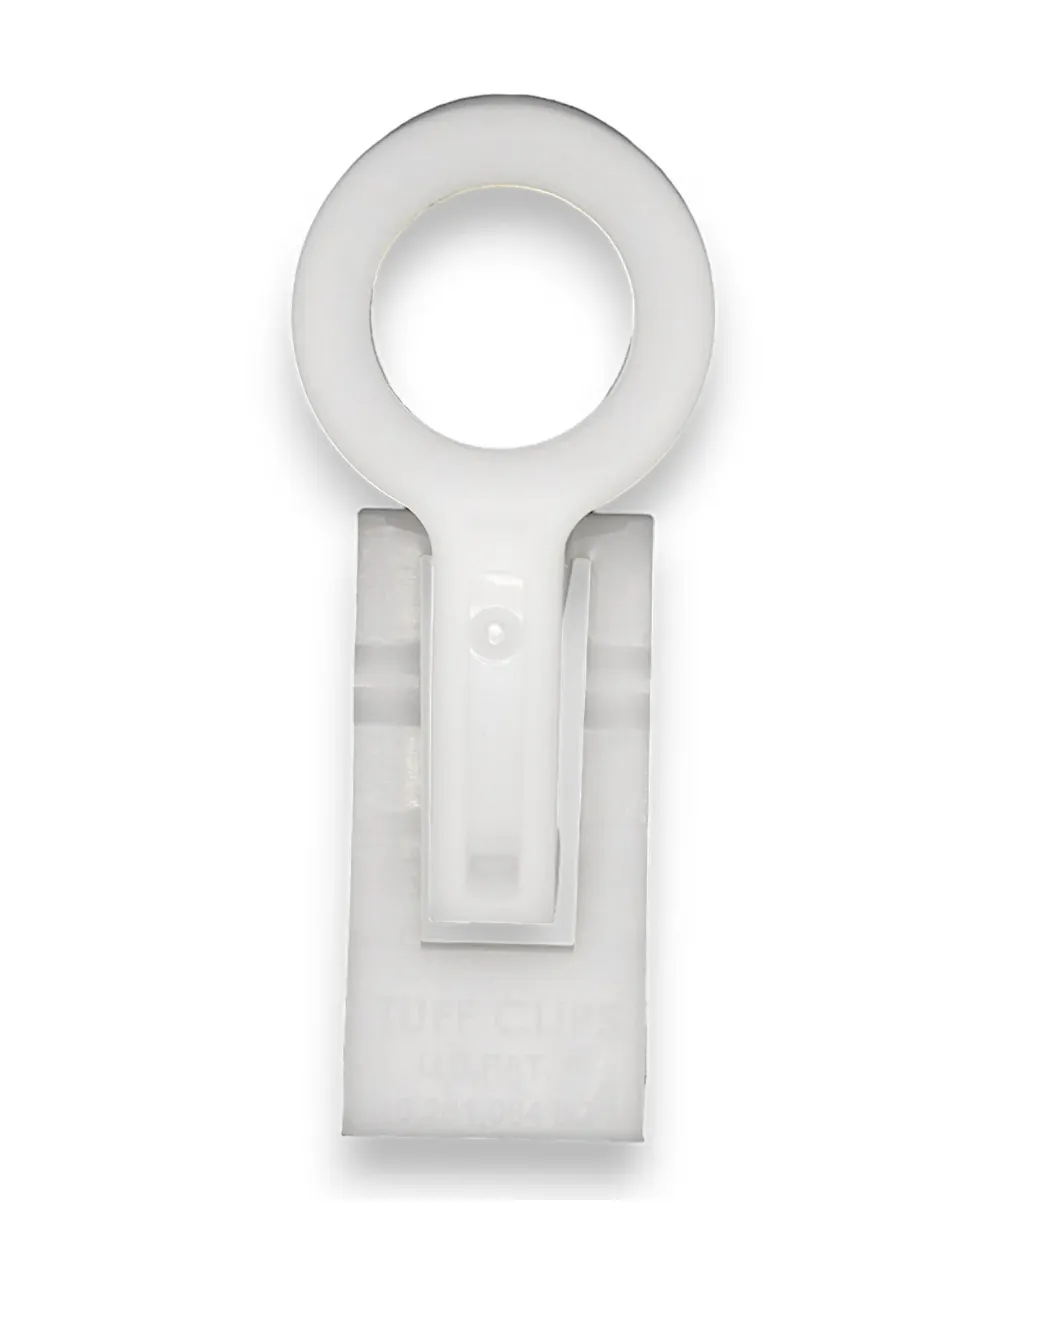
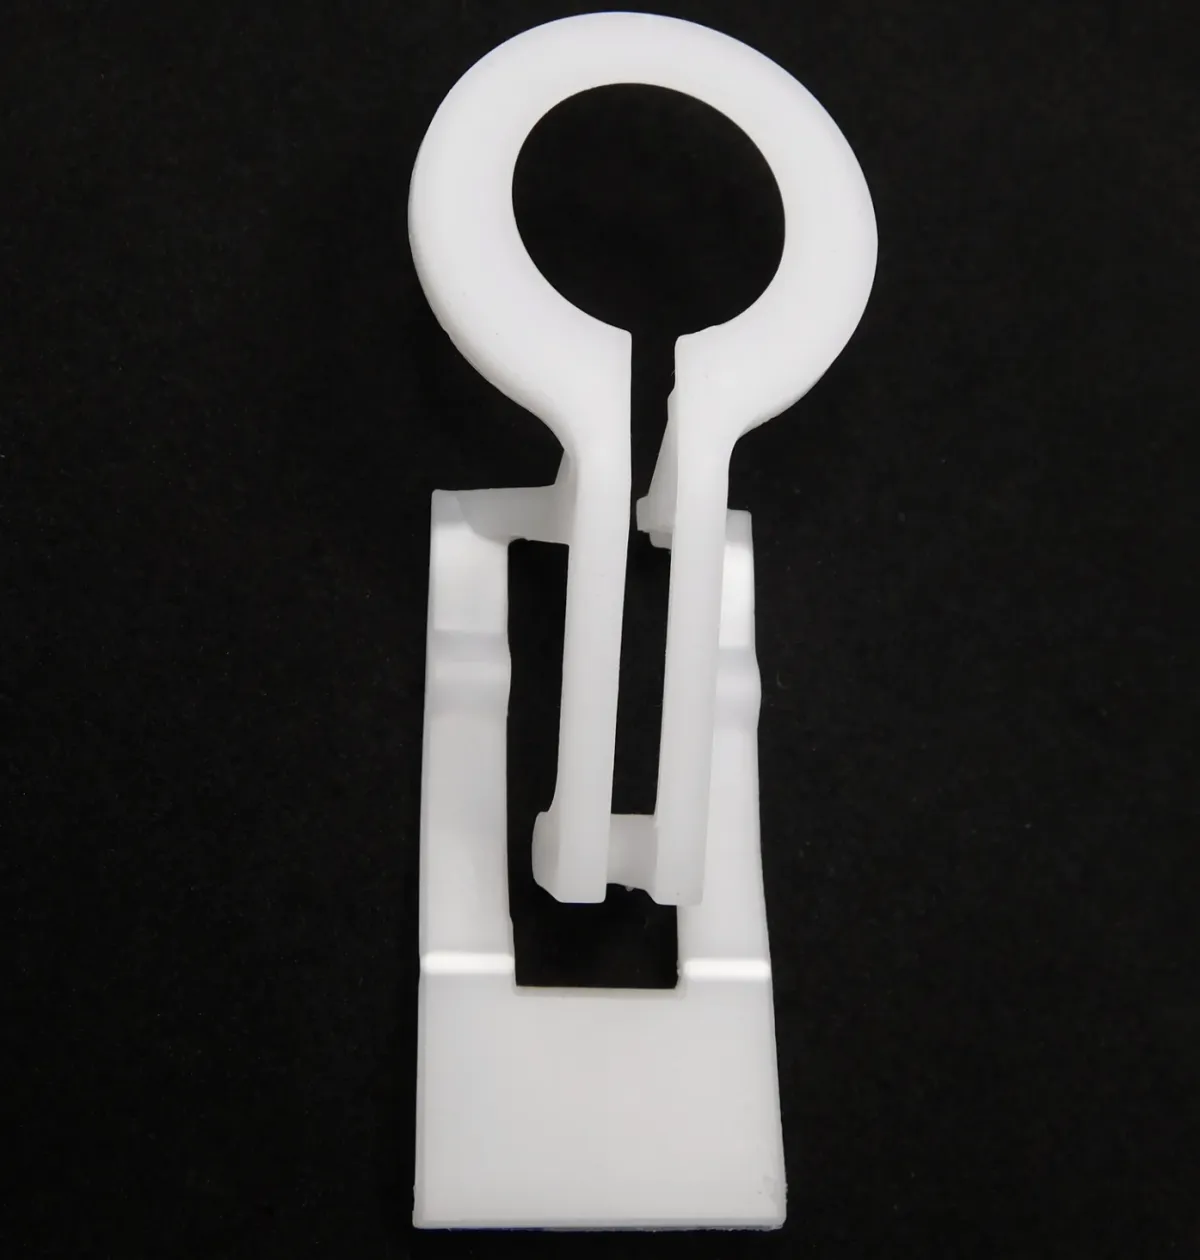
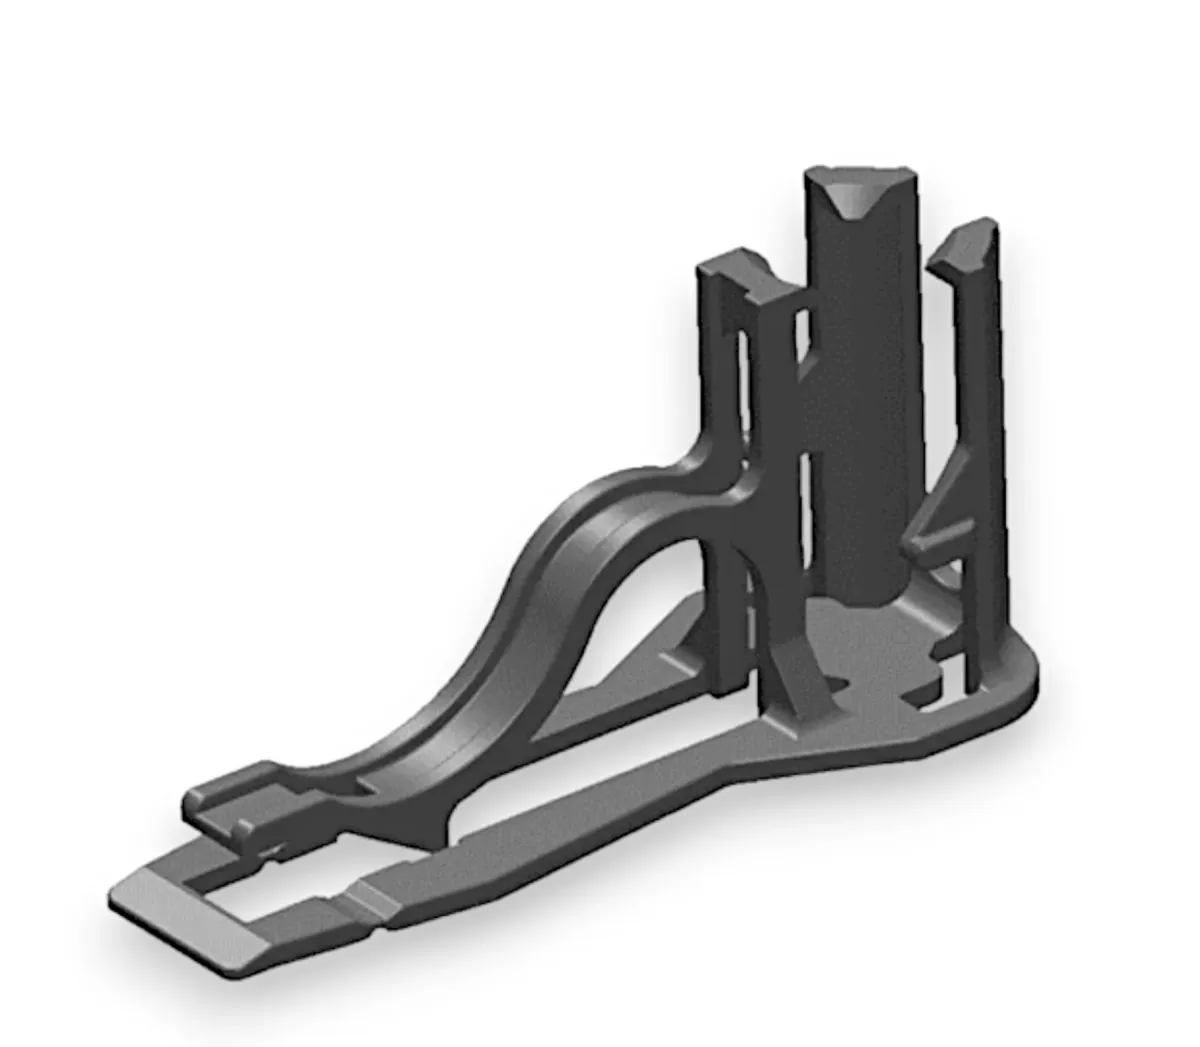
C9 Tuff Clip
The C9 Wedge Clips, a top choice for professional installers, offer versatile installation options and a secure "sandwich style" design, reducing seasonal install and removal time by 50% for C9 light lines.
C7 Christmas Light Clips
C7 Flex Clip
These flexible circle clips for C7 bulbs and sockets ensure your Christmas lights stay securely in place, offering easy installation by inserting the bulb through the clip before screwing into the socket,
C7 White Best Wedge Clip
These white circle clips for C7 bulbs and sockets ensure your Christmas lights stay securely in place, offering easy installation by inserting the bulb through the clip before screwing into the socket.
Christmas LiteClip & Strips
Streamline your holiday light installation with our commercial-grade LiteClips. Available for both C9 and C7 bulbs, these versatile clips easily secure between the socket and bulb, allowing for downward, upward, or straight-out positioning. For a complete, safe, and secure setup, pair with our LiteClipStrip mounting system. These efficient tools ensure quick and professional-looking installations for homes and businesses alike. Available in White or Brown.
C7 White LiteClips with Strips
C7 Brown LiteClips with Strips
C9 White LiteClips with Strips
C9 Brown LiteClips with Strips
Speciality Christmas Lights Clips
Canny Systems
Pro Clip
This versatile clip offers horizontal mounting on shingles and vertical on gutters, featuring a sleek, low-profile design for minimal daytime visibility, a secure grip that keeps the clip attached during bulb removal, and ensures quick, effortless installation and takedown.
Canny Systems
Shingle V-Clip
This sleek clip securely holds bulbs vertically on shingles and horizontally on gutters, offering minimal daytime visibility, staying attached during bulb removal, and allowing for quick and easy installation and takedown.
Canny Systems
Pro Clip Plus
This versatile clip points lights outward on shingles and upward on gutters, featuring a sleek, low-visibility design, secure bulb/socket grip for easy removal, quick installation and takedown
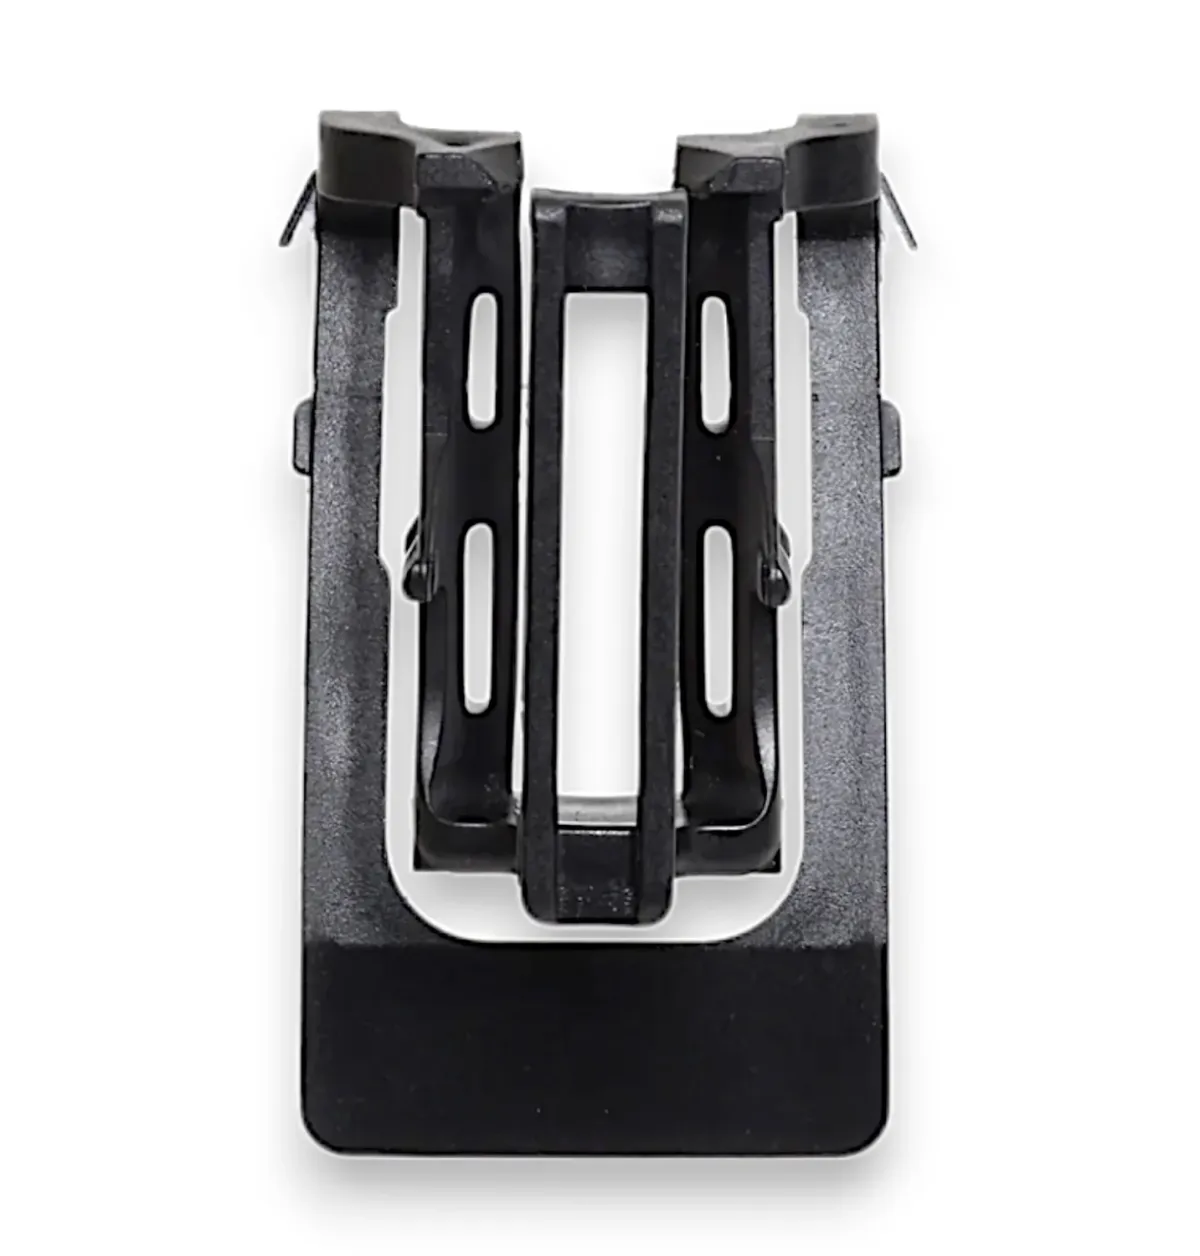
All-Purpose
Clip
The All-in-One Plus clip, favored by professional installers, accommodates C7, C9, C6, mini, and icicle lights, offering versatile horizontal gutter and vertical shingle mounting options, a tight grip for mini lights, layering capabilities for unique designs, and the ability to hang two light strings simultaneously, ensuring a perfect roof display.
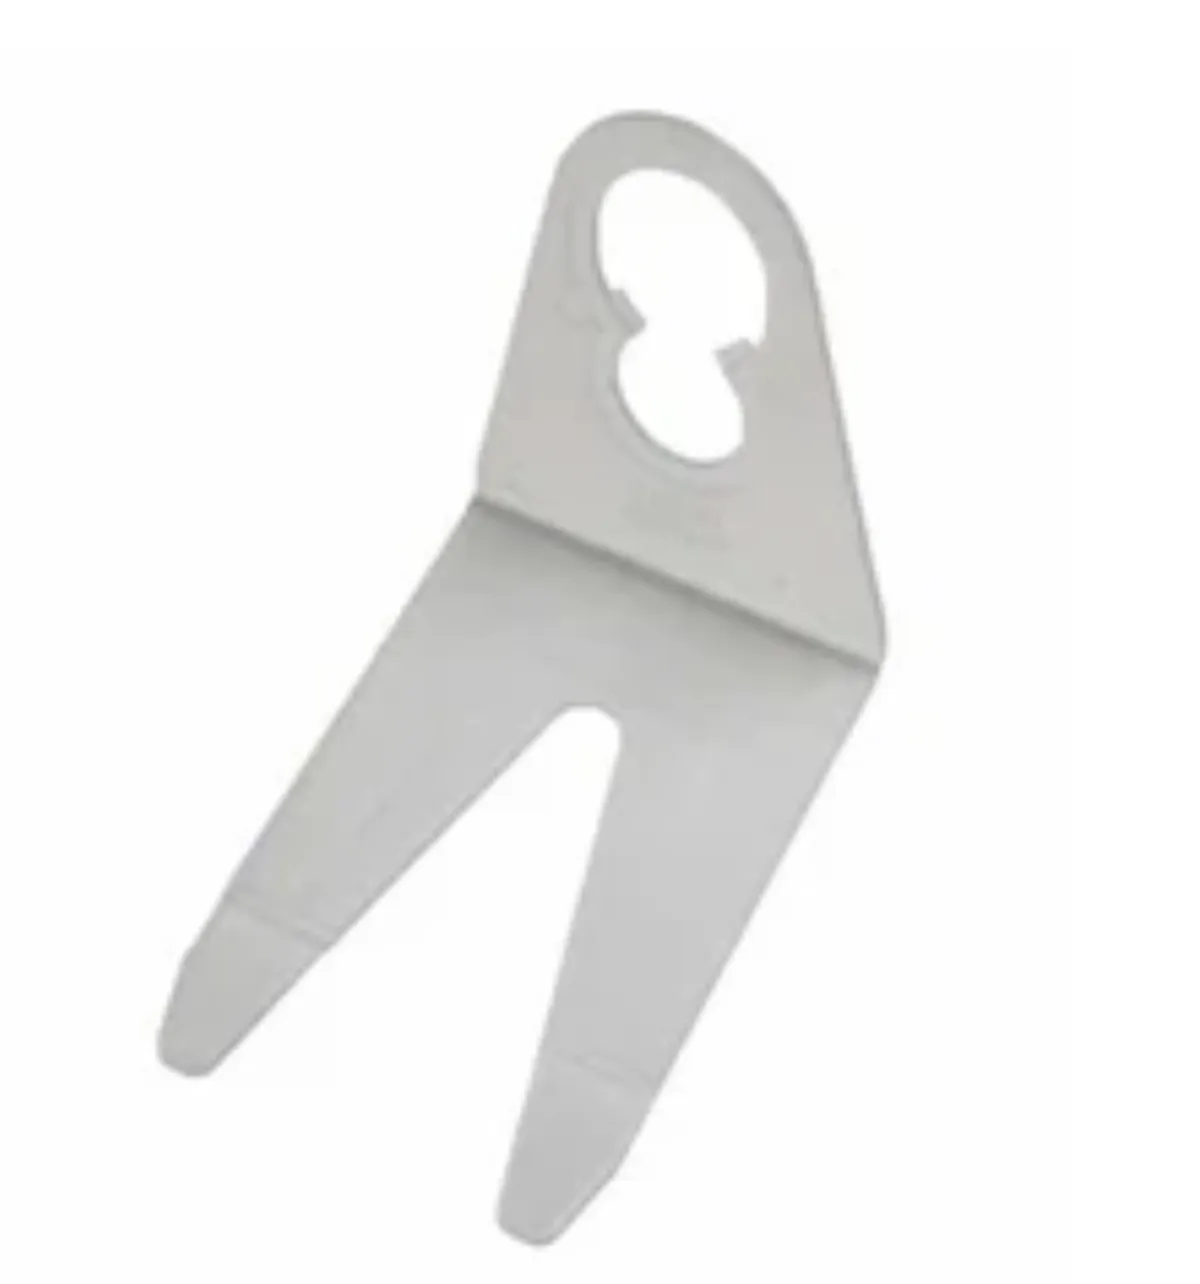
Best Tuff Shingle
Tab Clip
This durable plastic shingle tab, more robust than standard versions, securely holds both C7 and C9 sockets, easily slides under shingles, and versatilely attaches to gutters, decks, and flat surfaces (when paired with a parapet clip), making it the perfect Christmas light accessory for various installation needs.
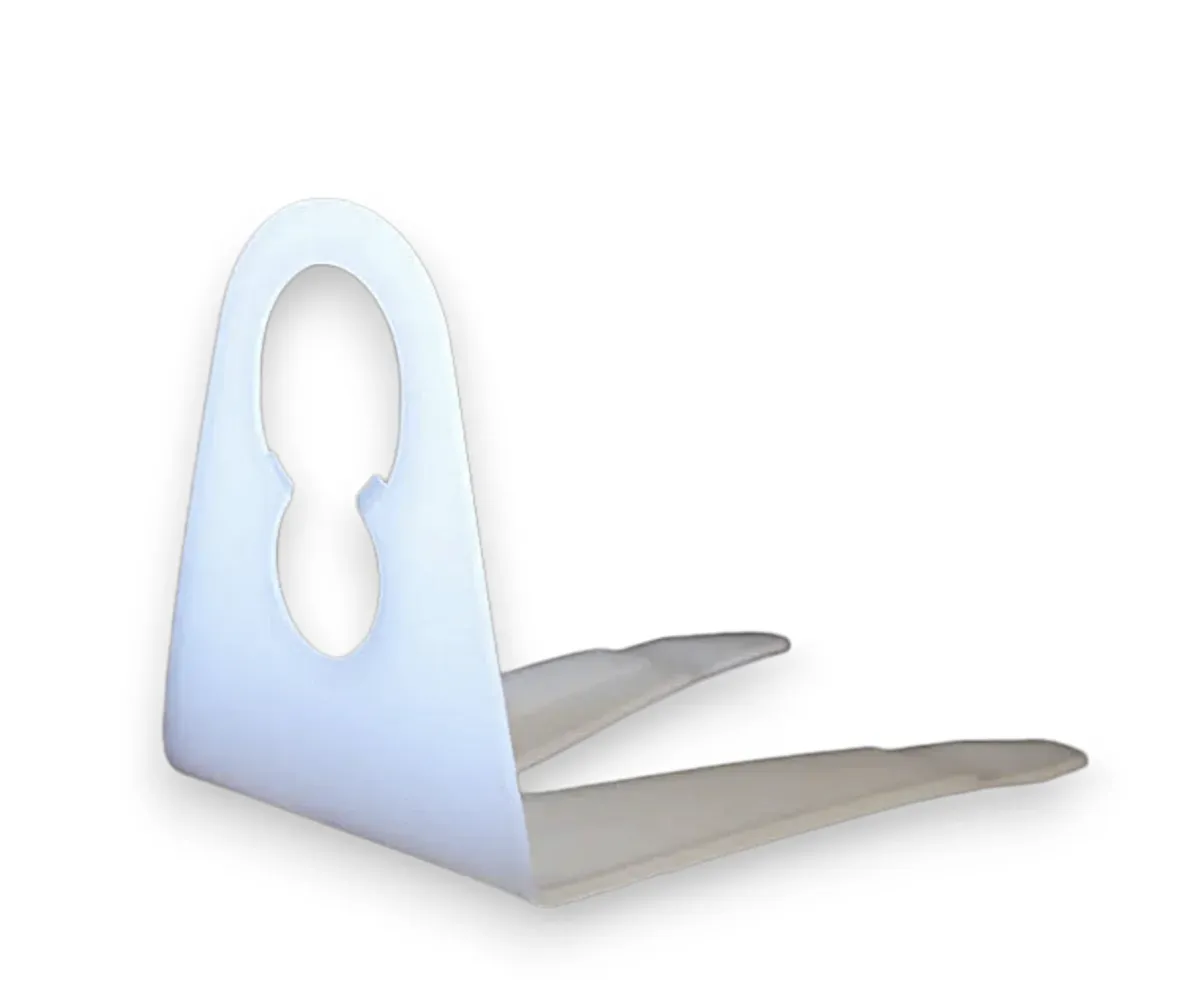
Tuff Tab
Clip
The durable Tuff Tabs, designed for C7 or C9 bulbs, feature Flex technology for easy installation over socketed bulbs, 360-degree rotation, outward-facing positioning on shingles or cedar shakes, two living hinges for secure hold, and weather-resistant construction for professional-grade Christmas light displays.
Christmas Light Ridge Clips

Canny Systems
Ridge Clip Pro
This patent-pending clip securely holds most bulb/socket sizes on asphalt shingles and ridge vents (10", 12") without damaging the roof or compromising shingle integrity, withstanding high winds while eliminating the need to "peel up" shingles during installation.
Magnetic Christmas Lights Clips
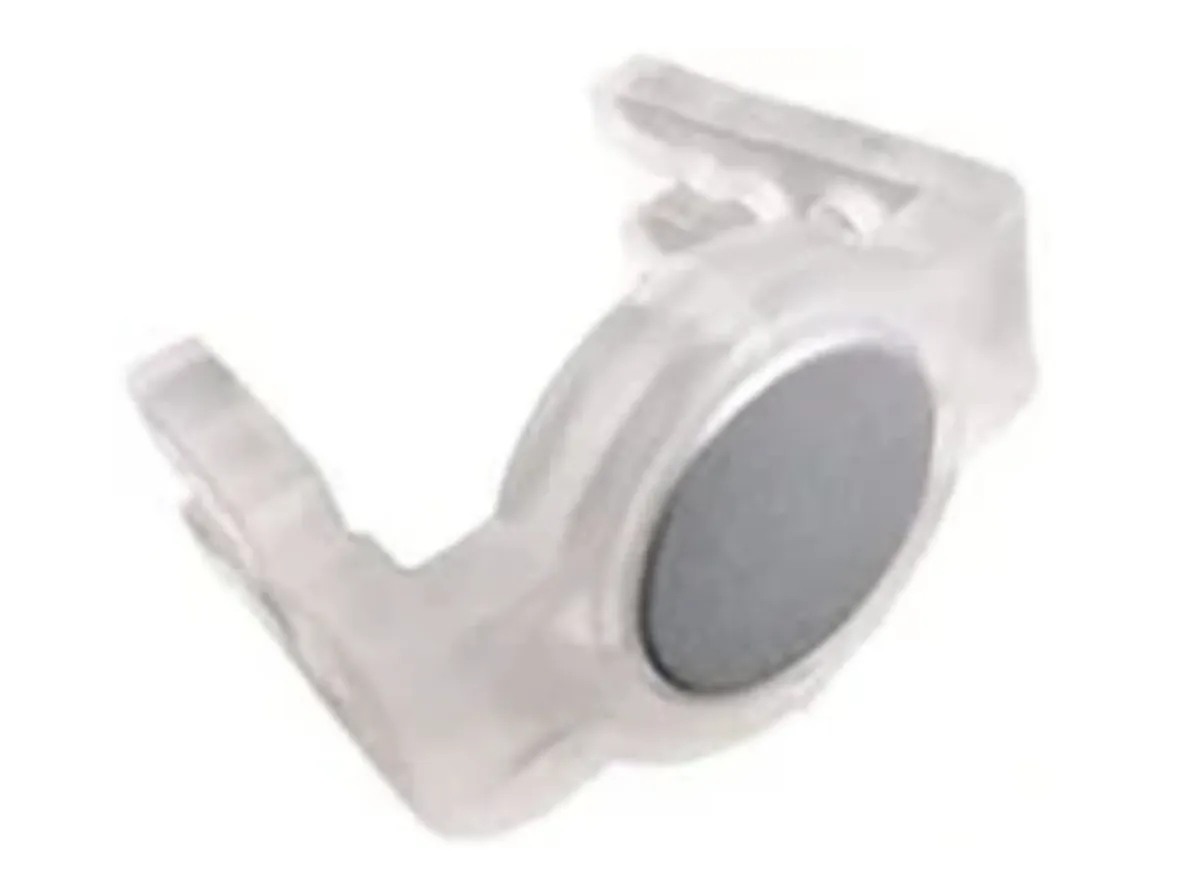
Magnet Clip for C7/C9
Socket Wire
The Magnetic Clip for C7 or C9 Sockets, designed exclusively for SPT-1 wire (not compatible with LED stringer sets), features a high-strength solid magnet that securely holds lights horizontally or vertically on metal surfaces (excluding aluminum), allowing for quick, reusable installations year after year.
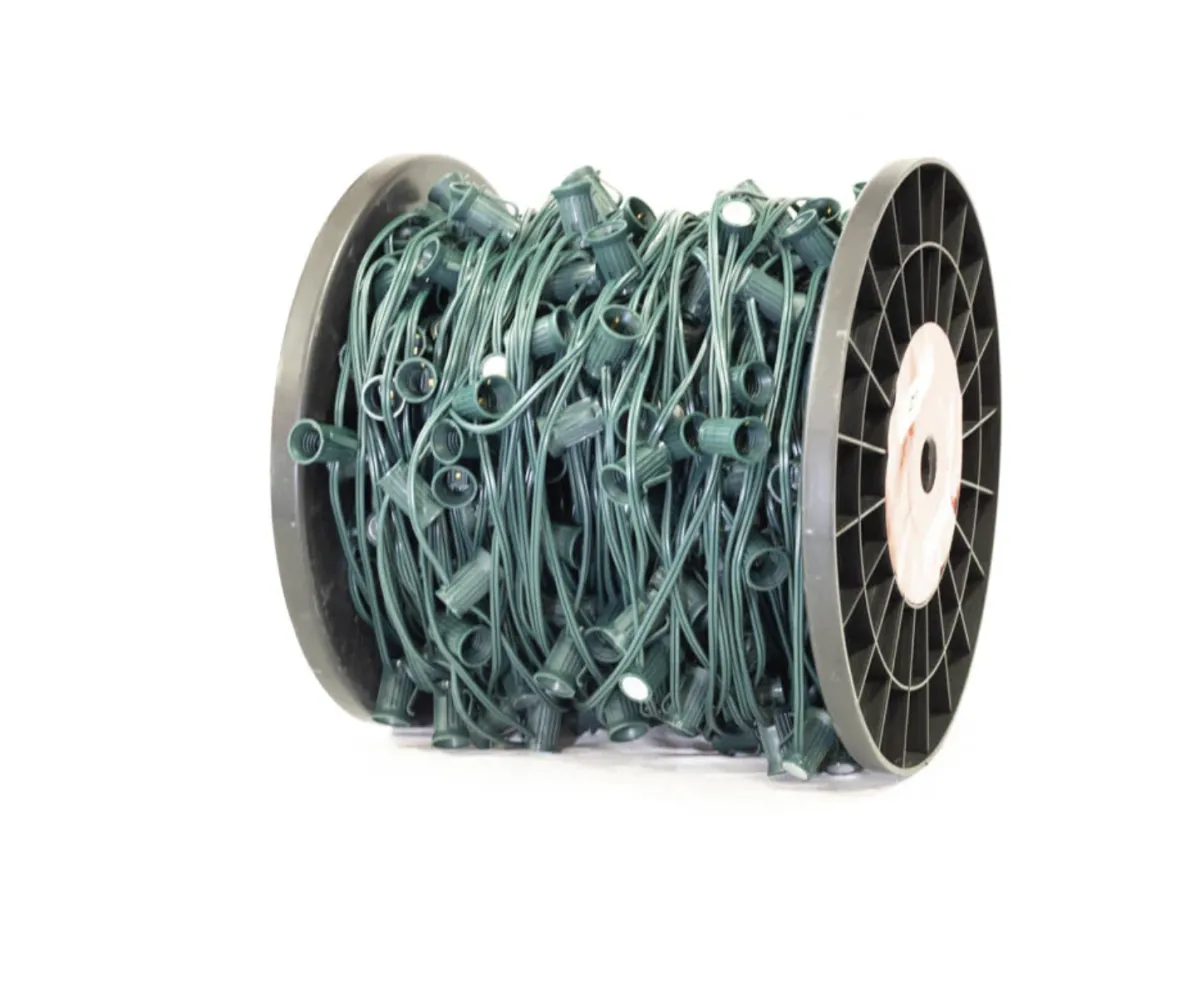
C9 Magnetic Spool
12" Spacing
This versatile lighting solution features heavy-duty, UV-protected 18-gauge SPT-1 wire rated for 840 watts, equipped with rust-resistant nickel-plated C9 magnetic sockets for secure attachment to ferrous metals, 12" spacing, 250' or 500' foot spool, compatible with E17 base incandescent and LED bulbs (sold separately), and suitable for both indoor and outdoor use.
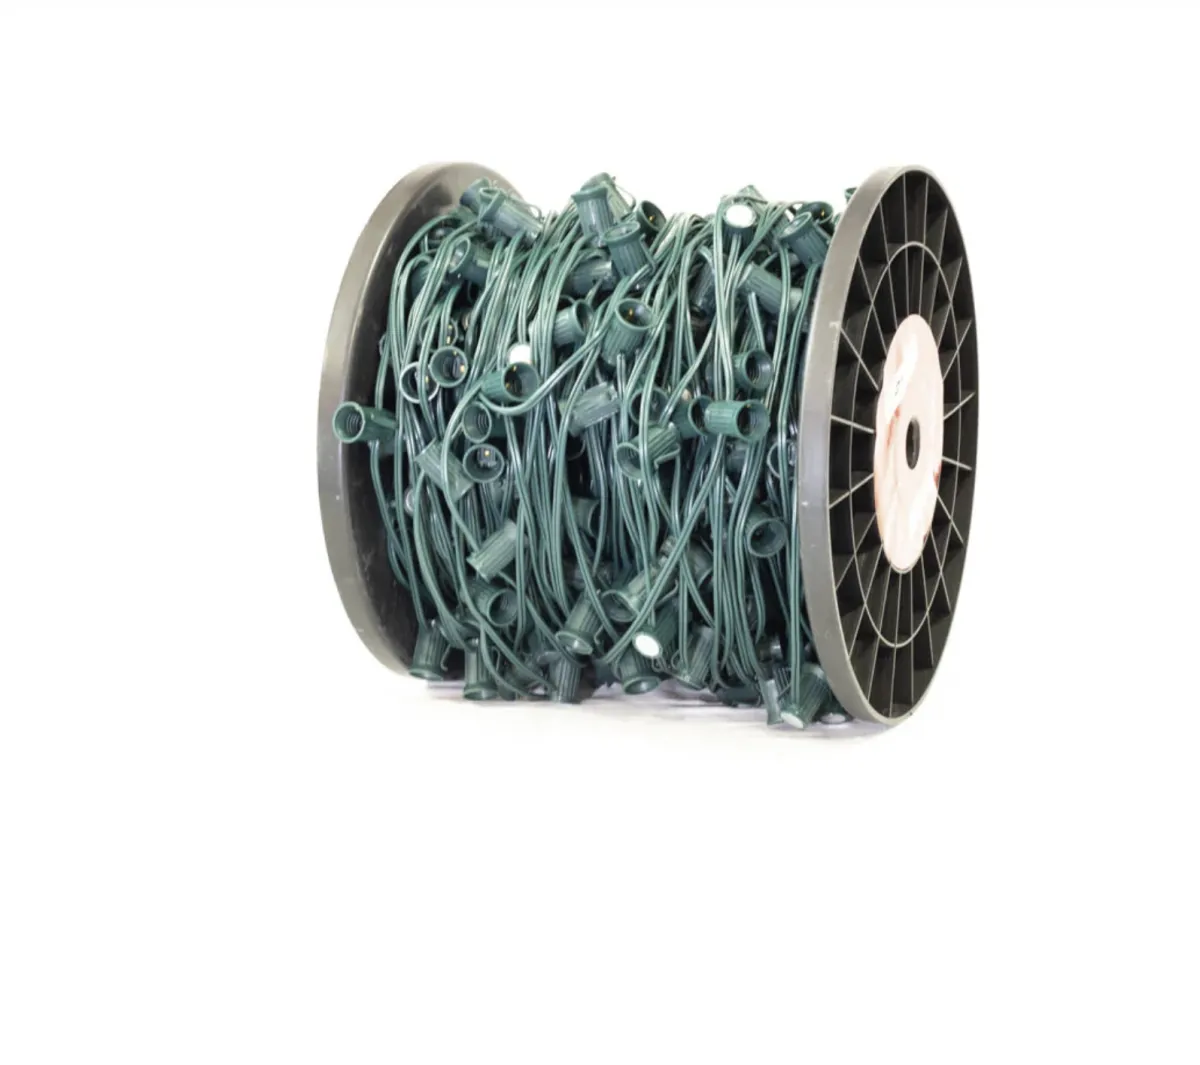
C9 Magnetic Spool
15" Spacing
This versatile lighting solution features heavy-duty, UV-protected 18-gauge SPT-1 wire rated for 840 watts, equipped with rust-resistant nickel-plated C9 magnetic sockets spaced 15" apart on 250' or 500' spools, securely attaching to ferrous metals and compatible with E17 base incandescent and LED bulbs (sold separately) for both indoor and outdoor use.
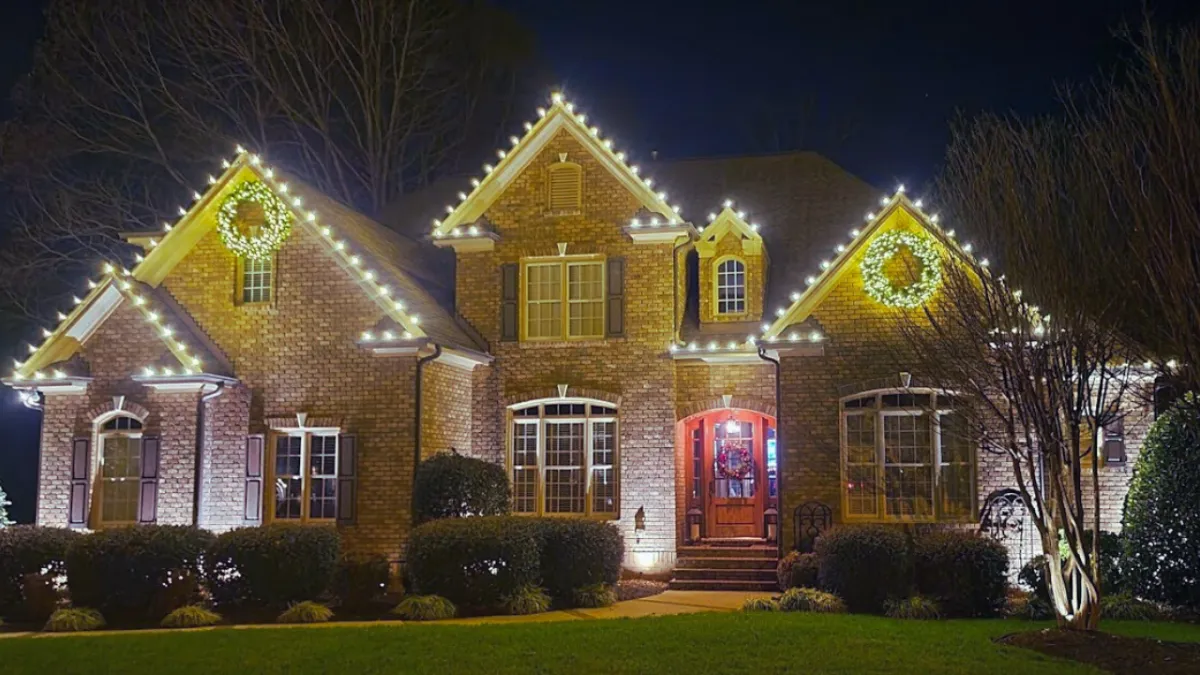
Why Christmas Light Clips Are a Game-Changer
Transform your holiday decorating experience with professional-grade Christmas light clips. These versatile tools are the secret to creating clean, polished displays that withstand the elements all season long. Designed for various surfaces and bulb sizes, quality clips ensure your lights stay securely in place, avoiding the sloppy appearance and frequent adjustments often associated with cheaper alternatives. Easy to install and remove, these clips are favored by professionals nationwide for their durability and neat finish. By investing in commercial-grade clips, you'll save valuable time during both setup and takedown, allowing you to focus more on enjoying the festive season rather than fussing with your decorations. Make your holiday lighting effortless and impressive with the right clips, and elevate your display to a professional standard with minimal hassle.
Christmas Light Clips
for Damage-Free, Professional Displays
Upgrade your holiday decorating technique by replacing staple guns and nails with versatile Christmas light clips. These innovative tools not only protect your home and lights from damage but also allow for easy adjustments after installation. Available in various designs to suit different surfaces like gutters, shingles, and flat areas, light clips can securely hold multiple bulb sizes, including C7, C9, icicle, and mini lights. By switching to clips, you'll preserve your property's integrity, extend the life of your lights, and gain the flexibility to perfect your holiday illumination with ease. Embrace this simple yet effective solution to elevate your decorating process and achieve professional-looking results without the hassle and potential harm of traditional fastening methods.
Frequently Asked Questions
How do Christmas light clips compare to traditional methods like staples or nails?
Christmas light clips are superior to staples or nails because they don't damage your home or lights, allow for easy adjustments and removal, and provide a cleaner, more professional look. They also make it easier to reuse your lights year after year without causing additional wear and tear.
Can using Christmas light clips save time during installation and removal?
Yes, using Christmas light clips can significantly reduce setup and takedown time. They're designed for easy installation and removal, allowing you to spend less time on decorating and more time enjoying the holiday season.
How do Christmas light clips improve the longevity of my holiday lights?
By securely holding your lights in place without pinching or damaging the wires, Christmas light clips help extend the life of your holiday lights. They also protect lights from harsh weather conditions, reducing the need for frequent replacements.
How do professional-grade Christmas light clips contribute to a better overall display?
Professional-grade clips ensure your lights stay in place, creating a neat and uniform appearance. They allow for precise positioning and spacing of lights, resulting in a polished, high-quality display that enhances your home's festive appeal.
What surfaces can Christmas light clips be used on?
Christmas light clips are designed for use on various surfaces, including gutters, shingles, and flat areas. There are also specialized clips for different applications, such as ridge clips and all-purpose clips.
How do Christmas light clips benefit holiday decorating?
Christmas light clips offer several benefits: they protect your home and lights from damage, allow for easy adjustments after installation, work on various surfaces, securely hold multiple bulb sizes, and help achieve a professional-looking display without the hassle of traditional fastening methods.
Discover Expert Tips on Our Blog
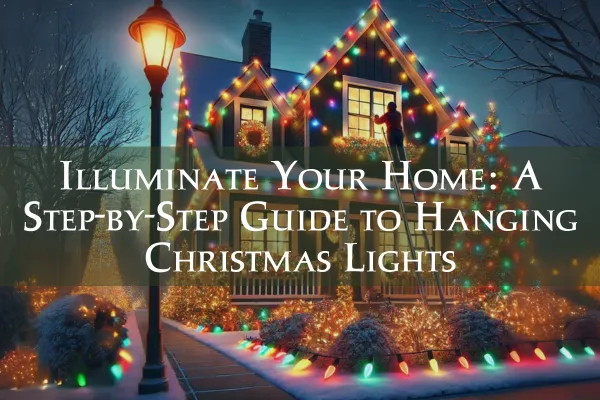
Step-by-Step Guide to Hanging Christmas Lights
The holiday season is upon us, and what better way to spread festive cheer than by illuminating your home with beautiful Christmas lights? Whether you're a seasoned decorator reusing your beloved lights or a beginner ready to embark on your first holiday lighting project, our comprehensive guide is here to assist you. From selecting the perfect lights to the final magical flick of the switch, we’ll walk you through every step to ensure your light hanging experience is not only easy but also a whole lot of fun. Get ready to transform your home into a dazzling winter wonderland that captures the joy and wonder of the season!
Step 1: Essential Materials for Hanging Christmas Lights Like a Pro
Hanging Christmas lights doesn't have to be a daunting task. With the right tools and some basic know-how, anyone can transform their home into a festive wonderland. Here’s what you need to get started:
Choosing the Right Christmas Lights
Before you can hang your Christmas lights, you obviously need to pick the right ones! Whether you're setting up for the first time or planning a brand-new design, selecting the right type of lights is crucial. We offer DIY Easy Starter Packages along with a wide variety of Christmas lights to fit any theme or style.

Timers and Controllers
To really professionalize your setup, consider incorporating timers and controllers. These devices allow you to set your lights to illuminate and turn off automatically, ensuring your home is lit up at just the right time every evening, even when you’re not there. It's a fantastic way to manage your light display efficiently and ensure your home spreads holiday cheer even in your absence.
Secure Installation with the Right Clips
Achieving a polished look is all about the details. Christmas light clips are your best friends when it comes to hanging your lights with precision. They are designed for use on gutters, shingles, walkways, windows, and railings, ensuring that every string of lights is securely and neatly displayed. With the right clips, you can avoid common installation pitfalls and achieve a clean, professional-quality finish. For more detailed information on choosing the right clips, check out our blog post: Discover the Different Types of Light Clips.

Other Essential Tools and Supplies
A few additional tools and equipment can make the installation process even smoother:
- Ladder: Ensure you have a sturdy ladder that reaches the height you need safely.
- Adhesive Hooks: Great for surfaces where clips aren’t suitable, these provide a non-invasive way to hang lights.
- Light-Hanging Pole: Ideal for high or hard-to-reach areas, this tool can help you hang lights without a ladder.
Armed with the right materials and a bit of planning, hanging your Christmas lights can be an enjoyable and rewarding experience. Not only will you brighten your home, but you'll also bring joy to everyone who sees your beautifully lit residence. Ready to get started? Check out our extensive selection of lights, timers, and installation tools today and turn your holiday lighting visions into a stunning reality.
Step 2: Measuring Like a Professional
One of the secrets to achieving a seamless and stunning Christmas light display is precise measurement. Professional installers know that guessing the amount of lights needed is a recipe for mid-decorating trips to the store or uneven light distribution. Here’s how to measure like a pro:
Get the Right Tools
Start with a good tape measure. This simple tool is your best ally in determining exactly how many lights you’ll need and the lengths of each string required for your display.
Measure Your Space
Begin at the base of your house and work your way around, carefully measuring along any turns and corners to ensure you capture every detail. Don’t forget to measure doors and door frames, window frames, and any columns or other architectural features you plan to highlight with lights.
Account for Height and Peaks
If your design includes illuminating peaks or high points on your house, safety comes first. Use a sturdy ladder to reach these higher areas, and measure carefully along the area you intend to decorate. Always ensure your ladder is stable and consider having someone with you to spot you as you measure.
Record Your Measurements
Keep a detailed record of all your measurements. This record will not only help you purchase the correct amount of lights but also assist you in planning the layout of your lights. Knowing your exact measurements can save you a lot of time and frustration, allowing you to enjoy the decorating process more fully.
Plan for Extra Length
It’s always a good idea to buy a little more length than your measurements require. This gives you some leeway for adjustments and ensures you won’t run short if your measurements are slightly off or if you decide to extend your display.
By taking the time to measure accurately, you set the foundation for a holiday light display that looks both professional and enchanting. Just like the pros, you’ll be able to create a perfectly tailored and brilliantly lit holiday home that captures the joy and beauty of the season.

Step 3: Evaluating Hanging Surfaces for Optimal Light Installation
To ensure a seamless and secure Christmas light display, it’s essential to thoroughly evaluate the surfaces where the lights will be hung. This step is crucial for both aesthetic alignment and practical installation. Here’s how to assess your home’s exterior effectively:
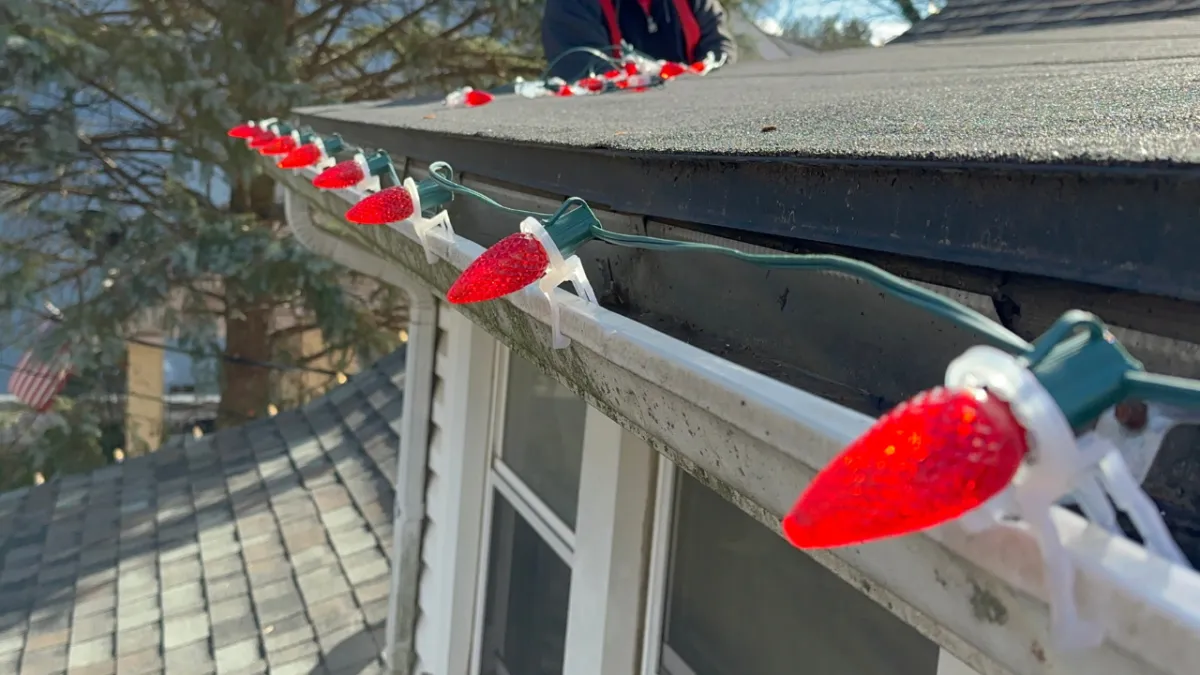
Inspect Your Roofline, Gutters, and Shingles
Start by closely examining the roofline, gutters, and shingles of your home. Each of these surfaces offers potential for installing Christmas lights, but they require different types of clips or fasteners:
- Roofline: Ideal for mounting lights that highlight the shape of your home. Check for any loose sections that may need securing before you start.
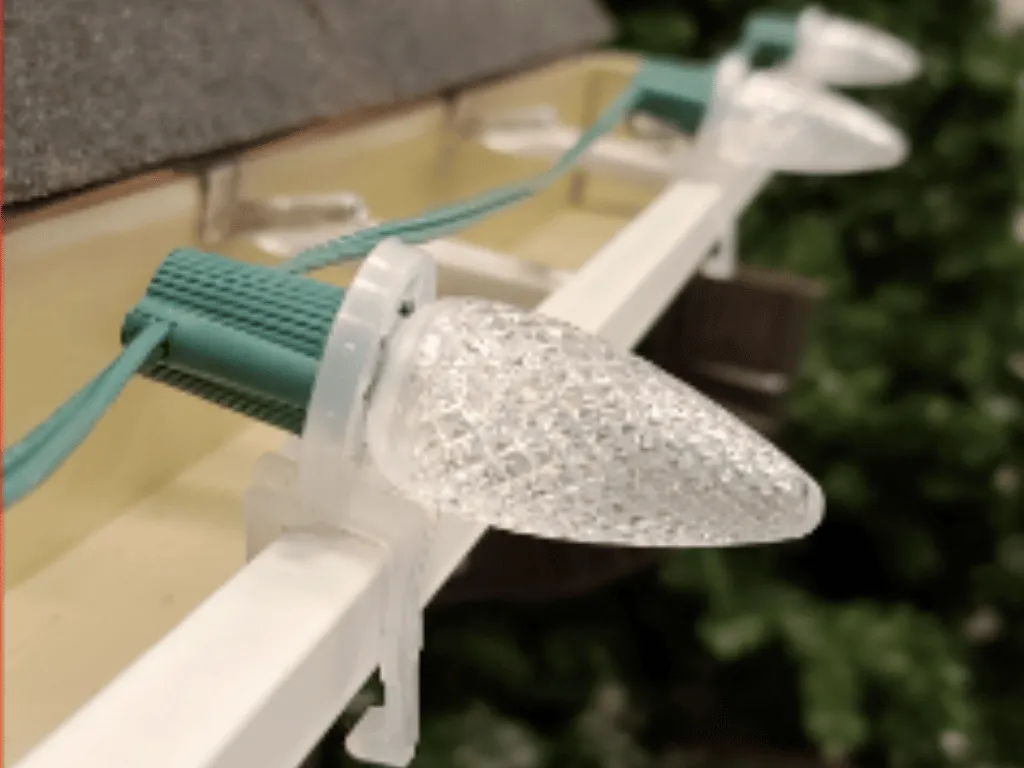
- Gutters: These are great for draping lights and easy to use with universal light clips that clip onto the gutter lip. Check the thickness of the gutter lip to ensure you choose clips that fit securely. For more information on hanging lights on gutters, check out our blog post: How To Hang Christmas Lights on Gutters.
- Shingles: If you prefer to attach lights directly to your roof, shingle clips can slide under shingles without causing damage. Evaluate how tightly the shingles are attached to avoid any that are too loose or worn out.

Assess Power Source Availability
Identifying accessible power sources is next:
- Outdoor Power Sources: Many new homes come equipped with outdoor outlets, which are ideal for exterior light installations. Ensure they are functional and safely located where they won’t be exposed to water.
- Indoor Power Sources: Older homes may not have outdoor outlets. In such cases, you might need to run a power cord from an indoor outlet. Check for a practical path that minimizes the risk of tripping over cords or creating hazards. You may run the cord through a window or a door, using a flat extension cord to keep it secure and unobtrusive.
Measure for Power Cords
Once you've located your power source, measure the distance to the starting point of your light display. This measurement is vital to determine the length of the power cord needed to ensure that every light is powered without overstretching or leaving loose cords that could be hazardous.
Prepare for Surprises
Especially for first-timers, unexpected challenges can arise when hanging Christmas lights. Whether it’s an oddly shaped gutter that makes clip placement tricky or an underestimated distance to the nearest power source, being prepared and flexible in your planning can make all the difference.
By taking the time to thoroughly evaluate your hanging surfaces and power source options, you lay a strong foundation for a successful installation. This proactive approach not only enhances safety but also ensures that your holiday lights display will shine brightly and reliably throughout the season.
Step 4: Choosing the Best Christmas Lights for Your Installation
When it comes to decking out your home's exterior for the holidays, selecting the right type of Christmas lights is crucial. Here’s a breakdown of the most popular options suited for hanging on roofs or gutters and how to choose the best one for your project:
Types of Christmas Lights
Icicle Lights: These are a holiday favorite, especially for roof and gutter decorations. Icicle lights hang down from the roofline, mimicking the winter icicle look. They add a touch of whimsy and a wintry feel to your home’s façade.
C7 and C9 Bulbs: These traditional Christmas light bulbs are favorites for their visible size and brightness. C7 bulbs are slightly smaller than C9s, but both can be seen from greater distances, making them perfect for outdoor displays. Check out our blog post: C7 vs C9 Christmas Lightbulbs: Which to Choose? for further reading.

Purchasing Options
- Separate Bulbs and Stringers: Buying bulbs and stringers separately offers the most flexibility. This option allows you to customize the color of the wires to match your home’s exterior, easily replace any burnt-out bulbs, and switch out colors from year to year if desired.
- Commercial Light Sets: These are convenient as they come with bulbs and stringers together. If you’re looking for a quick and easy setup, commercial sets might be the way to go. They are available with either non-removable or removable bulbs, depending on your preference for permanence and flexibility.
- Pre-lamped Light Strings: These sets come with non-removable bulbs, which means the entire string needs to be replaced if one bulb goes out. While potentially less convenient, they are often more budget-friendly and can still provide a stunning lighting effect.
Customization and Large Projects
For those who have large areas to cover or specific design ideas in mind, purchasing a light spool might be the best choice. You can cut the wire to fit exact measurements of your roofline and landscaping, providing a tailored appearance that off-the-shelf strings can’t match. This option allows for high customization and is particularly useful for intricate or expansive lighting displays.
Considerations for Your Choice
When selecting which lights to purchase, consider factors like:
- Durability: Look for lights rated for outdoor use, capable of withstanding your local winter conditions.
- Energy Efficiency: LED options are available for both icicle and C7/C9 bulbs, offering lower energy consumption and longer life spans.
- Aesthetic: Choose colors and styles that complement your home’s architecture and existing holiday decor.
Choosing the right Christmas lights involves more than just picking the shiniest option on the shelf. By considering your specific needs, the architectural details of your installation surface, and how often you’re willing to update or replace your setup, you can create a holiday display that’s both beautiful and brilliantly customized. Whether you prefer the classic charm of C7/C9 bulbs or the whimsical allure of icicle lights, the right choice will ensure your home shines brightly this festive season.
Step 5: Calculating Christmas Lights Wattage for Safe Installation
When it comes to setting up Christmas lights, managing the electrical load is crucial to ensure safety and prevent any electrical mishaps. Understanding how to calculate the wattage and amperage of your Christmas lights will help you create a dazzling display without overloading your home's electrical circuits.
Understanding Wattage and Amperage
Before you start stringing lights around your home, it's essential to calculate the total wattage and amperage your display will require:
1. Calculate Total Wattage: To find the total wattage of a string of Christmas lights, multiply the wattage per bulb by the number of bulbs on the string. For example, if a string has 50 bulbs and each bulb is 0.4 watts, the total wattage for the string would be 20 watts.
2. Convert Wattage to Amperage: To determine how many amps your string of lights will draw, divide the total wattage by the voltage of your supply (typically 120 volts in the U.S.). Using the previous example, 20 watts divided by 120 volts equals approximately 0.17 amps.

Why This Matters
Understanding the electrical load of your Christmas lights is critical because:
- Prevent Circuit Overloads: Overloading an electrical circuit can trip breakers, blow fuses, and potentially cause fire hazards.
- Ensure Circuit Capacity: Most household circuits are rated for 15 or 20 amps. It's recommended to use only up to 80% of a circuit's capacity to avoid overloads. This means a 15-amp circuit should not exceed 1440 watts, and a 20-amp circuit should not exceed 1920 watts.
Practical Tips for Safe Lighting
- Check Your Circuit Ratings: Before designing your light display, check the amp rating of the circuits you plan to use. This information can typically be found on the circuit breaker or fuse box.
- Spread the Load: If your display requires more wattage than one circuit can safely handle, spread your lights across multiple circuits to balance the load.
- Use a Power Meter: For an accurate measurement of how much power your Christmas lights are actually consuming, consider using a power meter. This device can provide real-time data on the power usage of your lights and help you manage your display more effectively.
By carefully calculating and managing the wattage and amperage of your Christmas lights, you can ensure that your holiday decorations not only look great but are also safe and efficient. Remember, a little planning and calculation go a long way in preventing electrical issues and keeping your holiday season bright and cheerful.
Step 6: Selecting the Right Christmas Light Clips for Secure Installation
One of the most overlooked yet crucial aspects of installing Christmas lights is choosing the appropriate clips. The right clips not only make the installation process smoother but also ensure that your lights hang beautifully and securely throughout the season. Here’s how to choose the best Christmas light clips for your decorating project:
Assess Compatibility
Start by evaluating the surfaces where you'll be attaching the lights, such as the roofline, gutters, or shingles. Each surface may require a different type of clip for optimal attachment:
- Roofline and Shingles: Some clips are specifically designed to fit snugly onto shingles or under roof tiles without causing damage.
- Gutters: Look for clips that can clip onto the front lip of your gutters without obstructing water flow.
Consider Bulb Size
It’s crucial to match the clips with the type and size of bulbs you are using. All-in-one clips are highly versatile and recommended because they accommodate most bulb sizes and are suitable for various applications, whether you're attaching lights to gutters, shingles, or eaves.

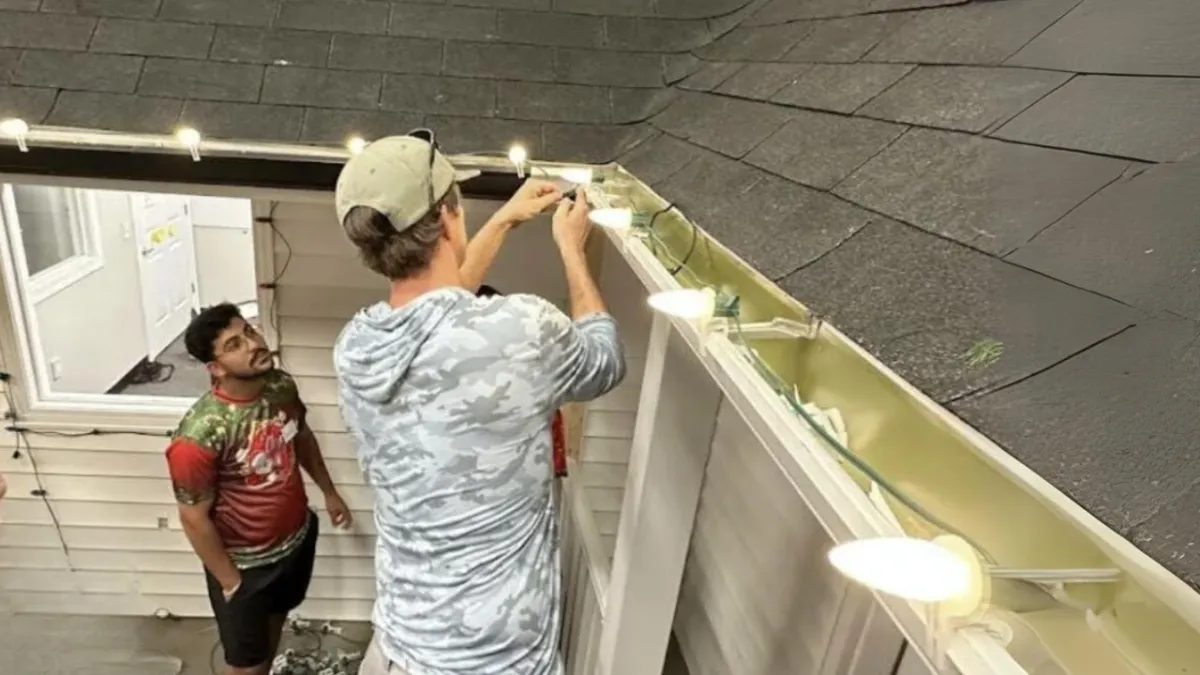
Installation Tips
For a safer and more efficient installation process, attach your Christmas lights to the clips before you climb the ladder. This approach minimizes the risk of tangling and allows you to manage one string of lights at a time. When using incandescent bulbs, extra caution is necessary to prevent them from striking the ladder or walls, which could cause them to break:
- Prepare on the Ground: Assemble your light strings with the clips attached on the ground to reduce the time spent on the ladder.
- Climb Safely: When climbing, ensure the lights are securely fastened and not dangling loosely to avoid any accidents.
Finding the Right Clips
To make an informed choice about which clips will best suit your needs, consult resources such as a Christmas light clips chart. These charts provide detailed information on the compatibility of different clips with various types of lights and surfaces, helping you find the perfect fit for your display.
Additional Resources
For those looking to explore a broader range of options, visiting online stores or local home improvement centers can offer insights into the latest and most effective light clips on the market. These resources often feature customer reviews and installation tips, providing valuable feedback from other users.
Choosing the right Christmas light clips might seem like a small detail, but it's a key step in ensuring that your holiday lighting is not only beautiful but also secure and durable. With the right preparation and the correct clips, you can create a dazzling holiday display that is the envy of your neighborhood.

Step 7: Lighting Up Your Masterpiece
After carefully planning, measuring, and installing your Christmas lights, the moment of truth arrives—it’s time to light up your display! This final step is not only rewarding but also crucial in ensuring your setup is perfect.
Power On and Inspect
The first thing to do is to plug in your lights and turn on the power. As the lights come alive, take a moment to admire your handiwork. This is also the perfect time to conduct a thorough inspection of your display. Walk around your property and look for any bulbs that aren't lit. Sometimes, bulbs can loosen during installation or simply burn out:
- Check Connections: Make sure each bulb is screwed in tightly.
- Replace Faulty Bulbs: Have spare bulbs on hand to replace any that are not working. This ensures your light display remains vibrant throughout the season.
Setting the Timer
For convenience and energy efficiency, setting an outdoor timer for your lights is essential. Timers automate the lighting process, turning your lights on at dusk and off at a specified time:
- Popular Timing: Most homeowners choose to have their lights turn off around midnight. This schedule ensures that your lights stay on long enough to be enjoyed by evening passersby but not so late that they waste electricity.
- Energy Considerations: If energy conservation is a priority, consider setting the timer to turn off earlier, like 11 PM. This still gives ample time for your display to be seen and appreciated without excessive energy use.
Capture and Share the Magic
Once your lights are glowing and your timer is set, don’t forget to capture the magic. Take photos of your illuminated home from different angles:
- Photography Tips: Try taking photos during the blue hour (just after sunset) for a beautiful sky backdrop, or later at night for a focus on the lights themselves.
- Share on Social Media: Upload your photos to Facebook or Instagram and tag us! We love seeing how our tips and products help bring your holiday visions to life. Sharing your success not only showcases your hard work but also inspires others in their festive endeavors.
By following these steps and turning on your Christmas lights, you’ve not only created a festive atmosphere but also brought joy to your neighborhood. Remember, the holiday season is about sharing happiness and warmth, and what better way to do so than with a beautifully lit home?

What are the best types of Christmas lights for outdoor decoration?
- Whether you're setting up for the first time or planning a new design, you can choose from a wide variety of lights. Traditional incandescent bulbs offer a warm glow, while energy-efficient LEDs provide long-lasting brightness and reduced energy consumption.
How do I ensure my Christmas lights turn on at the right time each evening?
- Incorporating timers and controllers with your Christmas lights setup allows you to set your lights to automatically illuminate and turn off. This ensures your home is lit up at just the right time every evening, even when you’re not there.
What are the best clips for hanging Christmas lights on gutters and shingles?
- All-in-one clips are recommended as they work with the largest variety of bulbs and applications, ensuring a secure and neat display on gutters, shingles, walkways, and more.
What other tools might I need for hanging Christmas lights?
- Aside from light clips, consider having a sturdy ladder, adhesive hooks for surfaces where clips aren’t suitable, and a light-hanging pole for high or hard-to-reach areas.
How do I measure my house for Christmas lights?
- Start at the base of your house and measure along turns and corners. Don’t forget to measure doors, window frames, and any other features you plan to highlight with lights. Accurate measurements help avoid mid-decorating trips to the store.

What should I check before purchasing Christmas lights?
- Before purchasing, consider the type of lights that best fit your theme, the wattage for energy considerations, and the length based on your prior measurements to ensure you have enough to cover your intended area.
How can I safely measure high points on my house for lights?
- For high areas like roof peaks, use a stable ladder and have someone with you to ensure safety. Measure carefully to ensure you cover the entire area you plan to decorate.
What should I do if I find that my Christmas lights are not working after installation?
- Check if the bulbs are screwed in tightly or need replacing. Keep spare bulbs handy during installation to quickly swap out any that do not work.

For additional help, check out our blog post: Why are Half My Christmas Lights Out?!
How can I manage the power supply for my Christmas lights effectively?
- Determine the placement of your nearest power source. If your home doesn't have an outdoor outlet, you may need to run a power cord from an indoor outlet, using a flat extension cord to minimize tripping hazards.
Why is it important to use a power meter with Christmas lights?
- Using a power meter can help you monitor how much power your Christmas lights are using, ensuring you do not exceed the safe capacity of your household circuits and helping prevent circuit overloads.
Copyright ©2026 All Right Reserved website designed by christmaslights.io
Terms of Service / Privacy Policy
Have questions or need assistance?
Contact us at (855)619-LITE