

All The Lights, Wire, Plugs, Garland, And Wreaths You Need To Build A Successful Christmas Lights Business
Premium Wholesale Christmas Lights supplies for Professional-Grade Installations
Your One-Stop Shop for Exceptional Christmas Lighting Solutions
Welcome to the ultimate resource for all your Christmas lights installation needs!
We understand the importance of quality, durability, and variety when it comes to building a successful Christmas lights installation business. That's why we offer an extensive selection of everything you need to illuminate the holiday season with brilliance and style.
All Christmas Lights Supplies
Professional-grade Christmas light supplies at unbeatable wholesale prices. Our premium holiday lighting solutions are specifically designed to meet the needs of professional installers, offering the highest quality and durability for stunning and reliable Christmas light displays.

EASY Starter Packages
Kickstart your holiday lighting business with our all-inclusive Christmas lights starter packages. These packages include everything you need, from bulbs and clips to socket wires and extension cords, ensuring you're fully prepared to begin your lighting installations from day one.

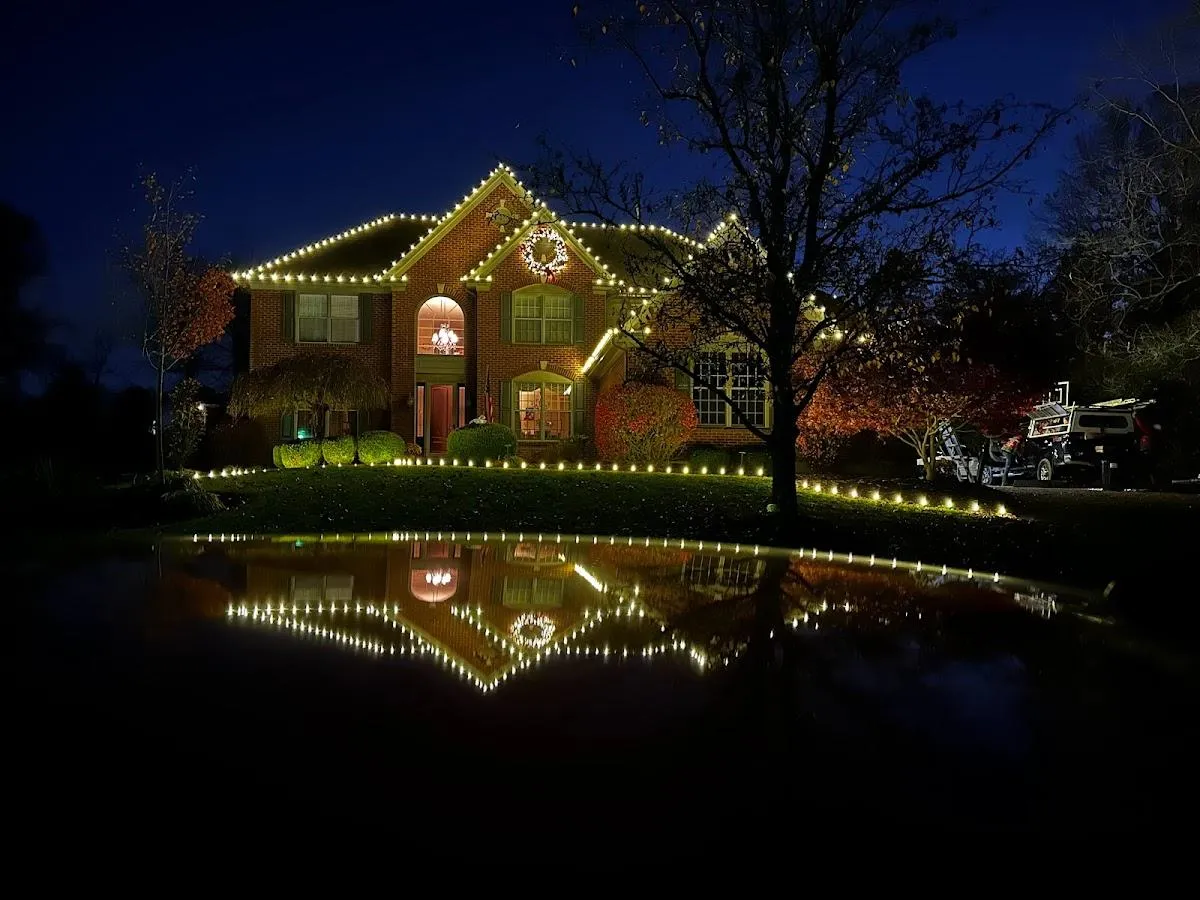
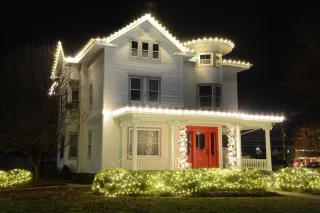
Permanent Christmas Lighting
Celebrate the festive spirit all year long with our premium permanent Christmas lighting solutions. Designed to keep your home or business glowing all year, these lights offer a timeless and elegant way to illuminate your property in any season.
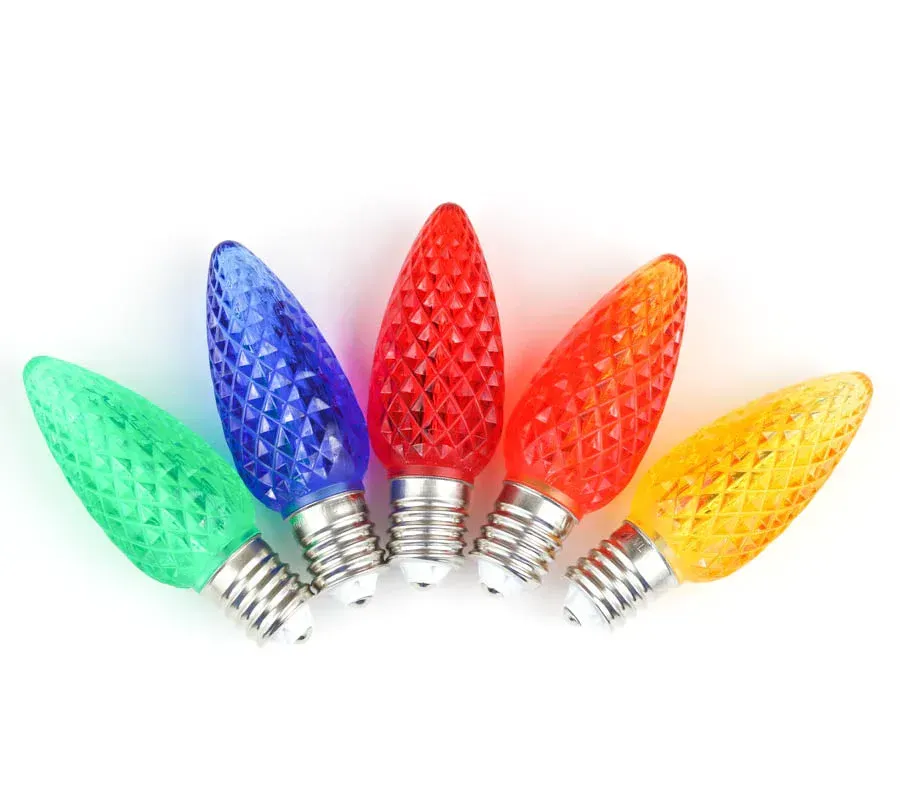
C9 & C7 Christmas Lights Bulbs
Click here to explore and purchase
our premium selection of
C9 & C7 bulbs for the perfect festive glow.
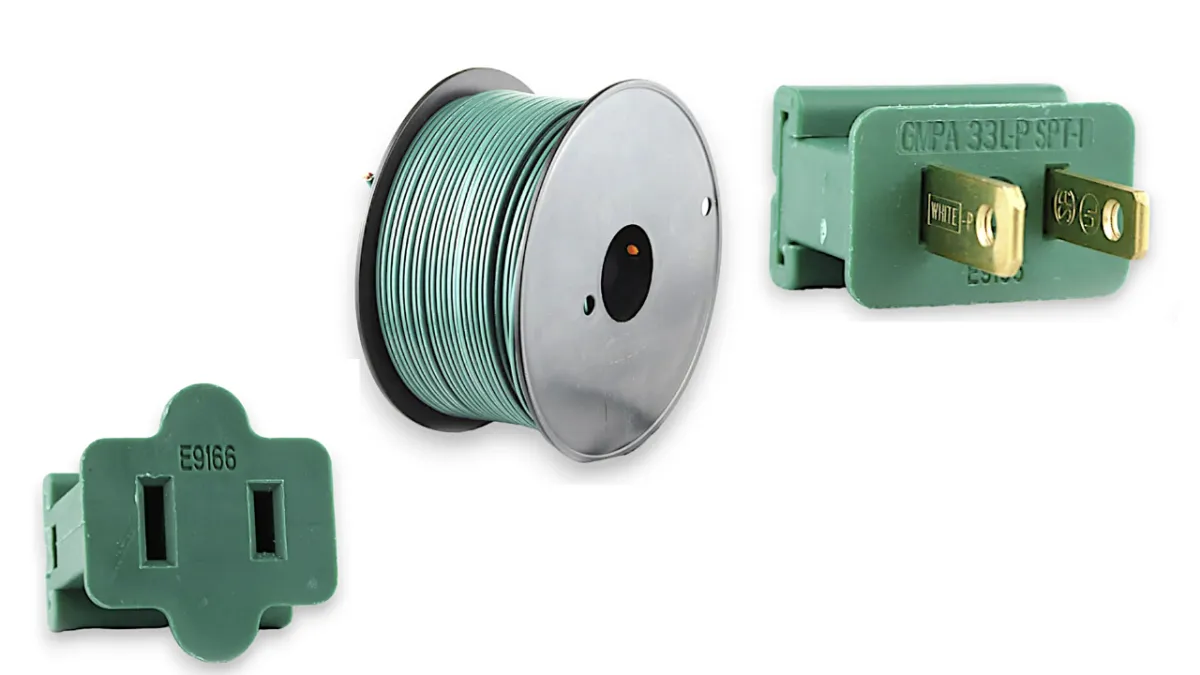
C9 & C7 Cord & Plugs
Discover our range of socket wires, durable plugs, and versatile wiring solutions, essential for creating seamless and safe lighting displays.
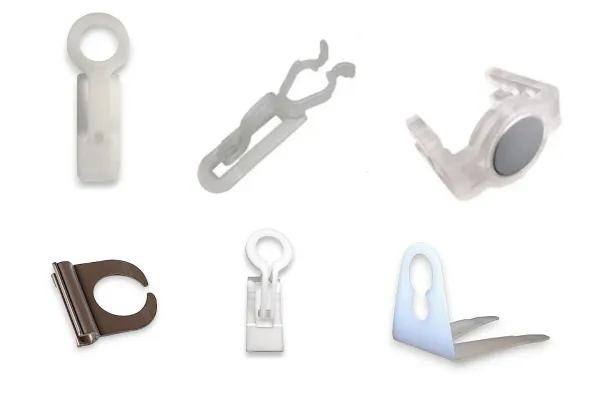
Clips for Christmas Lights
Secure your Christmas lights effortlessly with our premium clips and lighting solutions, ensuring stability and precision in every display.
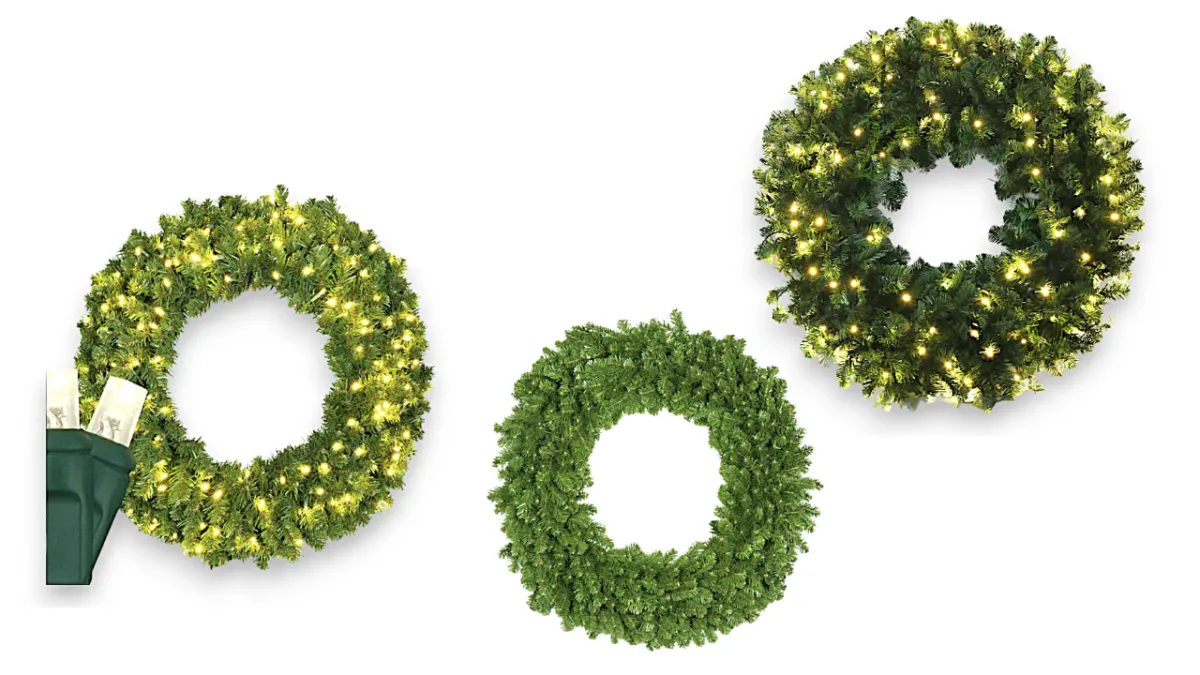
Wreaths
Enhance your holiday decor with our premium 24", 36", 48" and 60" wreaths, featuring pre-lit Evergreen and lush Sequoia Fir options, perfect for creating stunning displays in homes, offices, and commercial spaces.

Mini Lights
Illuminate your holiday displays with our versatile mini-lights, offering a range of colors, lengths, and styles perfect for creating enchanting indoor and outdoor decorations for homes, businesses, and events
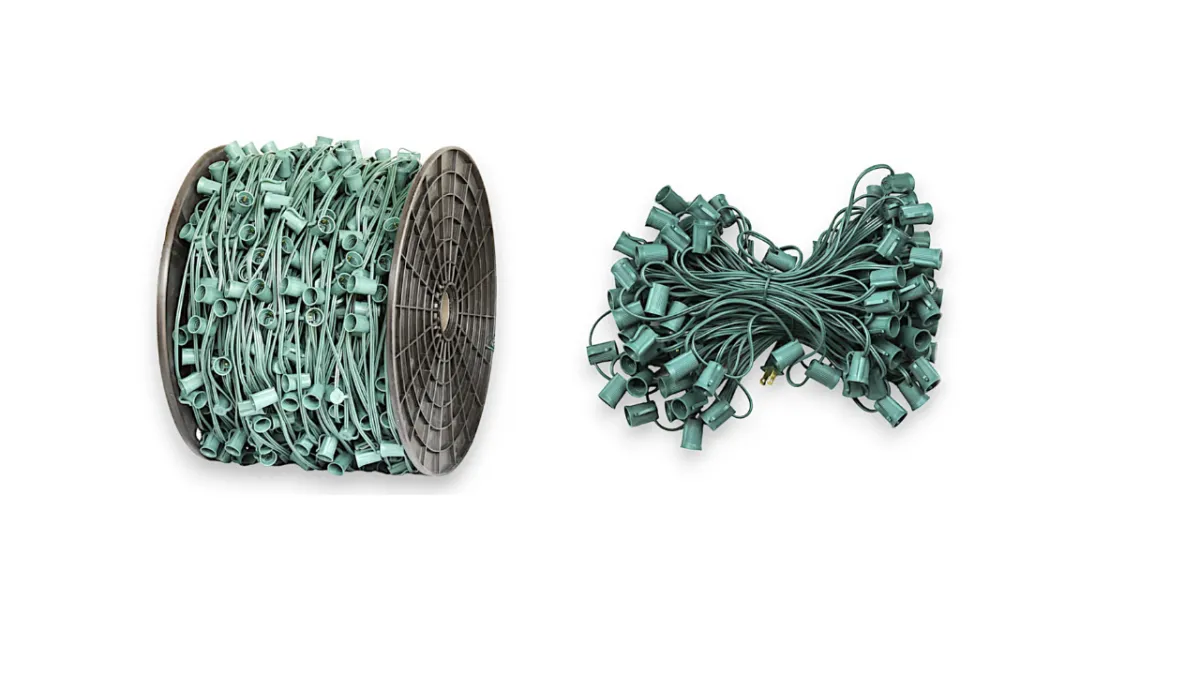
Socket Spools & Stringers
Our premium socket wire spools and stringers are the backbone of professional-grade light displays. From spools with flexible spacing to pre-made stringers for quick setups, our versatile, durable products suit residential and commercial.
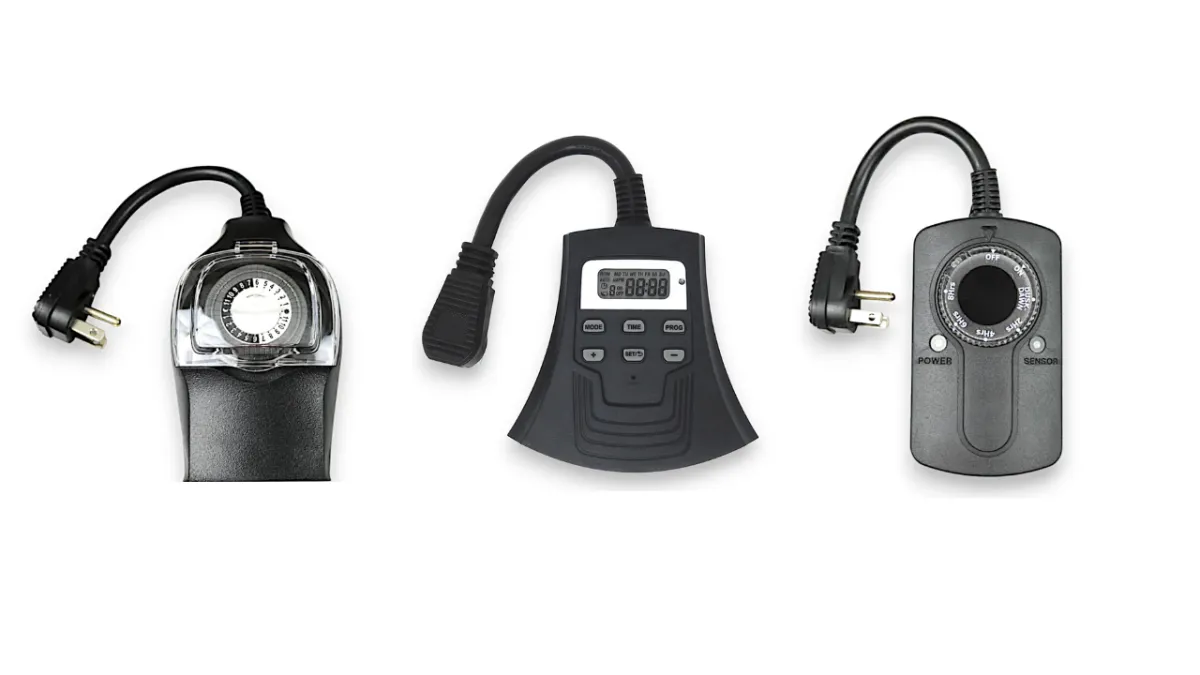
Outdoor Timers
Elevate your holiday displays with our professional-grade outdoor timers, designed for precise lighting control, energy efficiency, and ease of use in both indoor and outdoor settings.
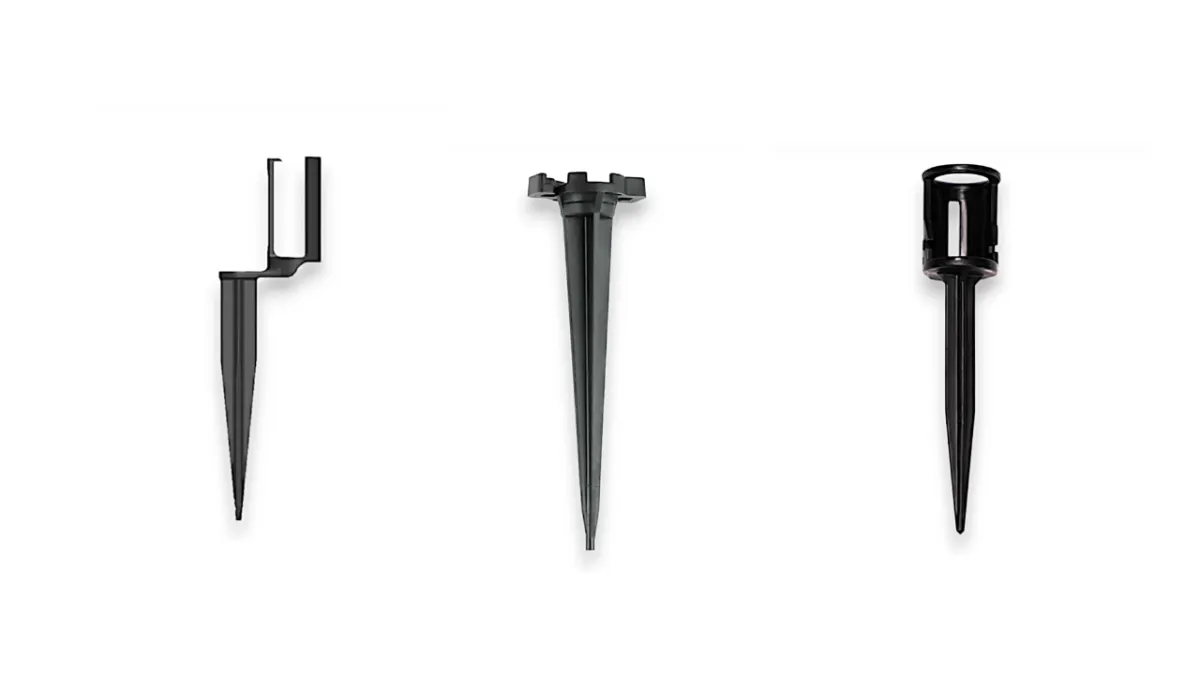
Light Stakes
Ensure your holiday lights stay perfectly in place with our high-quality light stakes. Designed for durability and ease of use, these stakes provide a secure foundation for your outdoor Christmas displays

Patio Lights
Our LED Spritzers stand unparalleled in the realm of festive lighting decor! Their adaptable design offers endless decorating possibilities, from fanning into orbs to laying flat or curling. After the season, their compact nature ensures hassle-free storage.

Garland
Add a touch of elegance and cheer to any space with our selection of pre-lit or unlit garland. Designed for durability, these can be used inside or outside to elevate your Holiday decor.
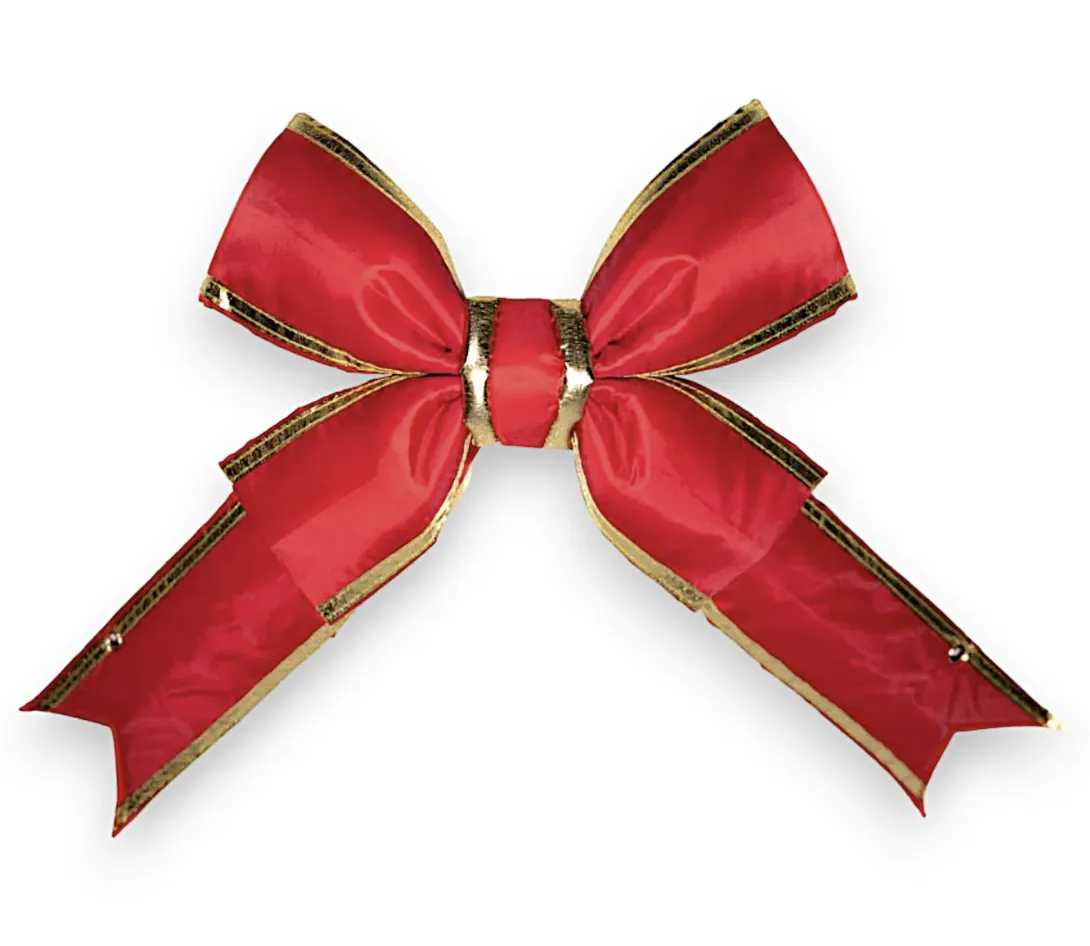
Bows
Enhance both interior and exterior spaces, by adding a cheerful touch to various holiday arrangements with one of our premium nylon bows. Great on wreaths, doors, fences, poles etc.
Discover Expert Tips on Our Blog

Simplify Metal Cutting with DeWalt's 20V Max XR
Metal cutting is an essential skill in many DIY projects, especially when it involves precise installations like permanent Christmas lights. A common challenge for many is achieving clean, precise cuts without damaging the material or ending up with a jagged finish. The DeWalt cutter emerges as a practical solution, offering ease and precision. This blog explores how to effectively use the DeWalt cutter, ensuring your metal cuts are not just good, but exceptional.
Unboxing the DeWalt Cutter
Initial Impressions
Upon opening the DeWalt cutter's box, you're greeted with a robust tool that promises durability and precision. The package typically includes a variety of blades—each suited for different materials, but for our purposes, the metal blade is our focus. The heft and grip of the tool suggest it's built for heavy-duty tasks, yet it's designed ergonomically to prevent user fatigue during extended use.
Setting Up
Setting up the DeWalt cutter involves a straightforward process:
1. Blade Installation: Begin by removing the blade guard to access the blade slot. The metal blade included is specifically designed for slicing through metal with minimal burr and heat generation.
2. Securing the Blade: Utilize the provided tool to loosen the retaining bolt, insert the blade, ensuring it's seated properly, and then tighten the bolt. The cutter’s design features a reverse-thread system, which might feel counterintuitive (lefty tighty, righty loosey), but it ensures the blade remains secure under the tool’s high-torque operation.

Preparing for the First Cut
Safety First
Before making the first cut, it's crucial to don safety glasses and sturdy gloves. Metal cutting can produce sharp debris and sparks, which can be hazardous. The DeWalt cutter comes equipped with a blade guard and an emergency stop feature, enhancing safety during operation.
Making the Cut
Marking the metal accurately is key to a perfect cut. Use a permanent marker to draw your cut line clearly. Position the cutter so that the blade aligns with the mark. The tool’s guide light (if available) can help illuminate the line during the cut, ensuring precision.
Practical Cutting Tips
Techniques for Clean Cuts
- Maintain the Tool: Regular maintenance, such as cleaning the blade and lubricating the moving parts, can significantly extend the cutter's life and performance.
- Operate at the Right Speed: Adjust the cutter's speed based on the thickness and type of metal. Slower speeds are better for thicker, harder metals to prevent blade overheating and wear.
Advanced Cutting Techniques
- Angled Cuts: For angled cuts, adjust the blade guard to the desired angle. This feature is incredibly useful for creating joins or decorations in metalwork projects.
- Handling Complex Cuts: For intricate or complex cuts, make several shallow passes to gradually achieve the depth, rather than trying to cut through thick metal in one go.

Post-Cutting Cleanup and Maintenance
Cleaning and Storing the Cutter
After use, it’s important to clean the cutter thoroughly to remove any metal filings or debris. Storing the tool in a dry, clean environment will prevent rust and keep it ready for the next use.
Blade Maintenance
Regularly inspect the blade for signs of wear or damage. Replace the blade if it becomes dull or damaged to maintain cutting efficiency. Keeping a few spare blades on hand is recommended for seamless project continuation.
The DeWalt cutter is an indispensable tool for those requiring precise and clean cuts in metal. By following the above guidelines, users can maximize the tool’s capabilities and ensure their projects turn out both successful and safe.

1. What safety gear should I wear when using the DeWalt cutter?
Answer: Always wear safety glasses to protect your eyes from metal debris and sparks. Sturdy gloves are also recommended to safeguard your hands from sharp edges and heat. Additionally, if you are working in a noisy environment or the tool is particularly loud, consider using ear protection.
2. How do I install a blade on the DeWalt cutter?
Answer: To install a blade on the DeWalt cutter, first remove the blade guard to access the blade slot. Use the included tool to loosen the retaining bolt, insert the metal blade ensuring it's properly seated, and then retighten the bolt. Remember, the cutter uses a reverse-thread system, so you'll tighten to the left and loosen to the right.
3. What should I do if the cut isn't clean or precise?
Answer: Ensure the blade is sharp and properly installed. If issues persist, check that you’re using the correct blade type for the metal you are cutting. Additionally, adjust the speed settings according to the metal’s thickness and hardness. Multiple shallow passes may be necessary for thicker or harder metals.
4. How do I maintain the DeWalt cutter?
Answer: After each use, clean the cutter to remove any metal filings or debris. Regularly check and lubricate moving parts to keep them functioning smoothly. Store the cutter in a dry, clean environment to prevent rust and degradation. Blade maintenance is also crucial; inspect blades regularly for wear and replace them as needed.
5. Can the DeWalt cutter make angled cuts?
Answer: Yes, the DeWalt cutter can be adjusted to make angled cuts. Adjust the blade guard to your desired angle before cutting to achieve clean and precise angled cuts. This feature is useful for creating joins or customized shapes in your metalwork projects.

Frequently Asked Questions
What are the essential supplies needed for Christmas light installation?
The basics include bulbs (like C9 or C7), socket wire, clips, plugs, extension wires, and optionally, timers. Check out the Christmas lights starter packages to get everything you need to start.
How do I choose the right type of Christmas light bulb?
Consider the desired look and location. C9 bulbs are larger and often used for outdoor displays, while mini lights are great for trees and bushes.
What is the difference between commercial-grade and residential-grade Christmas lights?
Commercial-grade Christmas lights are designed for heavy-duty use and can withstand harsher conditions than residential-grade lights. They are also typically brighter and more durable.
What are the different types of commercial-grade Christmas lights?
The most common types of commercial-grade Christmas lights are LED, C7, C9, mini, and solar lights.
What are the benefits of using commercial-grade Christmas lights?
Commercial-grade Christmas lights are more durable, brighter, and more energy-efficient than residential-grade lights. They are also more versatile and can be used to create a variety of different looks.
What are the drawbacks of using commercial-grade Christmas lights?
Commercial-grade Christmas lights can be more expensive than residential-grade lights. They may also be more difficult to find.
How do I choose the right type of commercial-grade Christmas lights for my needs?
When choosing commercial-grade Christmas lights, consider the following factors:
Durability: If you are using the lights for a large or outdoor display, you will need to choose lights that are durable and can withstand harsh weather conditions.
Brightness: If you need the lights to be seen from a distance, you will need to choose lights that are bright.
Energy efficiency: If you are using the lights for a long period of time, you will want to choose lights that are energy-efficient.
Versatility: If you want to be able to create a variety of different looks, you will need to choose lights that are versatile.
Cost: Commercial-grade Christmas lights can be more expensive than residential-grade lights. Set a budget before you start shopping.
Where can I buy commercial-grade Christmas lights?
Commercial-grade Christmas lights can be purchased online, at specialty lighting stores, and at some home improvement stores. Best prices are above to buy lights
How do I install commercial-grade Christmas lights?
To test commercial-grade Christmas lights before you install them, simply plug them in and turn them on. If any of the lights do not work, replace them before you put up your display.
How do I store commercial-grade Christmas lights properly?
When you are finished with your commercial-grade Christmas lights, be sure to store them properly in a cool, dry place. This will help to extend the life of your lights.
What is the average lifespan of commercial-grade Christmas lights?
The average lifespan of commercial-grade Christmas lights is 5-10 years. However, this can vary depending on the type of light and how well it is cared for.
How do I troubleshoot commercial-grade Christmas lights?
If you are having problems with your commercial-grade Christmas lights, the first thing you should do is check the wiring. Make sure that all of the connections are secure and that there are no frayed or damaged wires. If the wiring is in good condition, the next thing you should do is check the light bulbs. Replace any bulbs that are burned out.
What is the warranty on commercial-grade Christmas lights?
The warranty on commercial-grade Christmas lights varies depending on the manufacturer. Be sure to read the warranty information before you purchase your lights.
What are the safety precautions to take when using commercial-grade Christmas lights?
When using commercial-grade Christmas lights, it is important to take the following safety precautions:
Always use proper wiring.
Secure your lights to the ground or structure.
Do not overload your electrical circuits.
Be careful when using ladders or other elevated surfaces.
Copyright ©2025 All Right Reserved website designed by christmaslights.io
Terms of Service / Privacy Policy
Have questions or need assistance?
Contact us at (855)619-LITE