

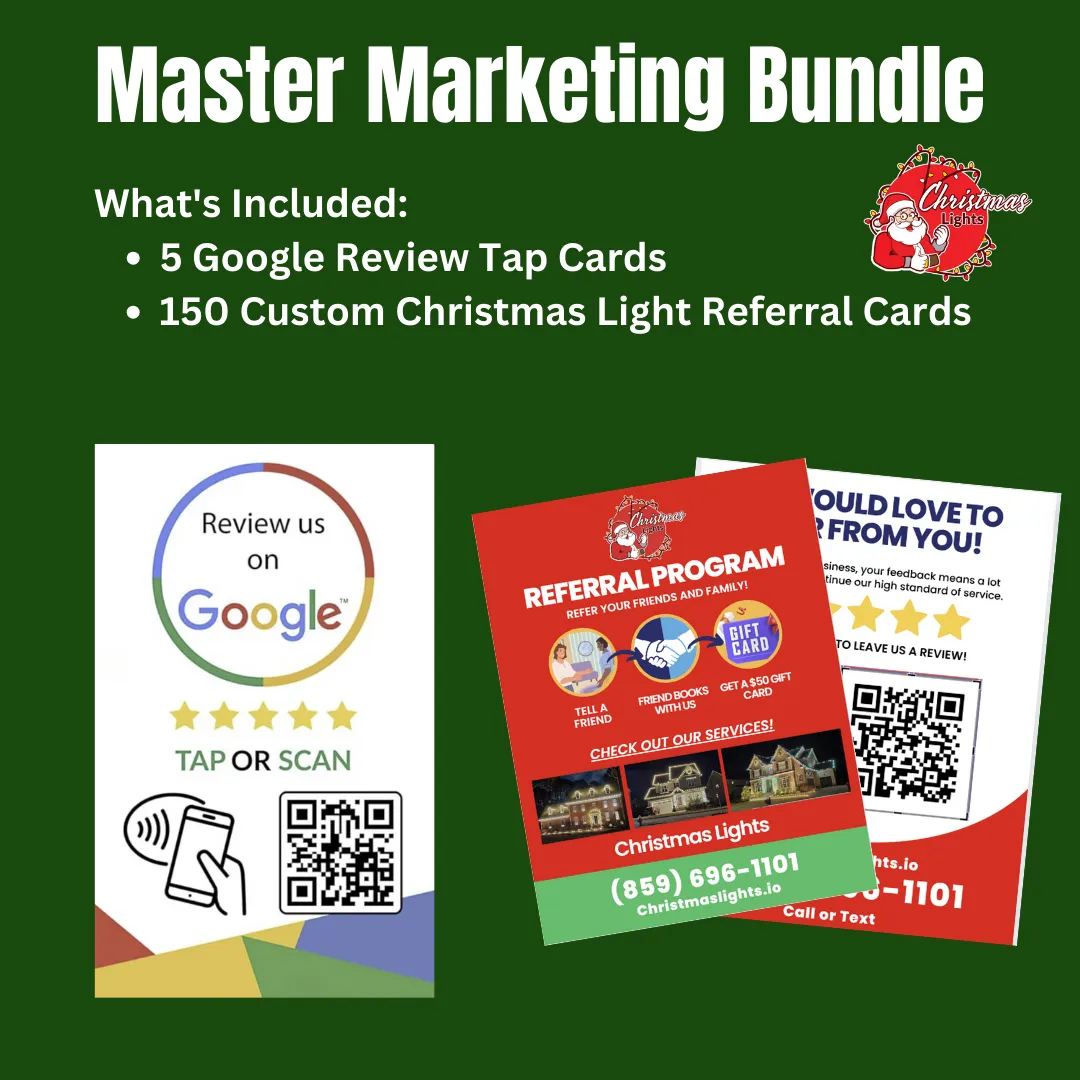
Master Marketing Bundle for Christmas Light Installers
🎄 Supercharge Your Business with Our All-in-One Solution! 🎄
Maximize your marketing impact and save money with our comprehensive package designed specifically for Christmas light installation businesses.
Bundle Includes:
5️⃣ Google Review Tap Cards
1️⃣5️⃣0️⃣ Custom Christmas Light Referral Cards
FREE Shipping!
Key Features:
🔍 Boost Visibility: Stand out online and in your neighborhood. Be the first choice when people search for Christmas light installers.
🤝 Foster Trust: Turn new clients into repeat customers with real testimonials.
📈 Expand Your Reach: Grow your business through referrals. Let satisfied customers bring you new jobs by spreading the word.
⏱️ Reclaim Your Time: Focus on hanging lights while we gather reviews and referrals.
🎩 Elevate Your Image: Look as professional as your work. Impress clients with quality marketing.
Why Choose the Master Bundle?
💰Save Over $75: Compared to buying items separately
🚀Complete Marketing Toolkit: Cover all bases with review
generation and referral promotion
🎯Targeted Approach: Tools designed specifically for Christmas light installers
⏱️Time-Saving: Streamline your marketing efforts with ready-to-use materials
📈Accelerated Growth: Combine the power of reviews and referrals to expand your business
Each bundle comes with:
5 Google Review Tap Cards

🎁Google Review Tap Cards
Boost your online reputation effortlessly
NFC technology for instant review access
Compatible with all smartphones
Complete set up included
150 Christmas Lights Referral Cards

🎁 Custom Referral Cards
Turn happy customers into your best marketers
Eye-catching, double-sided design
Built-in referral program promotion
QR code for easy reviews
Don't let another holiday season pass you by.
Invest in your growth today with our Master Marketing Bundle!
🎄 Get Your Master Bundle Now!
Discover Expert Tips on Our Blog
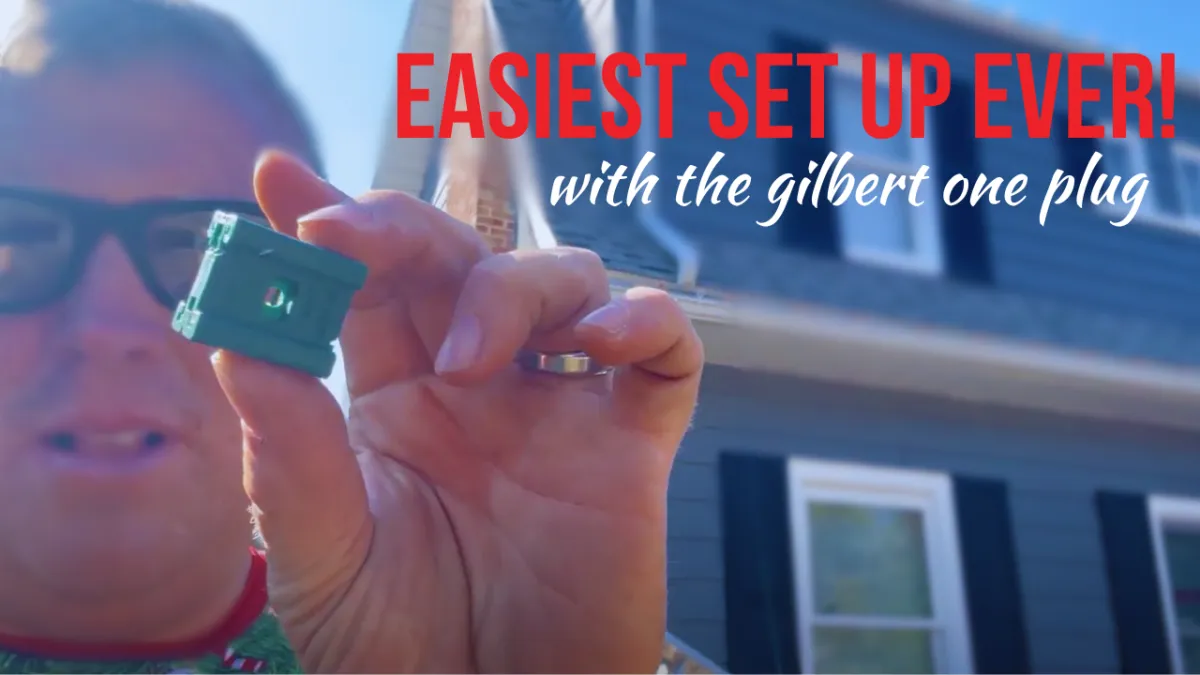
Gilbert One Plug: The Key to Easy Christmas Lights Setup
With the holiday season around the corner, setting up Christmas lights can add a festive touch to any home. However, the process can often be tricky, especially when it comes to managing extensive wiring and ensuring everything looks perfect and operates safely. An invaluable tool in achieving a seamless setup is the all-in-one clip. This blog post will guide you through the efficient use of all-in-one clips, ensuring your holiday lights are not only beautiful but also secure and safely installed.
What You Need
Before you begin, it's important to gather all necessary materials to ensure a smooth installation process:
- All-in-one clips: Suitable for your specific type of lights.
- Power cords: Length depending on your installation area.
- Wire cutters: For adjusting the lengths and fitting of wires.
- Measuring tape: To precisely measure distances between lights.
- Ladder: To reach higher installation points safely.
Choosing high-quality brands for clips and lights can make a significant difference in the durability and ease of your installation.

Step-by-Step Installation Guide
Step 1: Preparing the Power Source
Start by planning the route of your power cord from your power source to the area where you wish to begin your light installation. Lay out the power cord along this path, securing it with temporary fasteners if necessary to prevent any movement as you work.
Step 2: Positioning the All-In-One Clip
The all-in-one clip is designed for easy use. To prepare, simply slide off the two pieces of the clip, ready to attach it to the wire. When choosing where to place your clip, avoid areas directly beneath gutters where water collects; instead, position it slightly off to one side to prevent water damage.
Step 3: Attaching the Clip to the Power Cord
Attach the clip to your power cord by sliding the base of the clip around the wire, making sure it’s snug and secure. If your clip has a cap, now is the time to slide it on. Ensure the clip is positioned in such a way that it can evenly distribute power to both ends of your light string.
Step 4: Securing the Installation
Once the clip is attached, double-check that everything is held firmly in place. Adjust the position if necessary to ensure the clip and the lights are well-supported. This will prevent sagging and reduce the risk of damage from wind or adverse weather conditions.

Troubleshooting Common Issues
While using all-in-one clips generally simplifies the installation process, issues can still arise:
- Clips slipping: Ensure the surface of the cord and the clip are clean and dry before attachment.
- Uneven lighting: Check that the power distribution through the clip is balanced to avoid dim sections.
Maintenance Tips
To keep your Christmas lights shining brightly all season long, perform regular checks to ensure all clips and lights are securely attached and functioning. After the holidays, carefully remove the clips to prevent damage to both the clips and your lights, storing them in a cool, dry place until next year.

1. What are all-in-one clips?
- Answer: All-in-one clips are versatile tools designed to hold Christmas lights securely on various surfaces like gutters, shingles, or siding without the need for nails or screws. They are engineered to make the installation of holiday lights faster, easier, and safer.
2. Why should I use all-in-one clips instead of traditional methods?
- Answer: All-in-one clips provide a uniform appearance to your light display, ensure that lights are securely attached, and minimize damage to your home’s exterior that can be caused by nails or staples. They also allow for quick installation and easy removal.
3. Can all-in-one clips be reused?
- Answer: Yes, all-in-one clips are designed to be durable and reusable. After the holiday season, simply remove them carefully and store them in a cool, dry place. Inspect each clip before reuse to ensure it hasn’t been damaged and is still capable of securely holding your lights.
4. How do I choose the right all-in-one clip for my Christmas lights?
- Answer: Selecting the right clip depends on the type of lights you have and where you plan to install them. Make sure the clip matches the size and shape of your lights and is suitable for the surface you will be attaching it to (e.g., gutter, shingle, or siding).
5. What should I do if my lights start sagging or the clips begin to slip?
- Answer: Ensure that the surface of the cord and clip are clean and dry before attaching them. If slipping occurs, reposition the clip to a more stable part of the cord or replace it if it appears worn out. Regular maintenance checks can help prevent these issues.
These FAQs can assist readers in understanding and troubleshooting common concerns they might encounter while using all-in-one clips for setting up their holiday lights.