Blog
Our Top Blog Posts
The Ultimate Guide to Hanging Christmas Lights on Medium to Tall Trees from the Ground
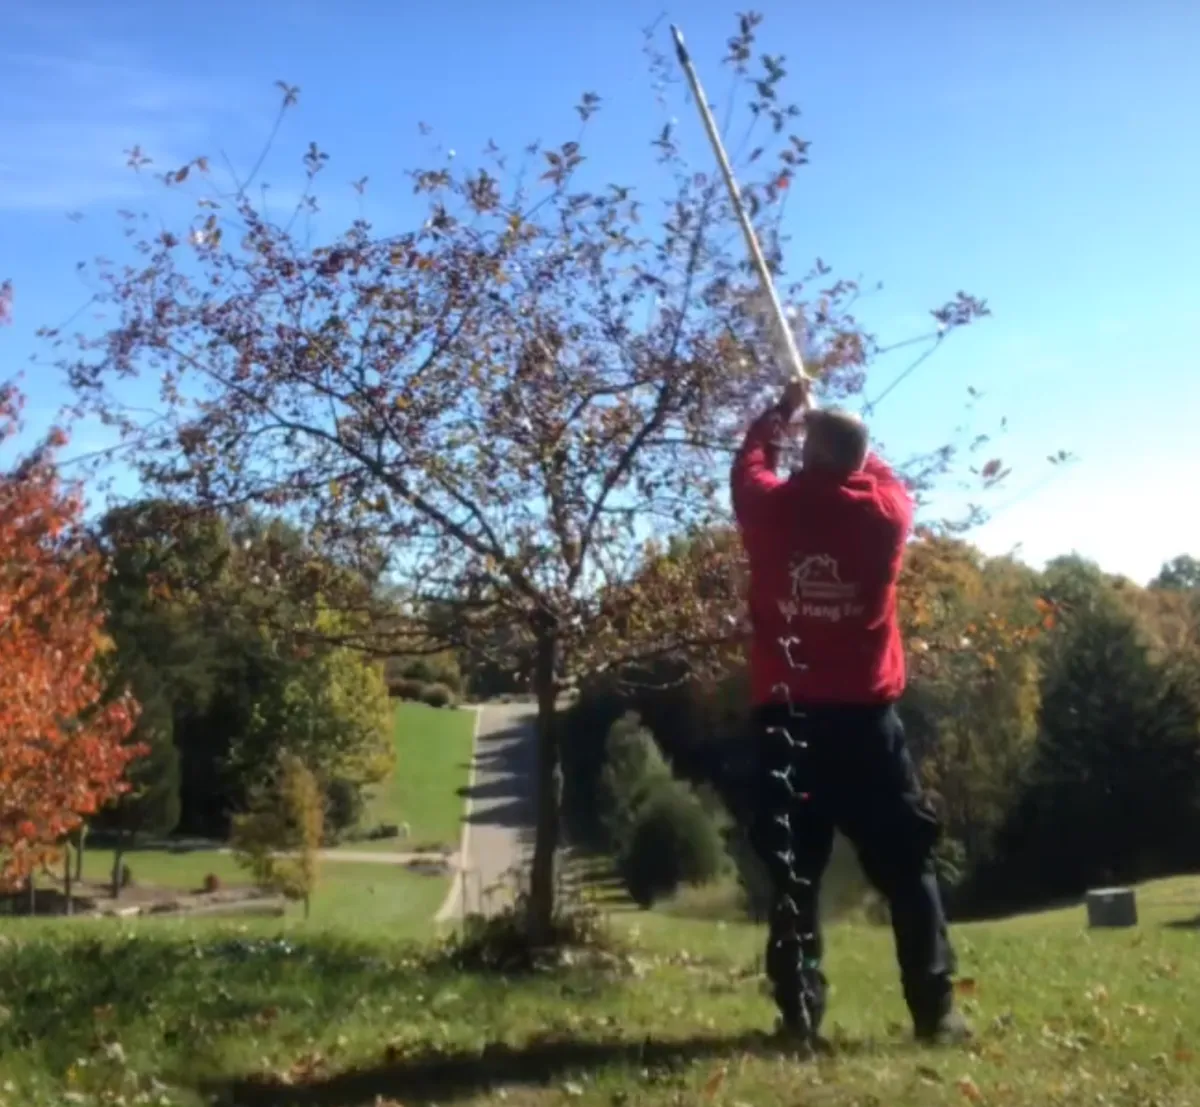
The holiday season is a time of joy, warmth, and, most importantly, lights! Christmas lights, to be precise. There's something truly magical about a tree, whether it's in your front yard or in the heart of your community, twinkling with the warm glow of festive lights. Yet, the challenge often lies in how to adorn these towering trees with lights without the need for ladders, lifts, or even risking a precarious climb. Today, I'm excited to guide you through a simple, yet ingenious, DIY project that will enable you to hang Christmas lights on trees up to 25 feet tall—all from the safety and comfort of the ground.

The Concept
Our mission is to create a versatile tool using a paint roller and Mr. Longarm, a 24-foot extension pole, transforming it into a Christmas light-hanging wizard. The beauty of this DIY project lies in its simplicity and the ingenuity behind using everyday items to solve a common holiday decorating dilemma.
What You'll Need
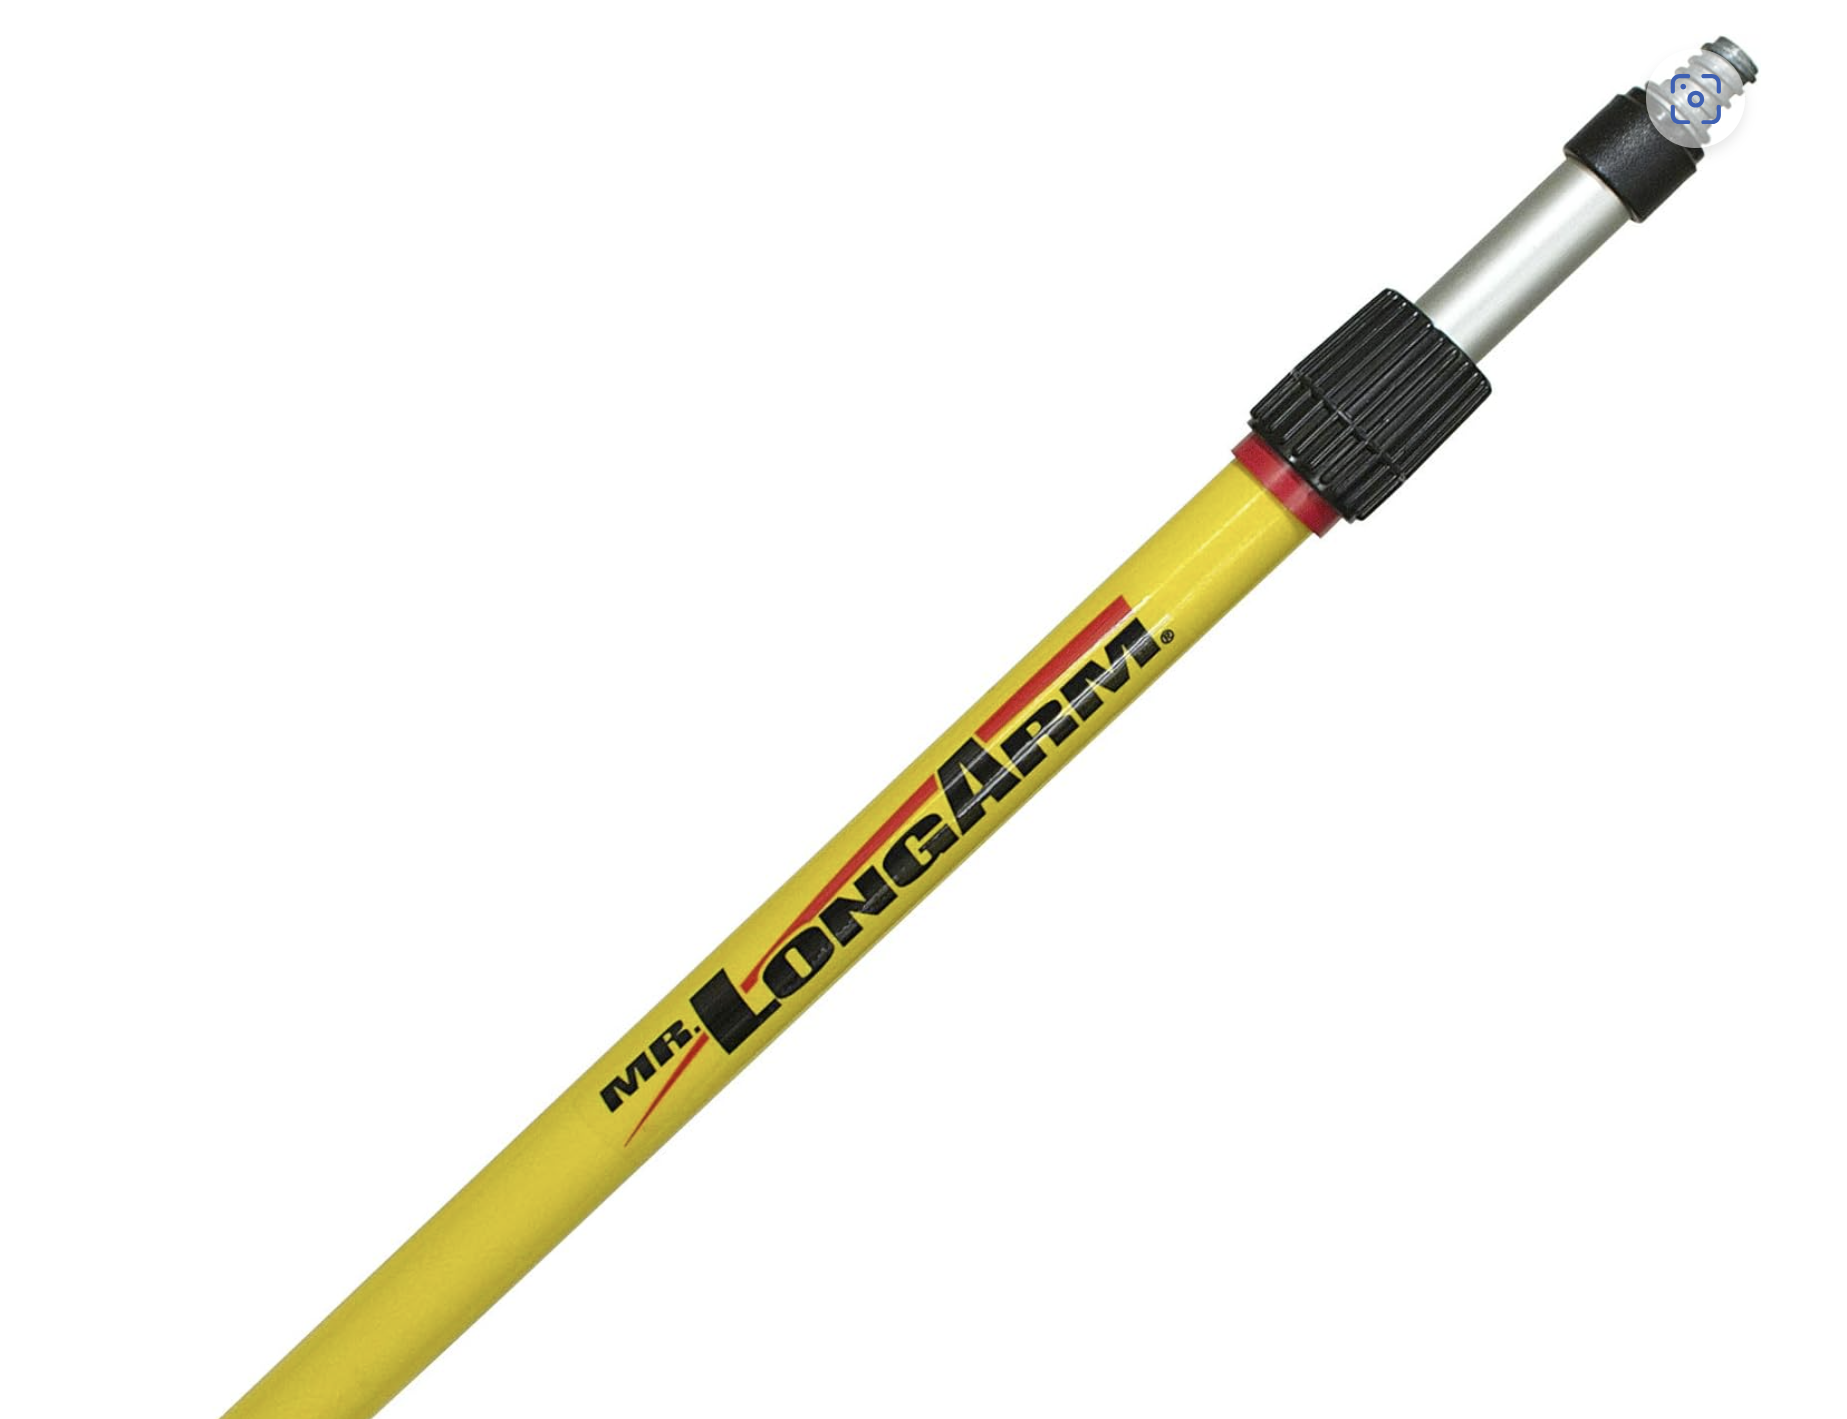
Mr. Longarm 24-foot extension pole: This will serve as the backbone of our tool, providing the reach we need to access the upper branches of tall trees.
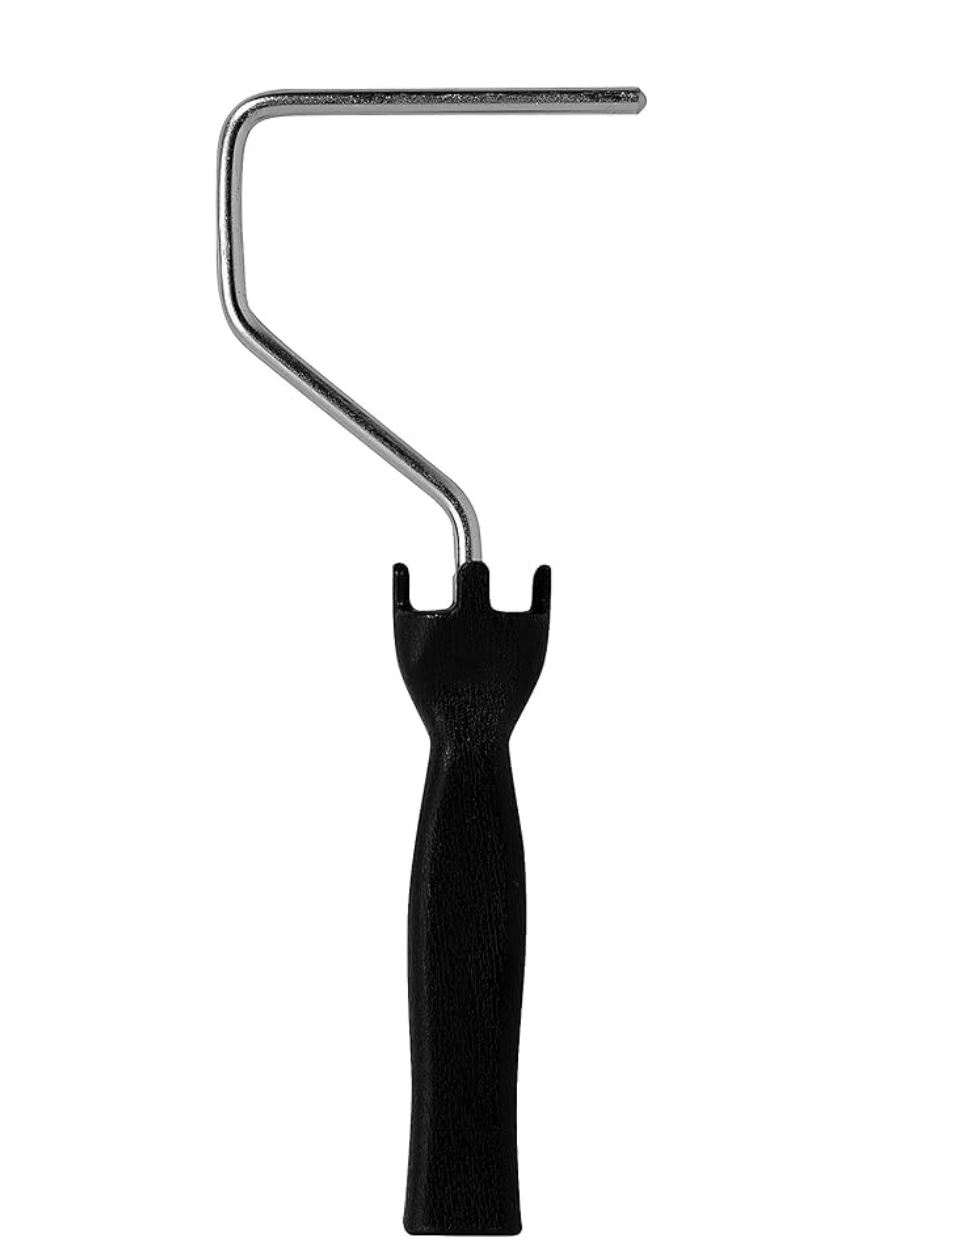
A standard paint roller: This will be modified to become the business end of our tool, responsible for gripping and releasing the Christmas lights.
A piece of metal: Used for modifying the paint roller. This can be anything sturdy enough to bend the roller to our needs—a piece of scrap metal, a bumper, or any similar object could work.
Basic tools: Pliers might come in handy for bending the metal, along with a screwdriver for attaching the modified roller to the extension pole.
The Process
Step 1: Modifying the Paint Roller
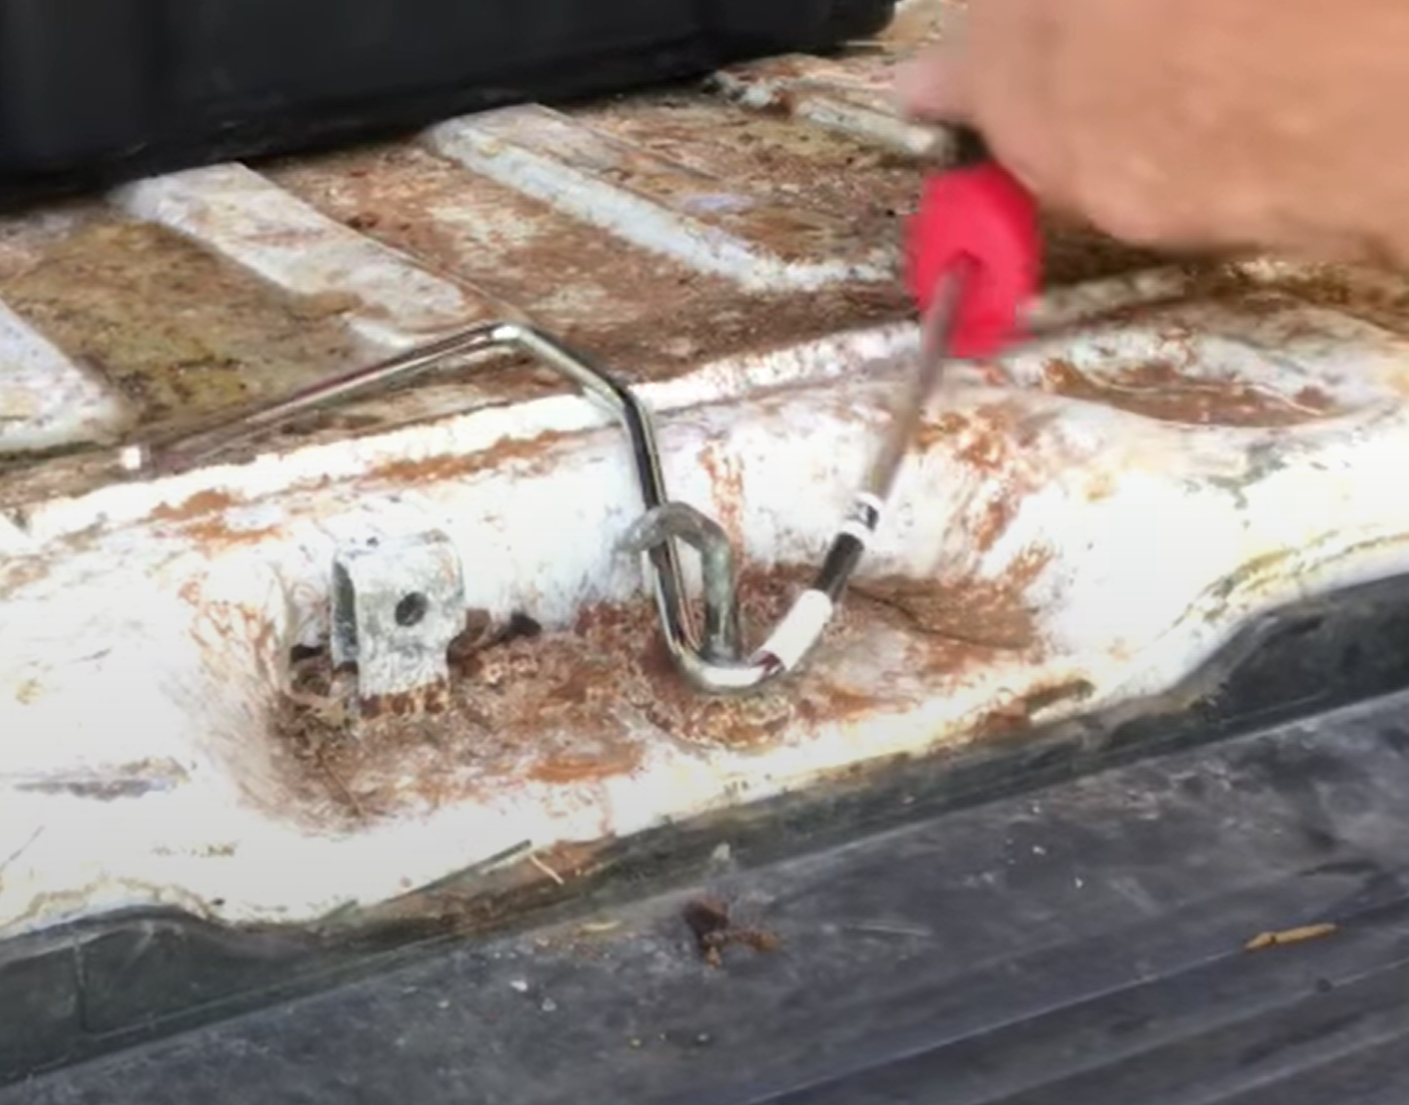
The first step in our project involves transforming the paint roller into a hook capable of grabbing and releasing Christmas lights with ease. To do this, we'll need to create a "crook" or a bend in the roller. The goal is to shape it in such a way that it can both push up and pull down the lights around the branches, acting as an extension of your hand, but from 25 feet below.
Bending the Roller: Using your piece of metal as leverage, carefully bend the paint roller to create a hook. This might require some force, so be sure to do this slowly to avoid breaking the roller. The shape you're aiming for is a gentle curve, similar to a shepherd's crook, which is both strong enough to carry the weight of the lights and gentle enough to not damage them.
Step 2: Attaching to Mr. Longarm
Once you've got your paint roller shaped into a beautiful, functional hook, it's time to unite it with Mr. Longarm.
Securing the Roller: Most paint rollers are designed to be attached to extension poles for painting hard-to-reach areas, so attaching your modified roller to Mr. Longarm should be straightforward. Screw the roller onto the pole, ensuring it's securely fastened and ready for action.
Step 3: The Technique
With your tool assembled, it's time to put it to the test. The technique for hanging lights will involve a bit of practice and patience, but once you get the hang of it, you'll be wrapping lights around branches with the grace of a professional.
Hanging the Lights: Start by standing a safe distance from the tree, ensuring you have a clear view of the branches you wish to decorate. Extend Mr. Longarm to the desired length, and use the hook to gently catch a section of the light string. Carefully push it up and onto the branch, using the hook to guide and release the lights. To remove or adjust the lights, simply reverse the process, using the hook to gently pull the lights back towards you.
Custom HTML/CSS/JAVASCRIPT
Wrapping It Up
The Importance of Plug Orientation
One of the first and most important steps in our process is ensuring the correct orientation of the light strands. Contrary to what might seem intuitive, you'll want to make sure that the female plug is at the top of the tree, not the male plug. This configuration is crucial for several reasons, including ease of adding more strands and reducing the risk of electrical issues.

Step-by-Step Light Hanging Guide
With your paint hook pole in hand and your light strands correctly oriented, it's time to begin the actual process of hanging the lights. Here's a step-by-step guide to ensure your tree not only shines brightly but safely.
Step 1: Secure the Light Strand to the Paint Hook Pole
Take the beginning of your light strand (remember, female plug on top) and wrap it around the hook of your paint hook pole two or three times. This secures the lights to the pole, allowing you to easily maneuver them onto the tree.
Step 3: Wrapping the Tree
Starting at the top of the tree, use the pole to wrap the light strand around the branches. The idea is to move in a downward spiral, ensuring even coverage and a beautiful display. The pole allows you to reach higher branches without the need for a ladder, making the process safer and more efficient.
Check out our blog post How to Wrap a Tree with Christmas Lights to guide you through measuring your tree, selecting the right lights, and the step-by-step process of effectively wrapping your tree.
Step 4: Adding Additional Strands
When it's time to add another strand of lights, don't just plug the male end of the new strand into the female end of the one already on the tree. Wind and the natural movement of the tree can cause these connections to come loose. Instead, tie an overhand knot with the strands (this doesn't harm them) before plugging them together. This simple step ensures your lights stay connected, no matter the weather. Repeat the wrapping and knotting process for as many strands as you need to achieve your desired level of brightness. Remember, the goal is not just to illuminate the tree but to do so in a way that enhances its natural beauty and the overall festive atmosphere of your outdoor space.

Step 5: Wrapping the Base of the Tree
Once the upper parts of the tree are adorned to your satisfaction, it's time to focus on the base. Starting from the bottom, wrap the lights around the base of the tree. The technique here is slightly different, employing a "four-finger spacing" method to ensure even distribution of lights. This means you'll use the width of four fingers to gauge the space between each wrap around the tree, creating a consistent and pleasing visual effect.
Step 6: Securing the Final Connection
As you finish wrapping the base and reach the end of your light strands, it's crucial to secure the final connection. Just as you did when adding new strands, tie an overhand knot before plugging into the power source. This not only keeps the plug secure but also ensures that your entire display is as safe as it is stunning.
Tips and Tricks
Practice Makes Perfect: Before attempting to decorate a tree, practice the motion of catching, pushing, and pulling with the lights on a lower branch or even on a makeshift setup in your garage.
Safety First: Always be aware of your surroundings, especially overhead power lines or any other hazards that could pose a risk while using your extended pole.
Teamwork: While this tool enables you to hang lights solo, having a helper to hand you light strings or guide you from a different angle can make the process smoother and faster.
And there you have it—a comprehensive guide to hanging Christmas lights on medium to tall trees, transforming a daunting task into a delightful holiday tradition. By following these steps, you not only ensure that your outdoor decorations are a sight to behold but also prioritize safety and efficiency. So, as the holiday season approaches, take a moment to appreciate the beauty of your handiwork, knowing that you've created a luminous landscape that captures the magic of Christmas. Happy decorating!

Why is it important to have the female plug at the top of the tree?
Answer: Having the female plug at the top is crucial for two main reasons: it simplifies the process of adding additional strands of lights by providing an easy-to-reach connection point, and it helps prevent electrical issues by ensuring that the connections are secure and less exposed to water and debris.
Can I use any type of paint roller for this project?
Answer: Yes, most standard paint rollers will work for this project. However, you'll need to modify the roller by bending it into a hook shape. The key is to choose a roller that's sturdy enough to handle the modification and the weight of the Christmas lights.
How do I modify the paint roller to hang lights?
Answer: Use a piece of metal or any sturdy object to bend the roller into a hook shape. The goal is to create a gentle curve that can easily grip and release the Christmas lights without damaging them. Take care to bend the roller slowly to avoid breaking it.
What is Mr. Longarm?
Answer: Mr. Longarm is a brand name for an extendable (telescoping) pole, typically used for painting or window cleaning, that can reach up to 24 feet. For this project, it's used to extend the reach of our modified paint roller, allowing you to hang lights on tall trees safely from the ground.
How do I ensure the light strands stay connected in windy conditions?
Answer: To prevent the light strands from coming undone in the wind, tie an overhand knot with the ends of the strands before plugging them together. This simple step secures the connection, ensuring the lights remain lit and in place regardless of weather conditions.
How many times should I wrap the light strand around the hook?
Answer: Wrap the light strand around the hook two or three times. This provides sufficient grip to maneuver the lights onto the tree without the risk of the strand slipping off the hook during the hanging process.
What is the "four-finger spacing" method?
Answer: The "four-finger spacing" method refers to using the width of four fingers as a guide for spacing between each wrap of the lights around the base of the tree. This technique helps ensure even distribution and a visually pleasing display of lights.
Can I hang lights on any type of tree with this method?
Answer: Yes, this method is versatile and can be used on a variety of tree types and sizes, from medium to tall. The key is to adjust the length of Mr. Longarm and the technique based on the specific tree you're decorating.
What should I do if the modified paint roller doesn't fit onto Mr. Longarm?
Answer: Most standard paint rollers are designed to fit onto extension poles like Mr. Longarm. If you encounter compatibility issues, check to ensure you're using the correct size and type of roller. If necessary, adapter accessories are available that can bridge the gap between different sizes and types of poles and rollers.
Is it safe to hang Christmas lights using this method?
Answer: Yes, this method is designed with safety in mind. By using Mr. Longarm and a modified paint roller, you can hang lights without the need for ladders or climbing, significantly reducing the risk of falls and injuries. Always ensure that all connections are secure and that electrical safety practices are followed, especially when working with outdoor lights.


The Ultimate Guide to Hanging Christmas Lights on Medium to Tall Trees from the Ground
The holiday season is a time of joy, warmth, and, most importantly, lights! Christmas lights, to be precise. There's something truly magical about a tree, whether it's in your front yard or in the heart of your community, twinkling with the warm glow of festive lights. Yet, the challenge often lies in how to adorn these towering trees with lights without the need for ladders, lifts, or even risking a precarious climb. Today, I'm excited to guide you through a simple, yet ingenious, DIY project that will enable you to hang Christmas lights on trees up to 25 feet tall—all from the safety and comfort of the ground.

The Concept
Our mission is to create a versatile tool using a paint roller and Mr. Longarm, a 24-foot extension pole, transforming it into a Christmas light-hanging wizard. The beauty of this DIY project lies in its simplicity and the ingenuity behind using everyday items to solve a common holiday decorating dilemma.
What You'll Need
Mr. Longarm 24-foot extension pole: This will serve as the backbone of our tool, providing the reach we need to access the upper branches of tall trees.
A standard paint roller: This will be modified to become the business end of our tool, responsible for gripping and releasing the Christmas lights.
A piece of metal: Used for modifying the paint roller. This can be anything sturdy enough to bend the roller to our needs—a piece of scrap metal, a bumper, or any similar object could work.
Basic tools: Pliers might come in handy for bending the metal, along with a screwdriver for attaching the modified roller to the extension pole.

The Process
Step 1: Modifying the Paint Roller
The first step in our project involves transforming the paint roller into a hook capable of grabbing and releasing Christmas lights with ease. To do this, we'll need to create a "crook" or a bend in the roller. The goal is to shape it in such a way that it can both push up and pull down the lights around the branches, acting as an extension of your hand, but from 25 feet below.
Bending the Roller: Using your piece of metal as leverage, carefully bend the paint roller to create a hook. This might require some force, so be sure to do this slowly to avoid breaking the roller. The shape you're aiming for is a gentle curve, similar to a shepherd's crook, which is both strong enough to carry the weight of the lights and gentle enough to not damage them.

Step 2: Attaching to Mr. Longarm
Once you've got your paint roller shaped into a beautiful, functional hook, it's time to unite it with Mr. Longarm.
Securing the Roller: Most paint rollers are designed to be attached to extension poles for painting hard-to-reach areas, so attaching your modified roller to Mr. Longarm should be straightforward. Screw the roller onto the pole, ensuring it's securely fastened and ready for action.
Step 3: The Technique
With your tool assembled, it's time to put it to the test. The technique for hanging lights will involve a bit of practice and patience, but once you get the hang of it, you'll be wrapping lights around branches with the grace of a professional.
Hanging the Lights: Start by standing a safe distance from the tree, ensuring you have a clear view of the branches you wish to decorate. Extend Mr. Longarm to the desired length, and use the hook to gently catch a section of the light string. Carefully push it up and onto the branch, using the hook to guide and release the lights. To remove or adjust the lights, simply reverse the process, using the hook to gently pull the lights back towards you.
Custom HTML/CSS/JAVASCRIPT
Wrapping It Up
The Importance of Plug Orientation
One of the first and most important steps in our process is ensuring the correct orientation of the light strands. Contrary to what might seem intuitive, you'll want to make sure that the female plug is at the top of the tree, not the male plug. This configuration is crucial for several reasons, including ease of adding more strands and reducing the risk of electrical issues.

Step-by-Step Light Hanging Guide
With your paint hook pole in hand and your light strands correctly oriented, it's time to begin the actual process of hanging the lights. Here's a step-by-step guide to ensure your tree not only shines brightly but safely.
Step 1: Secure the Light Strand to the Paint Hook Pole
Take the beginning of your light strand (remember, female plug on top) and wrap it around the hook of your paint hook pole two or three times. This secures the lights to the pole, allowing you to easily maneuver them onto the tree.
Step 3: Wrapping the Tree
Starting at the top of the tree, use the pole to wrap the light strand around the branches. The idea is to move in a downward spiral, ensuring even coverage and a beautiful display. The pole allows you to reach higher branches without the need for a ladder, making the process safer and more efficient.
Check out our blog post How to Wrap a Tree with Christmas Lights to guide you through measuring your tree, selecting the right lights, and the step-by-step process of effectively wrapping your tree.
Step 4: Adding Additional Strands
When it's time to add another strand of lights, don't just plug the male end of the new strand into the female end of the one already on the tree. Wind and the natural movement of the tree can cause these connections to come loose. Instead, tie an overhand knot with the strands (this doesn't harm them) before plugging them together. This simple step ensures your lights stay connected, no matter the weather. Repeat the wrapping and knotting process for as many strands as you need to achieve your desired level of brightness. Remember, the goal is not just to illuminate the tree but to do so in a way that enhances its natural beauty and the overall festive atmosphere of your outdoor space.

Step 5: Wrapping the Base of the Tree
Once the upper parts of the tree are adorned to your satisfaction, it's time to focus on the base. Starting from the bottom, wrap the lights around the base of the tree. The technique here is slightly different, employing a "four-finger spacing" method to ensure even distribution of lights. This means you'll use the width of four fingers to gauge the space between each wrap around the tree, creating a consistent and pleasing visual effect.
Step 6: Securing the Final Connection
As you finish wrapping the base and reach the end of your light strands, it's crucial to secure the final connection. Just as you did when adding new strands, tie an overhand knot before plugging into the power source. This not only keeps the plug secure but also ensures that your entire display is as safe as it is stunning.
Tips and Tricks
Practice Makes Perfect: Before attempting to decorate a tree, practice the motion of catching, pushing, and pulling with the lights on a lower branch or even on a makeshift setup in your garage.
Safety First: Always be aware of your surroundings, especially overhead power lines or any other hazards that could pose a risk while using your extended pole.
Teamwork: While this tool enables you to hang lights solo, having a helper to hand you light strings or guide you from a different angle can make the process smoother and faster.
And there you have it—a comprehensive guide to hanging Christmas lights on medium to tall trees, transforming a daunting task into a delightful holiday tradition. By following these steps, you not only ensure that your outdoor decorations are a sight to behold but also prioritize safety and efficiency. So, as the holiday season approaches, take a moment to appreciate the beauty of your handiwork, knowing that you've created a luminous landscape that captures the magic of Christmas. Happy decorating!

Why is it important to have the female plug at the top of the tree?
Answer: Having the female plug at the top is crucial for two main reasons: it simplifies the process of adding additional strands of lights by providing an easy-to-reach connection point, and it helps prevent electrical issues by ensuring that the connections are secure and less exposed to water and debris.
Can I use any type of paint roller for this project?
Answer: Yes, most standard paint rollers will work for this project. However, you'll need to modify the roller by bending it into a hook shape. The key is to choose a roller that's sturdy enough to handle the modification and the weight of the Christmas lights.
How do I modify the paint roller to hang lights?
Answer: Use a piece of metal or any sturdy object to bend the roller into a hook shape. The goal is to create a gentle curve that can easily grip and release the Christmas lights without damaging them. Take care to bend the roller slowly to avoid breaking it.
What is Mr. Longarm?
Answer: Mr. Longarm is a brand name for an extendable (telescoping) pole, typically used for painting or window cleaning, that can reach up to 24 feet. For this project, it's used to extend the reach of our modified paint roller, allowing you to hang lights on tall trees safely from the ground.

How do I ensure the light strands stay connected in windy conditions?
Answer: To prevent the light strands from coming undone in the wind, tie an overhand knot with the ends of the strands before plugging them together. This simple step secures the connection, ensuring the lights remain lit and in place regardless of weather conditions.
How many times should I wrap the light strand around the hook?
Answer: Wrap the light strand around the hook two or three times. This provides sufficient grip to maneuver the lights onto the tree without the risk of the strand slipping off the hook during the hanging process.
What is the "four-finger spacing" method?
Answer: The "four-finger spacing" method refers to using the width of four fingers as a guide for spacing between each wrap of the lights around the base of the tree. This technique helps ensure even distribution and a visually pleasing display of lights.
Can I hang lights on any type of tree with this method?
Answer: Yes, this method is versatile and can be used on a variety of tree types and sizes, from medium to tall. The key is to adjust the length of Mr. Longarm and the technique based on the specific tree you're decorating.
What should I do if the modified paint roller doesn't fit onto Mr. Longarm?
Answer: Most standard paint rollers are designed to fit onto extension poles like Mr. Longarm. If you encounter compatibility issues, check to ensure you're using the correct size and type of roller. If necessary, adapter accessories are available that can bridge the gap between different sizes and types of poles and rollers.
Is it safe to hang Christmas lights using this method?
Answer: Yes, this method is designed with safety in mind. By using Mr. Longarm and a modified paint roller, you can hang lights without the need for ladders or climbing, significantly reducing the risk of falls and injuries. Always ensure that all connections are secure and that electrical safety practices are followed, especially when working with outdoor lights.

Copyright ©2025 All Right Reserved website designed by christmaslights.io
Terms of Service / Privacy Policy
Have questions or need assistance?
Contact us at (855)619-LITE


