

Christmas Lights Business Website
🎄 A Real Website for Your Christmas Light Business. Custom-built for Your Business, Your Services, Your Service Area.
The Same Site We Built for Installers Already Booking Their Season🎄
Structured for search from the first day it goes live. Not a template with your logo dropped in the corner.
Every page written from scratch for your services, your service area, and your name on the work. Built to win jobs, not just to be online.
Two ways to pay: $199 a month, or $2,000 upfront at a discount.
The Honest Truth
Your Business Grew. Your Website Should Too.
A basic starter site does one job: it makes you real. Somebody Googles your name, something shows up, you exist. That's a fine place to start.
But a starter site can't tell your story, can't rank for the towns you work in, and can't out-sell the installer down the road. When a homeowner is comparing three companies, "exists" doesn't win the job.
What This Is
The Site for When You're Done Starting
Every page custom written for your business. Your services, your towns, your crew, your name on the work. A pricing page that answers what homeowners actually search. Service area pages for every market you want to own.
Structured for search from the day it goes live.
What's Included
Everything Your Christmas Light Business Needs Online
Custom Multi-Page Website
Designed for Christmas light and permanent lighting installers. Fast, mobile-first, and built to turn a phone visitor into a booked quote.
Written for Your Market
Your services, your towns, your crew, your name on the work. Every page written from scratch for your business.
Service Area Pages
Individual pages for the towns you actually work in, so homeowners in each one can find you when they search.
Quote Request Form
Built to capture the lead and route it straight to you. Budget selector, address field, and text-message consent language included.
Analytics & Search Console
We set up Google Analytics and Google Search Console on your site at launch, tracking your traffic and your rankings from day one.
Hosting, Security & Support
Your site stays online, backed up, secure, and supported. Most issues handled within two business days.
Domain Included
Don't have a domain yet? We'll register one for you as part of the build. Already have one? We'll point it at your new site.
Built for Search From Day One
Clean page titles, real descriptions, and a structure Google understands. Done during the build.
Ready Before the Season
Only a few weeks from onboarding to launch, so your site is live and working before homeowners start searching.
The Build
10 to 15 Pages, Each One With a Job to Do
Every page targets something a homeowner is already searching for. Nothing is filler.
|
✓ Home — your offer, your proof, your quote form ✓ Residential Installation — the page that books most of your season ✓ Commercial Installation — storefronts, offices, HOAs ✓ Pricing — the question every homeowner searches first ✓ Permanent Lighting — your year-round revenue page ✓ Takedown & Storage — the service that wins the repeat customer ✓ About — your face, your family, your name on the work |
✓ Reviews — your proof, in one place ✓ Service Areas — the hub for every town you cover ✓ Individual Town Pages — built for your top markets ✓ FAQ — answers the objections before the call ✓ Contact — phone, form, and hours ✓ Terms & Privacy — published from the policies you provide |
Why Choose Our Christmas Lights Business Website?
Don't Take Our Word For It
Go Look at One We Built
Elite Christmas Lights in Fort Wayne, Indiana. Real installer, real crew, real photos off their own phones. Open it on your phone and click through it the way a homeowner would.
For Your Convenience
Two Ways to Pay. Pick Whichever Suits You.
Same website, same terms, same support either way. Spread it out monthly, or pay upfront and take the discount.
Pay Monthly
$199/month
24-month agreement. Nothing large due up front.
- The complete website build
- Domain registration if you need one
- Analytics and Search Console setup
- Hosting, security, and support
- Predictable monthly cost
Pay Upfront
$2,000
One payment. Same 24-month agreement.
- The complete website build
- Domain registration if you need one
- Analytics and Search Console setup
- Hosting, security, and support
- No monthly billing to track
Both options include the same website, the same hosting, and the same support, and both run on the same 24-month agreement. After 24 months your service converts to month-to-month, cancellable with 48 hours' notice.
Straight Answer
Why a 24-Month Agreement?
This Is a Custom Build
Every page is written and designed for your business from scratch. The agreement is what lets us build at this level without charging the full cost of a custom site on day one.
Your Site Has to Stay Live
Hosting, security, backups, and support don't stop after launch. The agreement covers keeping your site online and working through two full Christmas seasons.
Search Takes Time to Reward You
A site built right still needs months of being live before Google fully trusts it. Two seasons is where the work starts paying you back.
Your Website Starts Here
Frequently Asked Questions
Do I need technical skills?
None at all. We build the entire site for you and handle the technical side. You send us your information, we do the rest.
What's included after my site launches?
Everything that keeps your site online and working: hosting, security, backups, and technical support. Your website isn't something you have to think about again — it just stays up and does its job through the season.
How long does it take?
Faster than most people expect. Once we have your completed onboarding form, your photos, and your business information, most sites launch within a few weeks.
Can I use my own domain name?
Yes. If you already own one, we'll point it at your new site. If you don't have one, we'll register it for you as part of the build.
What if I don't have photos of my work yet?
No problem! We'll launch with professional stock imagery but we'd always rather use yours, so send whatever you've got.
What happens after 24 months?
Your service converts to a month-to-month plan that covers hosting, security, and support. You can cancel any time with 48 hours' notice.
Will this guarantee me leads?
No, and be careful with anyone who tells you otherwise. A website is the foundation. Getting found still takes reviews, Google Business Profile work, ads, and getting your name out in your market. We build you the foundation that's worth marketing.
Your Competitor's Site Is Already Up
Every day your site isn't live is a day customers in your towns are finding somebody else. There's no wrong time to fix that.
Questions first? Call (855) 619-LITE.
Discover Expert Tips on Our Blog

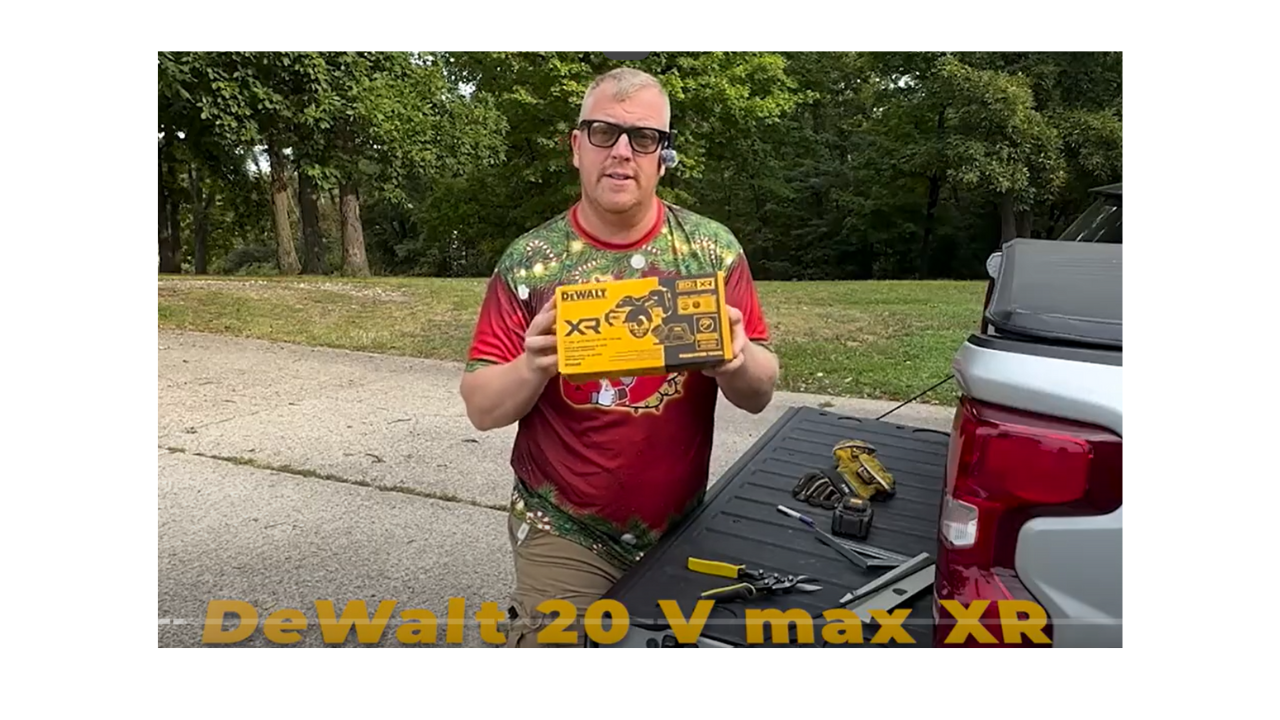
Simplify Metal Cutting with DeWalt's 20V Max XR
Metal cutting is an essential skill in many DIY projects, especially when it involves precise installations like permanent Christmas lights. A common challenge for many is achieving clean, precise cuts without damaging the material or ending up with a jagged finish. The DeWalt cutter emerges as a practical solution, offering ease and precision. This blog explores how to effectively use the DeWalt cutter, ensuring your metal cuts are not just good, but exceptional.
Unboxing the DeWalt Cutter
Initial Impressions
Upon opening the DeWalt cutter's box, you're greeted with a robust tool that promises durability and precision. The package typically includes a variety of blades—each suited for different materials, but for our purposes, the metal blade is our focus. The heft and grip of the tool suggest it's built for heavy-duty tasks, yet it's designed ergonomically to prevent user fatigue during extended use.
Setting Up
Setting up the DeWalt cutter involves a straightforward process:
1. Blade Installation: Begin by removing the blade guard to access the blade slot. The metal blade included is specifically designed for slicing through metal with minimal burr and heat generation.
2. Securing the Blade: Utilize the provided tool to loosen the retaining bolt, insert the blade, ensuring it's seated properly, and then tighten the bolt. The cutter’s design features a reverse-thread system, which might feel counterintuitive (lefty tighty, righty loosey), but it ensures the blade remains secure under the tool’s high-torque operation.
Preparing for the First Cut
Safety First
Before making the first cut, it's crucial to don safety glasses and sturdy gloves. Metal cutting can produce sharp debris and sparks, which can be hazardous. The DeWalt cutter comes equipped with a blade guard and an emergency stop feature, enhancing safety during operation.
Making the Cut
Marking the metal accurately is key to a perfect cut. Use a permanent marker to draw your cut line clearly. Position the cutter so that the blade aligns with the mark. The tool’s guide light (if available) can help illuminate the line during the cut, ensuring precision.
Practical Cutting Tips
Techniques for Clean Cuts
- Maintain the Tool: Regular maintenance, such as cleaning the blade and lubricating the moving parts, can significantly extend the cutter's life and performance.
- Operate at the Right Speed: Adjust the cutter's speed based on the thickness and type of metal. Slower speeds are better for thicker, harder metals to prevent blade overheating and wear.
Advanced Cutting Techniques
- Angled Cuts: For angled cuts, adjust the blade guard to the desired angle. This feature is incredibly useful for creating joins or decorations in metalwork projects.
- Handling Complex Cuts: For intricate or complex cuts, make several shallow passes to gradually achieve the depth, rather than trying to cut through thick metal in one go.

Post-Cutting Cleanup and Maintenance
Cleaning and Storing the Cutter
After use, it’s important to clean the cutter thoroughly to remove any metal filings or debris. Storing the tool in a dry, clean environment will prevent rust and keep it ready for the next use.
Blade Maintenance
Regularly inspect the blade for signs of wear or damage. Replace the blade if it becomes dull or damaged to maintain cutting efficiency. Keeping a few spare blades on hand is recommended for seamless project continuation.
The DeWalt cutter is an indispensable tool for those requiring precise and clean cuts in metal. By following the above guidelines, users can maximize the tool’s capabilities and ensure their projects turn out both successful and safe.

1. What safety gear should I wear when using the DeWalt cutter?
Answer: Always wear safety glasses to protect your eyes from metal debris and sparks. Sturdy gloves are also recommended to safeguard your hands from sharp edges and heat. Additionally, if you are working in a noisy environment or the tool is particularly loud, consider using ear protection.
2. How do I install a blade on the DeWalt cutter?
Answer: To install a blade on the DeWalt cutter, first remove the blade guard to access the blade slot. Use the included tool to loosen the retaining bolt, insert the metal blade ensuring it's properly seated, and then retighten the bolt. Remember, the cutter uses a reverse-thread system, so you'll tighten to the left and loosen to the right.
3. What should I do if the cut isn't clean or precise?
Answer: Ensure the blade is sharp and properly installed. If issues persist, check that you’re using the correct blade type for the metal you are cutting. Additionally, adjust the speed settings according to the metal’s thickness and hardness. Multiple shallow passes may be necessary for thicker or harder metals.
4. How do I maintain the DeWalt cutter?
Answer: After each use, clean the cutter to remove any metal filings or debris. Regularly check and lubricate moving parts to keep them functioning smoothly. Store the cutter in a dry, clean environment to prevent rust and degradation. Blade maintenance is also crucial; inspect blades regularly for wear and replace them as needed.
5. Can the DeWalt cutter make angled cuts?
Answer: Yes, the DeWalt cutter can be adjusted to make angled cuts. Adjust the blade guard to your desired angle before cutting to achieve clean and precise angled cuts. This feature is useful for creating joins or customized shapes in your metalwork projects.

Copyright ©2026 All Right Reserved website designed by christmaslights.io
Terms of Service / Privacy Policy
Have questions or need assistance?
Contact us at (855)619-LITE